Deploying Rancher On OpenStack
Tags:
#OpenStack
#Rancher
#Kubernetes
Verified
Tested on Red Hat OpenStack Platform 13, Rancher 2.2.4, and Ubuntu 16.04 guests.
Warning
This blog post describes a deployment that is not optimal for production. Use it only as part of the development deployment.
Introduction To Rancher
“One Platform for Kubernetes Management”
Rancher is an open-source container management platform (Platform as a Service) based on Kubernetes which allows users to run their container workloads across multiple Kubernetes clusters.
Rancher can be deployed on-premise, baremetal, and various cloud providers.
Why OpenStack?
Rancher to container orchestration is what OpenStack to infrastructure is, an open platform to run workloads across multiple platforms and architectures.
While OpenStack manages the various parts of infrastructure (storage, networking, compute, and many other services), it is most commonly paired with Kubernetes to leverage container orchestration.
Leveraging both products creates an open environment that is dynamic, scalable, and robust.
OpenStack Preparation Before Deployment
Before deploying Rancher, make sure that all the credentials and endpoints are accessible and that instances can be created on the OpenStack cloud.
Infrastructure details that are used during Rancher deployment:
- Authentication URL
- Username
- Project(Tenant) Name/ID
- Domain Name/ID (required if using identity v3 API)
- Region Name
If you are unsure of where to get these details from, we can download them from the horizons’ web interface (OpenStack Dashboard):
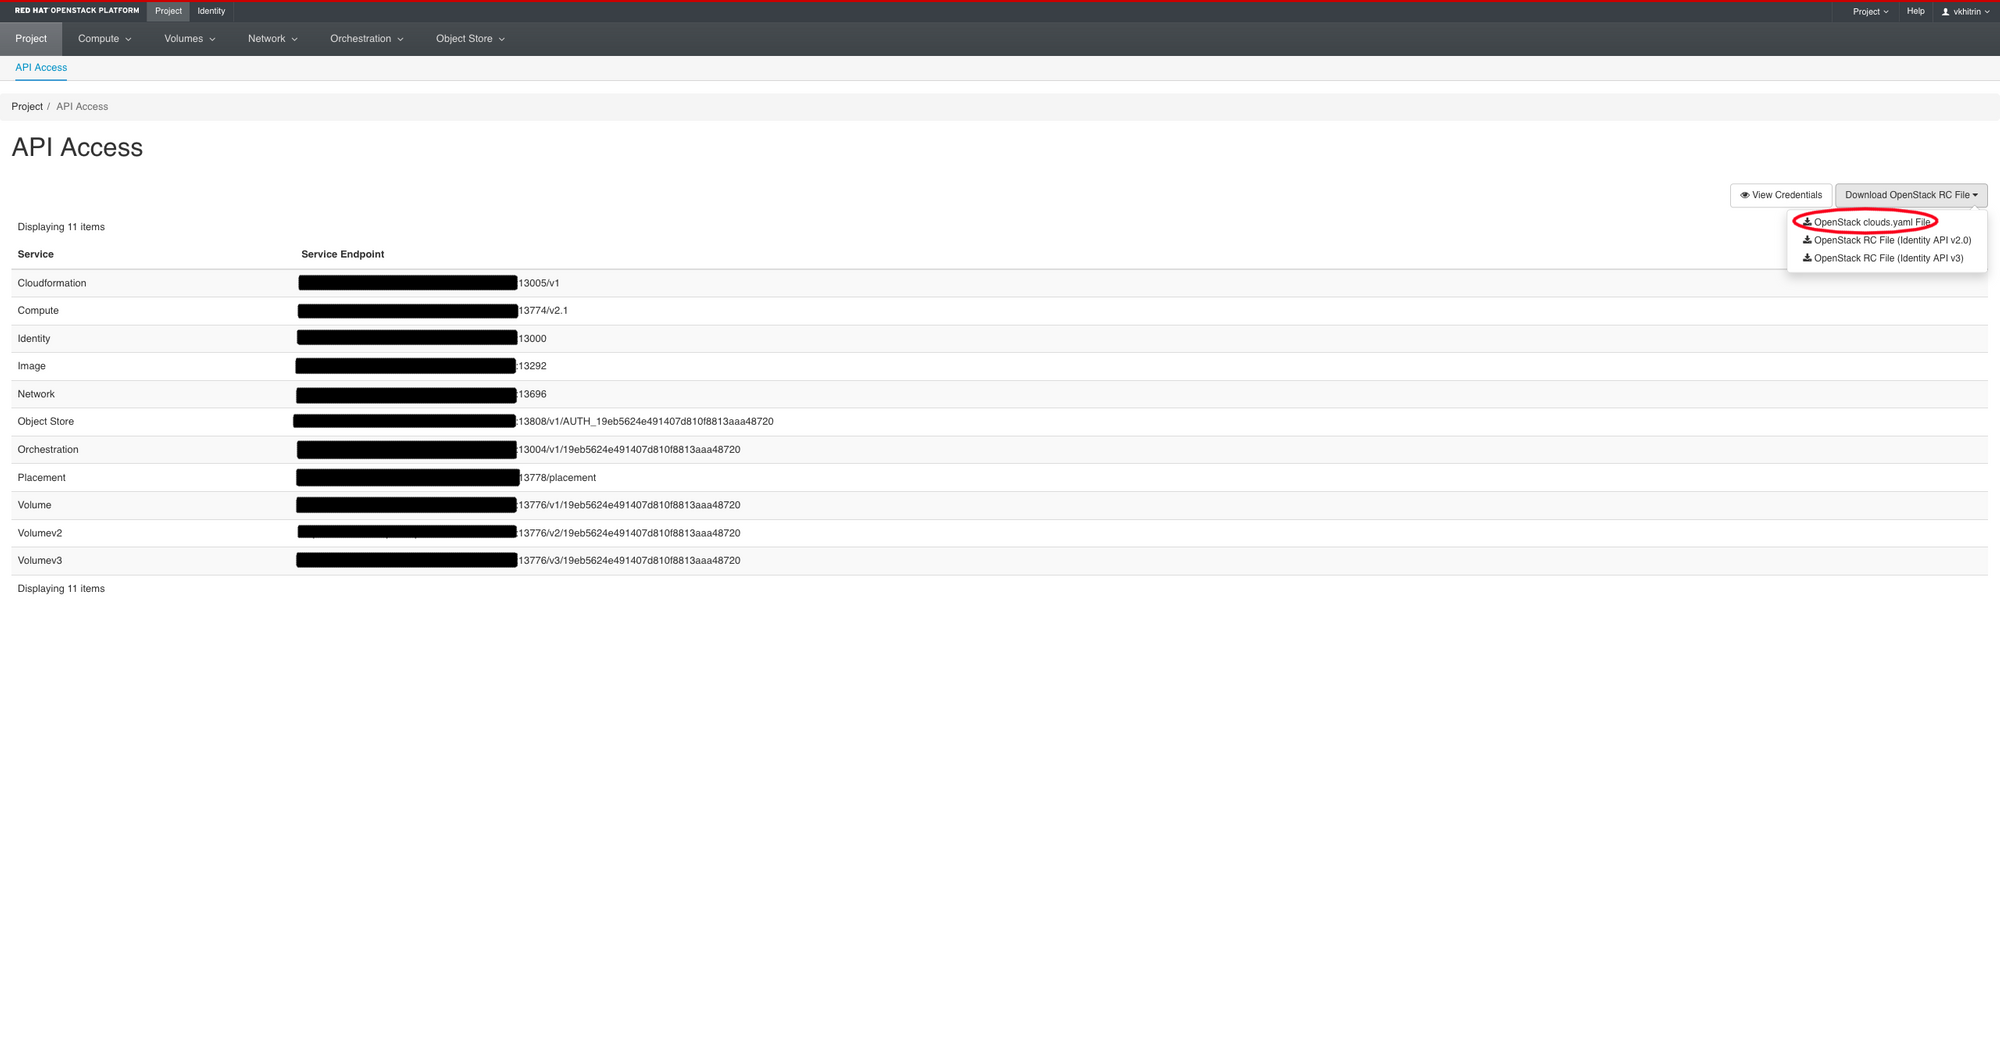
This will result in the following file being downloaded:
# This is a clouds.yaml file, which can be used by OpenStack tools as a source
# of configuration on how to connect to a cloud. If this is your only cloud,
# just put this file in ~/.config/openstack/clouds.yaml and tools like
# python-openstackclient will just work with no further config. (You will need
# to add your password to the auth section)
# If you have more than one cloud account, add the cloud entry to the clouds
# section of your existing file and you can refer to them by name with
# OS_CLOUD=openstack or --os-cloud=openstack
clouds:
  openstack:
    auth:
      auth_url: https://...:13000/v3
      username: “vkhitrin”
      project_id: 19eb5624e491407d810f8813aaa48720
      project_name: “rhosnfv”
      user_domain_name: “...”
    region_name: “regionOne”
    interface: “public”
    identity_api_version: 3
Instances use the following resources during Rancher deployment:
- Network (required, if necessary Floating IP as well)
- Flavor (required)
- Image (required)
- Keypair (optional)
- Userdata (cloud-init script) (optional)
- Availability Zone (optional)
- Config Drive (optional)
Once everything is configured and verified with OpenStack, we may set up the Rancher server to deploy a Rancher cluster.
Deploying Rancher
Setting Up Rancher Server
A rancher server is a container with a web interface able to orchestrate and manage various Rancher clusters. It is a standalone component that can be installed anywhere.
To deploy a Rancher server, execute the following command from a docker host:
sudo docker run --name rancher-server -d --restart=unless-stopped -p 80:80 -p 443:443 rancher/rancher:stable
This will deploy a Rancher server from the stable branch, which can be accessed via http://<hostname>.
Once the Rancher server is deployed, some initial configuration is required.
Set Rancher URL
Set a DNS/IP which will be accessible by all the nodes that will be created during cluster creation:

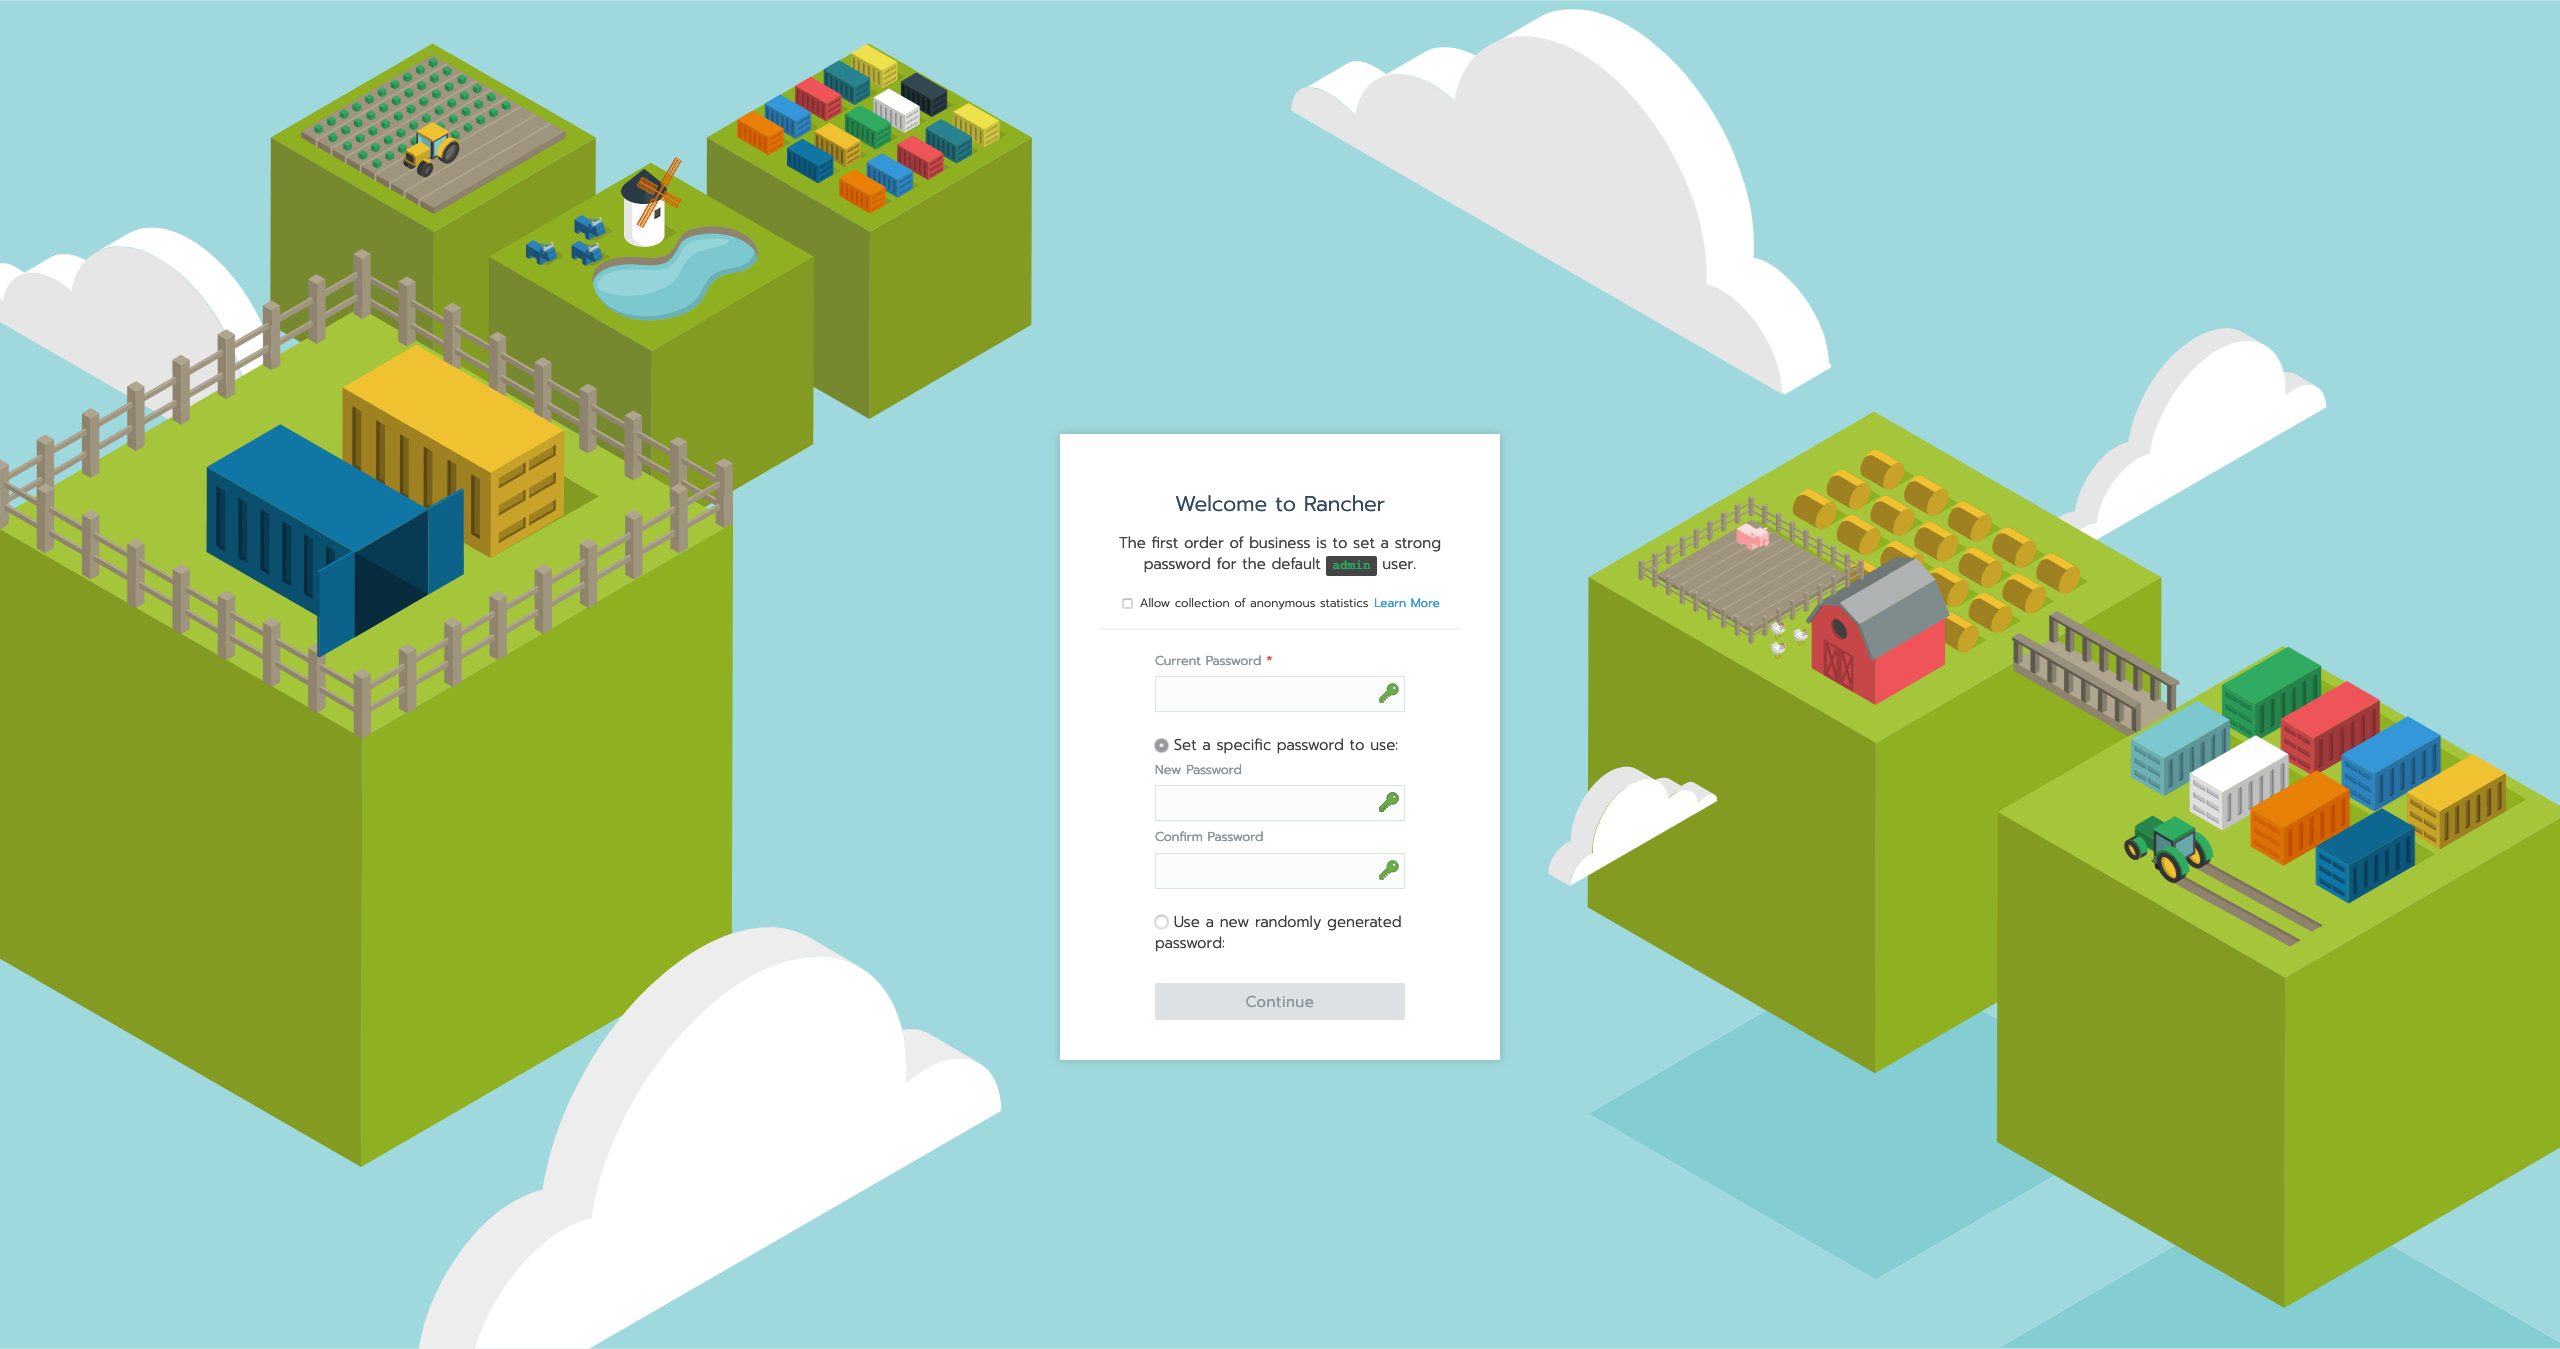
Set Admin User
Create a password for the admin user:
 Afterward, we will be redirected to Rancher’s dashboard:

Enable OpenStack As Infrastructure Provider
Before proceeding with the cluster creation, an OpenStack node driver has to be enabled in Rancher since it is turned off by default.
On the top navigation bar, navigate to Tools > Drivers:
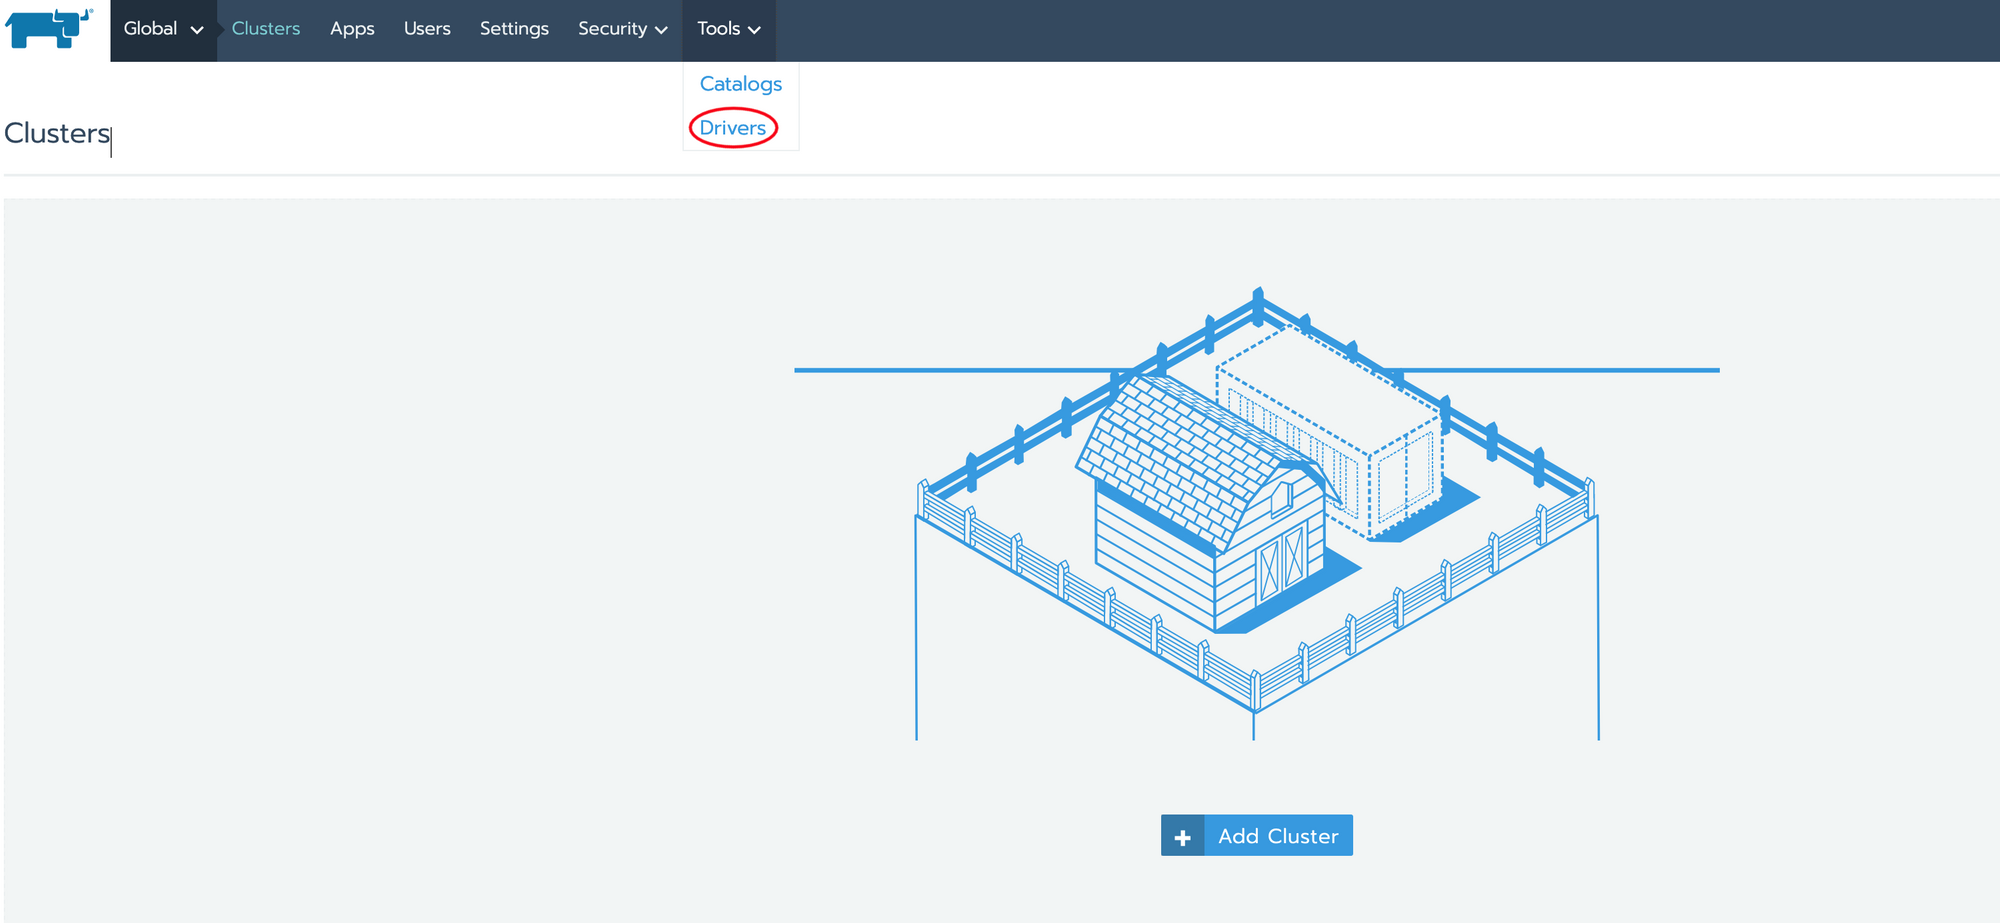 Navigate to
 Node Drivers:
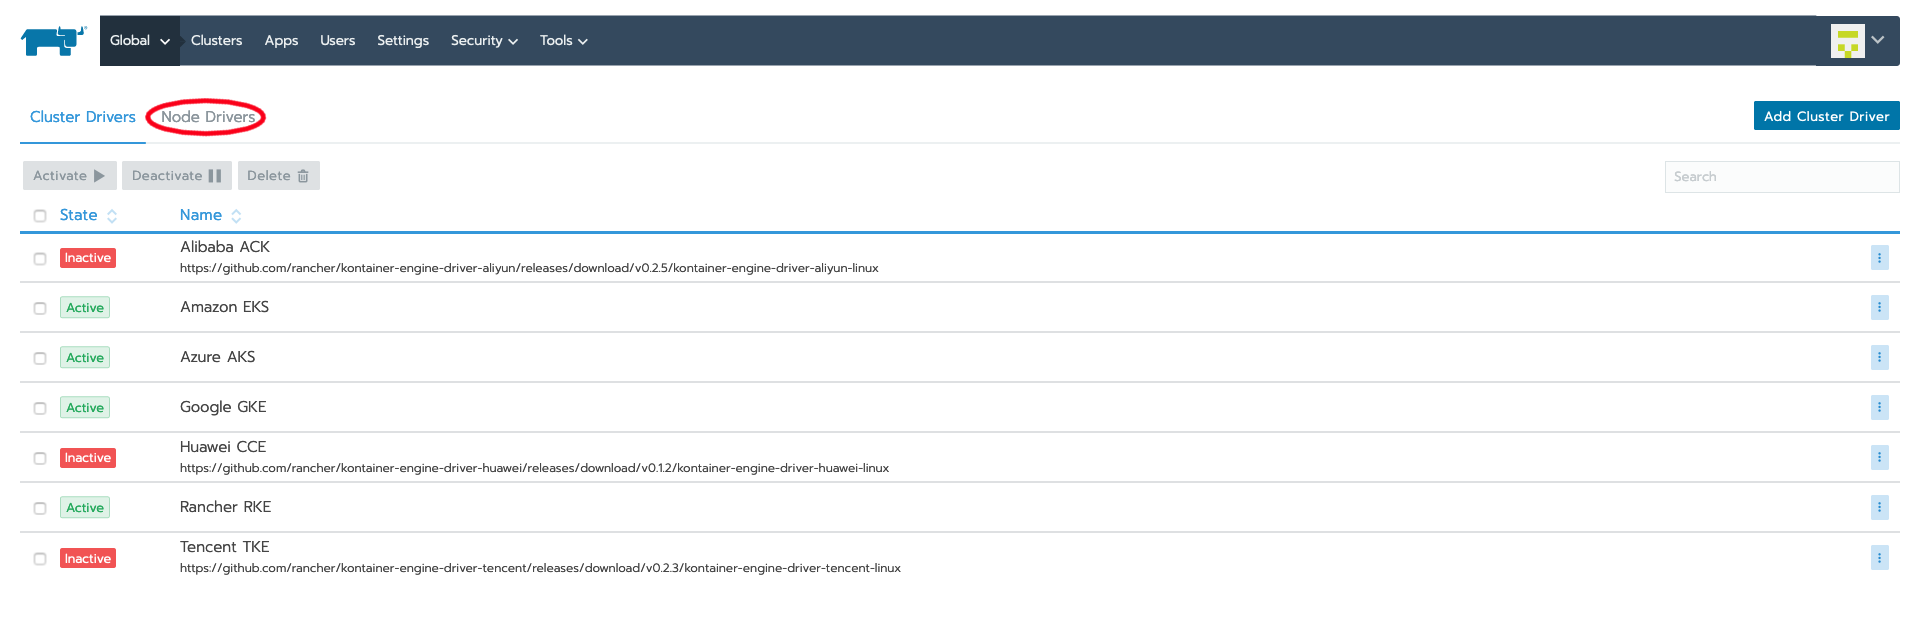 Select
 OpenStack and press Activate:
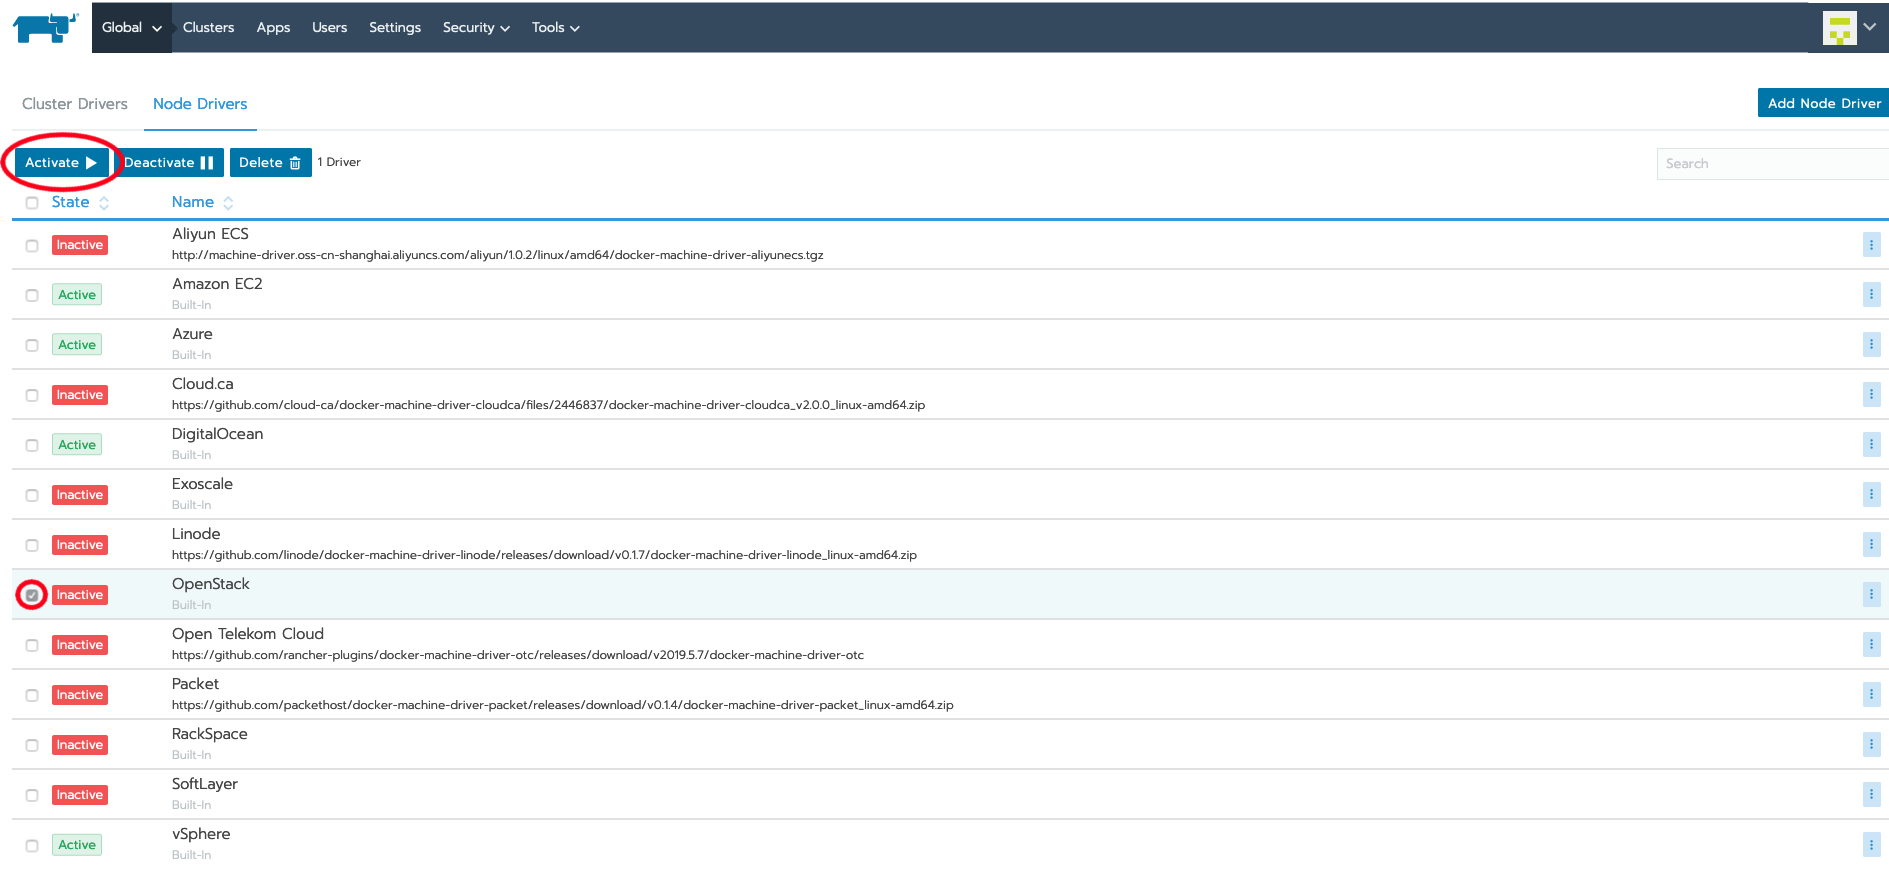 OpenStack Node Driver should be enabled now:

Navigate back to Clusters and press Add Cluster and the OpenStack option should be added to the From nodes in an infrastructure provider section:
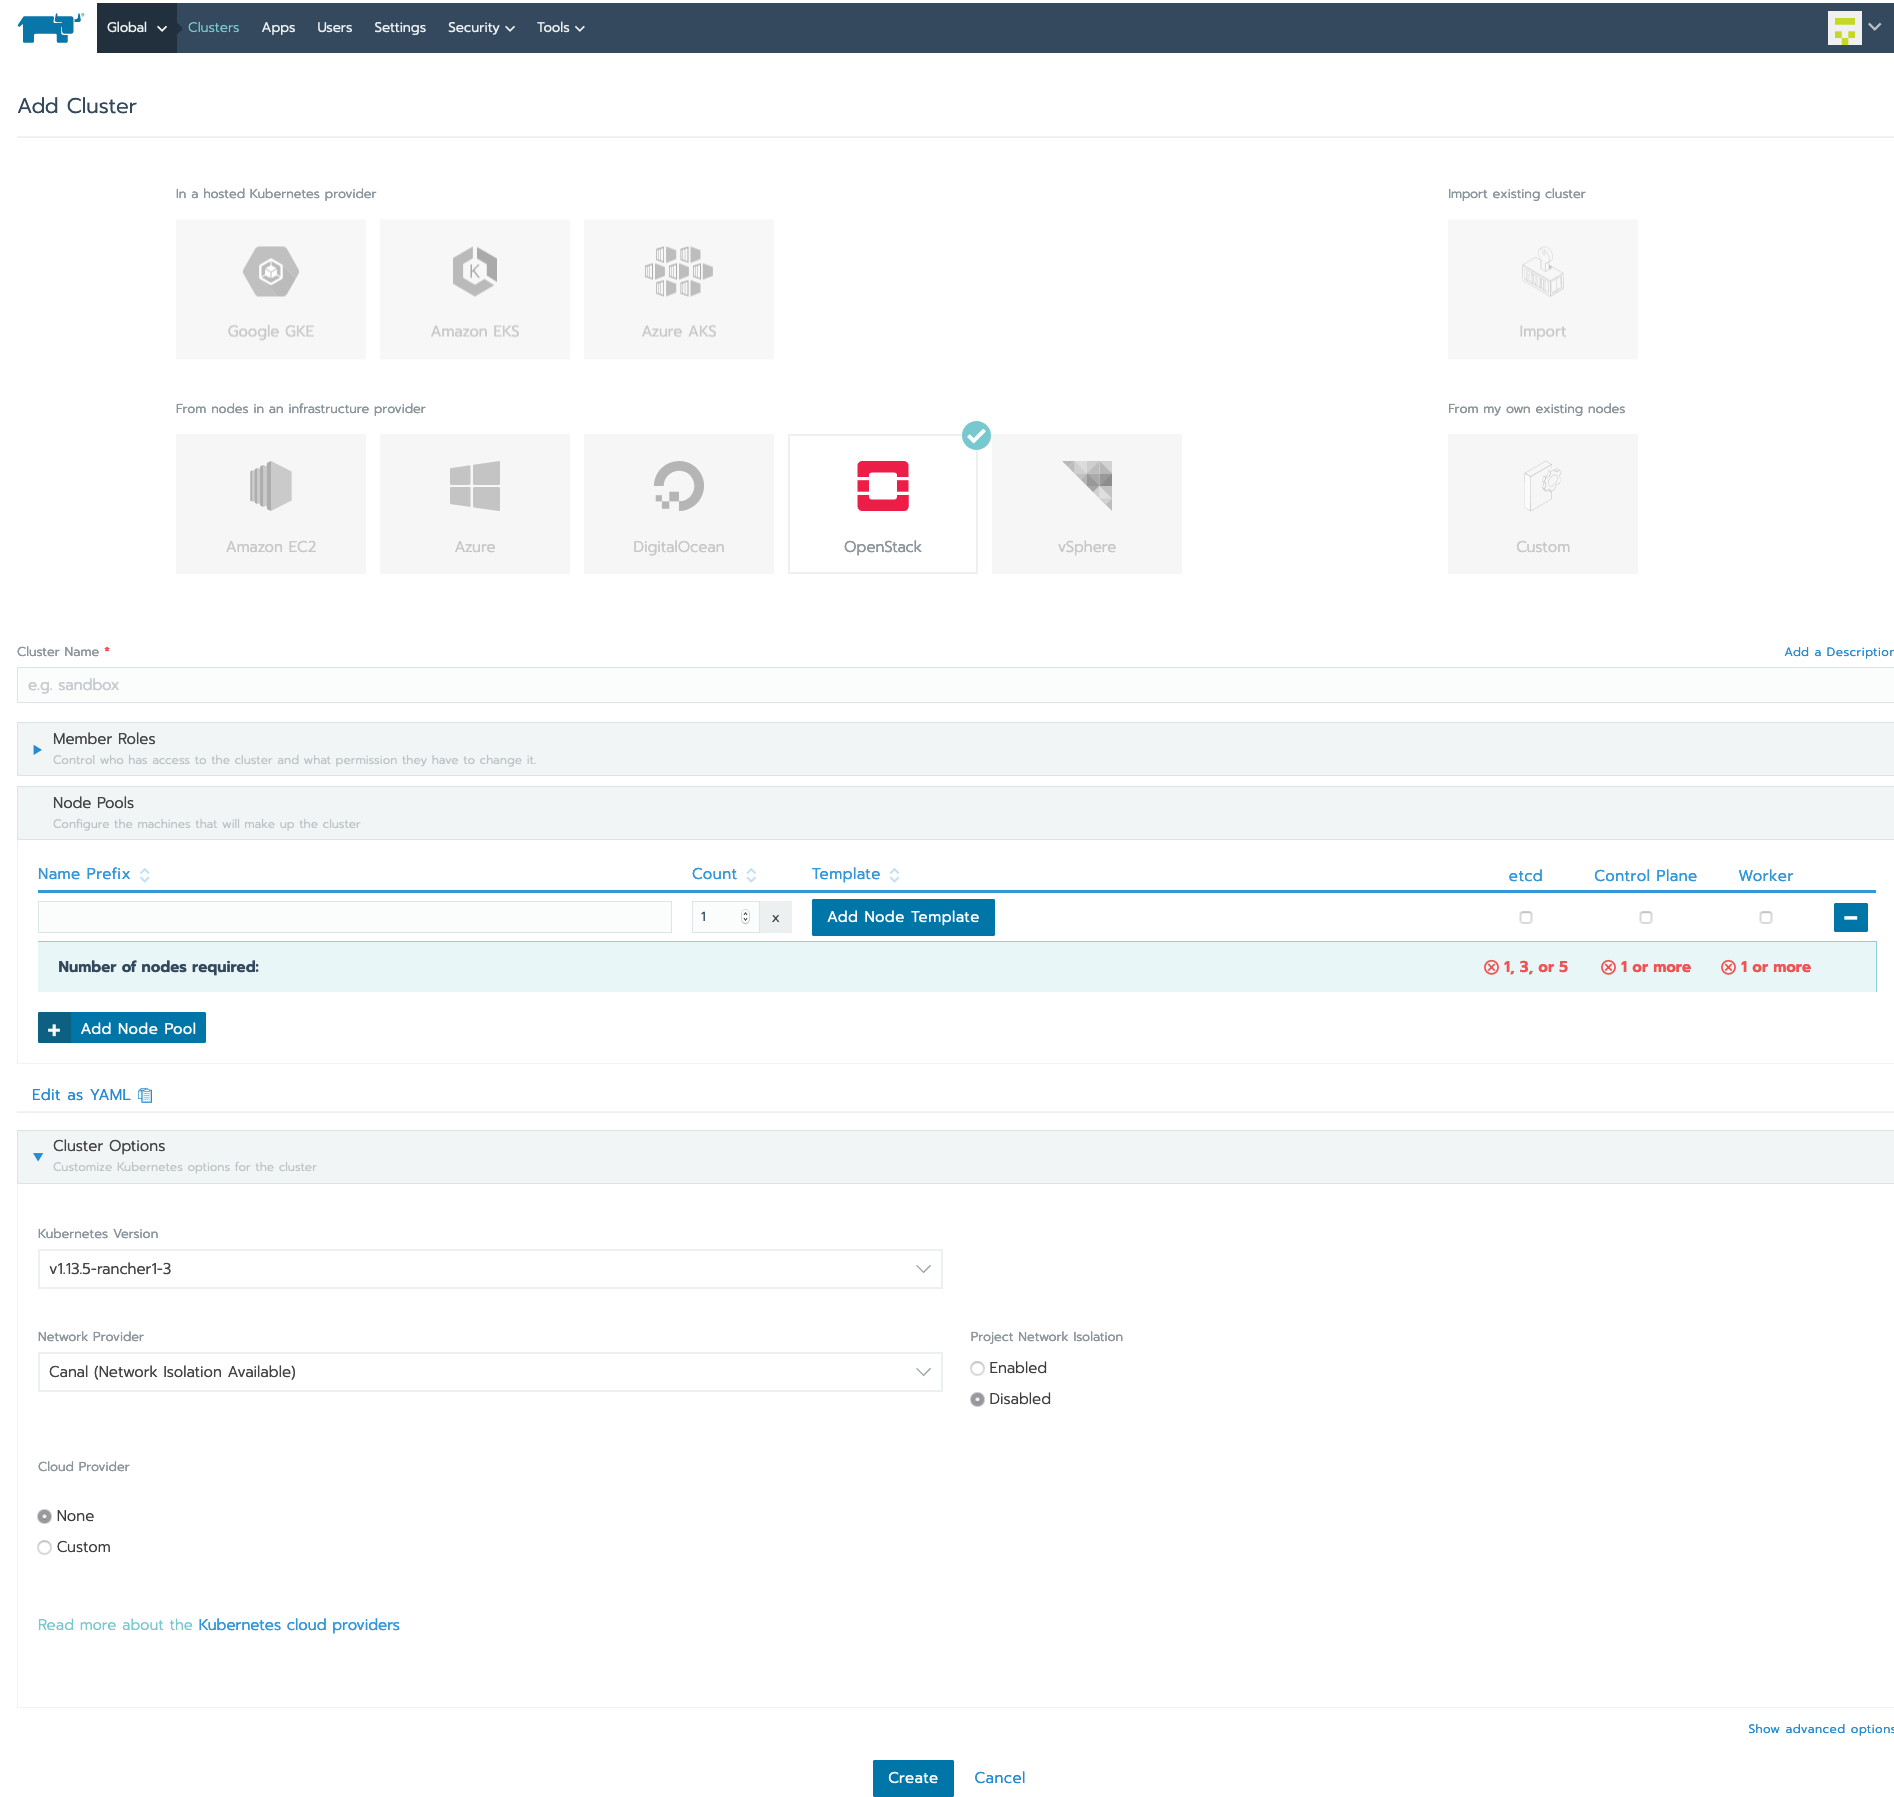
Deploying Rancher Cluster On OpenStack Infrastructure
During deployment, Rancher will create several guest instances on OpenStack that contain Kubernetes components based on the role assigned to the servers.
The rancher cluster contains nodes from the following Kubernetes roles:
- etcd - Kubernetes nodes running the
etcdcontainer act as a single source of truth in the cluster. Stores Kubernetes’ state. A singleetcdis enough, but a quorum must be present when deploying High Availability deployments (3,5 and so on). - control plane - Kubernetes nodes running stateless components like APIs, schedulers, and controllers.
- worker - Kubernetes nodes used for running workloads/pods.
Deploying a Rancher cluster
Go back to the Add Cluster tab.
Set Cluster Name + Description
Set a name to your cluster and add a description if you desire:

Add Members to Cluster
By default, the admin user is part of the default Admin group.
If you would like to add additional users during deployment, create them and add them in this section.
 Additional users may be added post-deployment.
Provisioning Instances
Select the required roles, node count, and other node pools according to your desired topology:
 Clicking on
 Add Node Template will open a template that will contain all the configurations needed to communicate with OpenStack:
 Fill in the template accordingly.
There are also additional settings to configure Docker, which we will not discuss in this blog post.
Workarounds Used During Deployment
Authenticating With Identity v3
If you have issues with docker-machine using identity v2 when your OpenStack cloud only supports identity v3, refer to the following post).
Workaround applied:
- Login into the
rancher-servercontainersudo docker exec -it rancher-server bash - Add the following environment variable to ~/.bashrc
echo ‘export OS_IDENTITY_API_VERSION="3"‘ >> ~/.bashrc - Use
tenantId; usingtenantNamewill causedocker-machineto use identity v2
Floating IP Provisioning Not Consistent
Floating IP is not consistent because of a race condition present in docker-machine.
I connected my external network directly to the instance.
Failed To Provision RHEL Guest Image
RHEL based instances failed to provide even though Rancher supports them (I provisioned a Kubernetes cluster using rke directly on RHEL instances).
For this post, I opted for using Ubuntu instances.
Additional Cluster Configuration
Most notable is Network Provider, which determines the CNI (Container Network Interface) that will be used in the Kubernetes cluster:
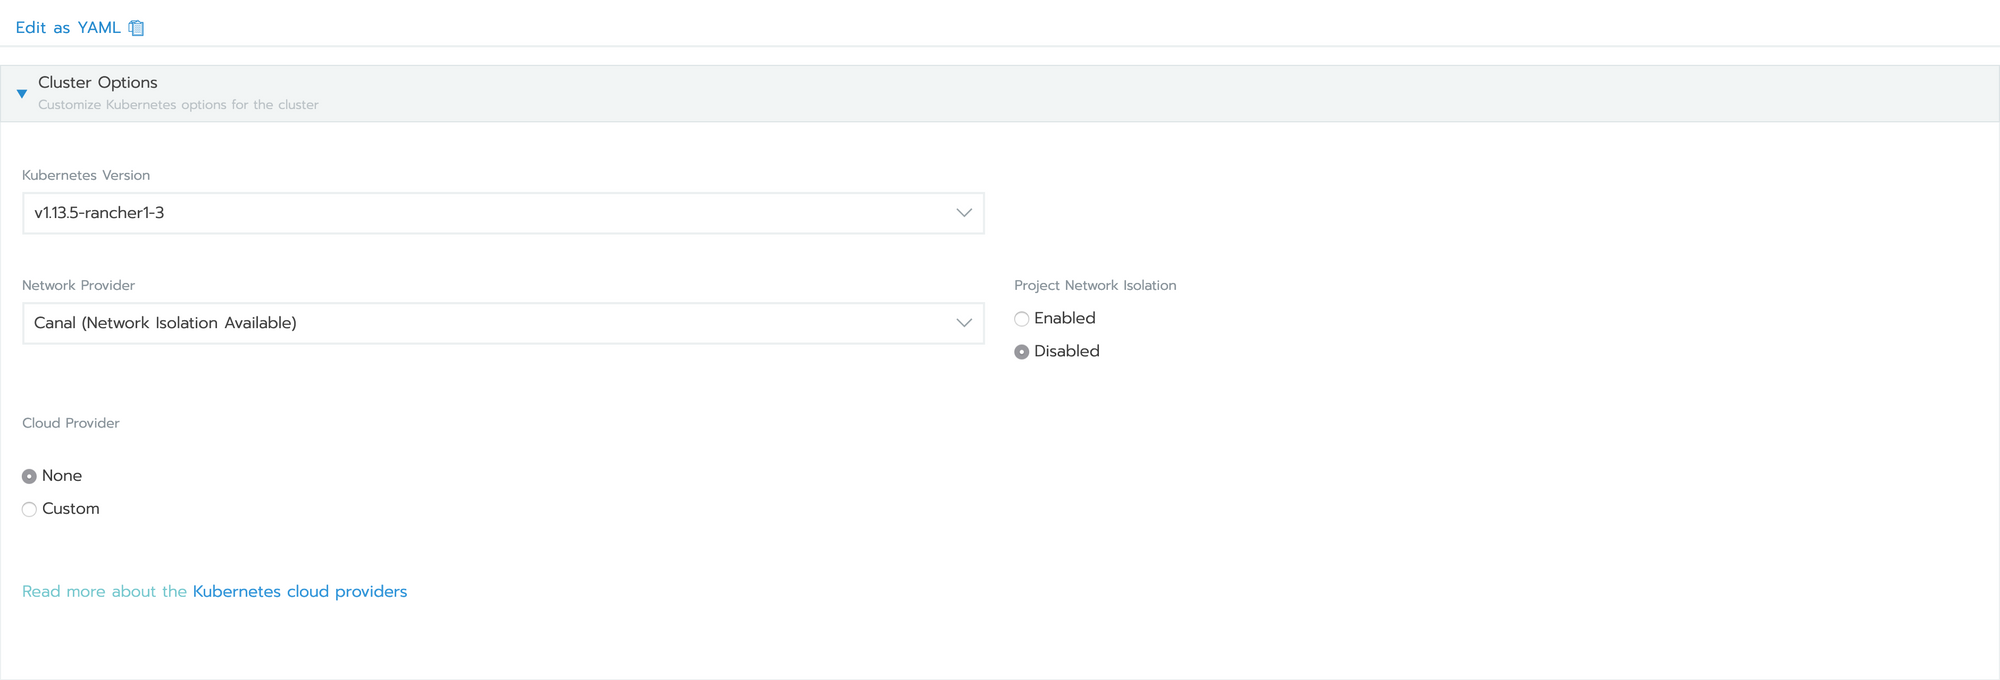
Currently, Rancher supports four options: Flannel, Calicio, Canal (default), and Weave.
A high-level overview comparison between the various CNIs can be found in Rancher’s CNI Provider documentation.
Following Deployment Process
Rancher Cluster Provisioning
After initiating a Ranch cluster deployment, you’ll be redirected to the clusters dashboard:
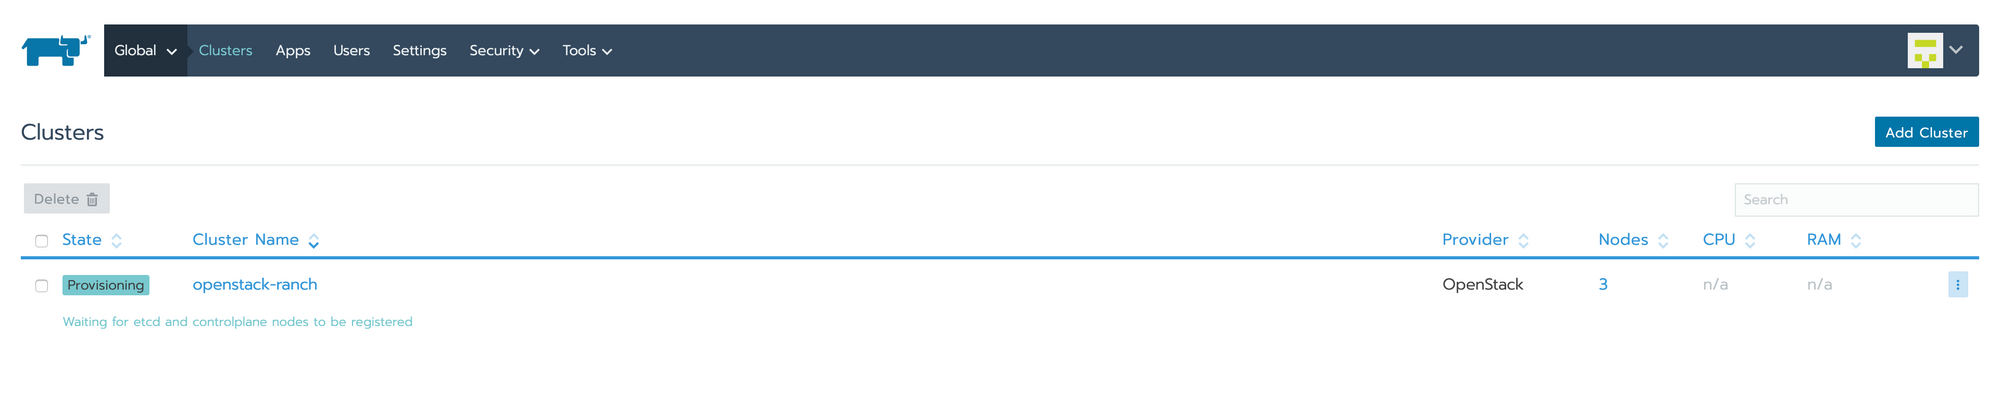 The cluster should be in
 provisioning state.
OpenStack Provisioning
OpenStack Rancher node driver uses docker-machine to create the instances on your OpenStack cloud:
 The output of
 docker-machine is logged and can be viewed in the container logs docker logs rancher-server:
2019/06/15 19:03:44 [INFO] stdout: (ranch-infra-node3) Creating machine...
2019/06/15 19:03:44 [INFO] (ranch-infra-node3) Creating machine...
2019/06/15 19:03:58 [INFO] stdout: Waiting for machine to be running, this may take a few minutes...
2019/06/15 19:03:58 [INFO] Waiting for machine to be running, this may take a few minutes...
2019/06/15 19:03:58 [INFO] stdout: Detecting operating system of created instance...
2019/06/15 19:03:58 [INFO] Detecting operating system of created instance...
2019/06/15 19:03:58 [INFO] stdout: Waiting for SSH to be available...
2019/06/15 19:03:58 [INFO] Waiting for SSH to be available...
2019/06/15 19:03:58 [INFO] stdout: Waiting for machine to be running, this may take a few minutes...
2019/06/15 19:03:58 [INFO] Waiting for machine to be running, this may take a few minutes...
2019/06/15 19:03:59 [INFO] stdout: Detecting operating system of created instance...
2019/06/15 19:03:59 [INFO] Detecting operating system of created instance...
2019/06/15 19:03:59 [INFO] stdout: Waiting for SSH to be available...
2019/06/15 19:03:59 [INFO] Waiting for SSH to be available...
2019/06/15 19:03:59 [INFO] stdout: Waiting for machine to be running, this may take a few minutes...
2019/06/15 19:03:59 [INFO] Waiting for machine to be running, this may take a few minutes...
2019/06/15 19:04:00 [INFO] stdout: Detecting operating system of created instance...
2019/06/15 19:04:00 [INFO] Detecting operating system of created instance...
2019/06/15 19:04:00 [INFO] stdout: Waiting for SSH to be available...
2019/06/15 19:04:00 [INFO] Waiting for SSH to be available...
Rancher Cluster Nodes Provisioning
Clicking on the cluster name will open the cluster management dashoard, click on Nodes in the navigation bar to track the node status:


Clicking on a node will open the node’s management dashboard, which will contain the current operation/state:
 If any errors occur, they’ll be briefly shown in the cluster management dashboard:

More detailed errors be logged in the rancher-server container. Use docker logs rancher-server to view deployment logs:
2019/06/17 22:26:27 [INFO] cluster [c-h5nmn] provisioning: Building Kubernetes cluster
2019/06/17 22:26:27 [INFO] cluster [c-h5nmn] provisioning: [dialer] Setup tunnel for host [XXX.XXX.XXX.XXX]
2019/06/17 22:26:27 [ERROR] cluster [c-h5nmn] provisioning: Failed to set up SSH tunneling for host [XXX.XXX.XXX.XXX]: Can’t establish dialer connection: can not build dialer to c-h5nmn:m-tqqgm
2019/06/17 22:26:27 [ERROR] cluster [c-h5nmn] provisioning: Removing host [XXX.XXX.XXX.XX] from node lists
2019/06/17 22:26:27 [ERROR] cluster [c-h5nmn] provisioning: Cluster must have at least one etcd plane host: failed to connect to the following etcd host(s) [XXX.XXX.XXX.XXX]
2019/06/17 22:26:27 [ERROR] ClusterController c-h5nmn [cluster-provisioner-controller] failed with: Cluster must have at least one etcd plane host: failed to connect to the following etcd host(s) [XXX.XXX.XXX.XXX]
Verifying Deployment
If your deployment were successful, the cluster management dashboard would be updated:
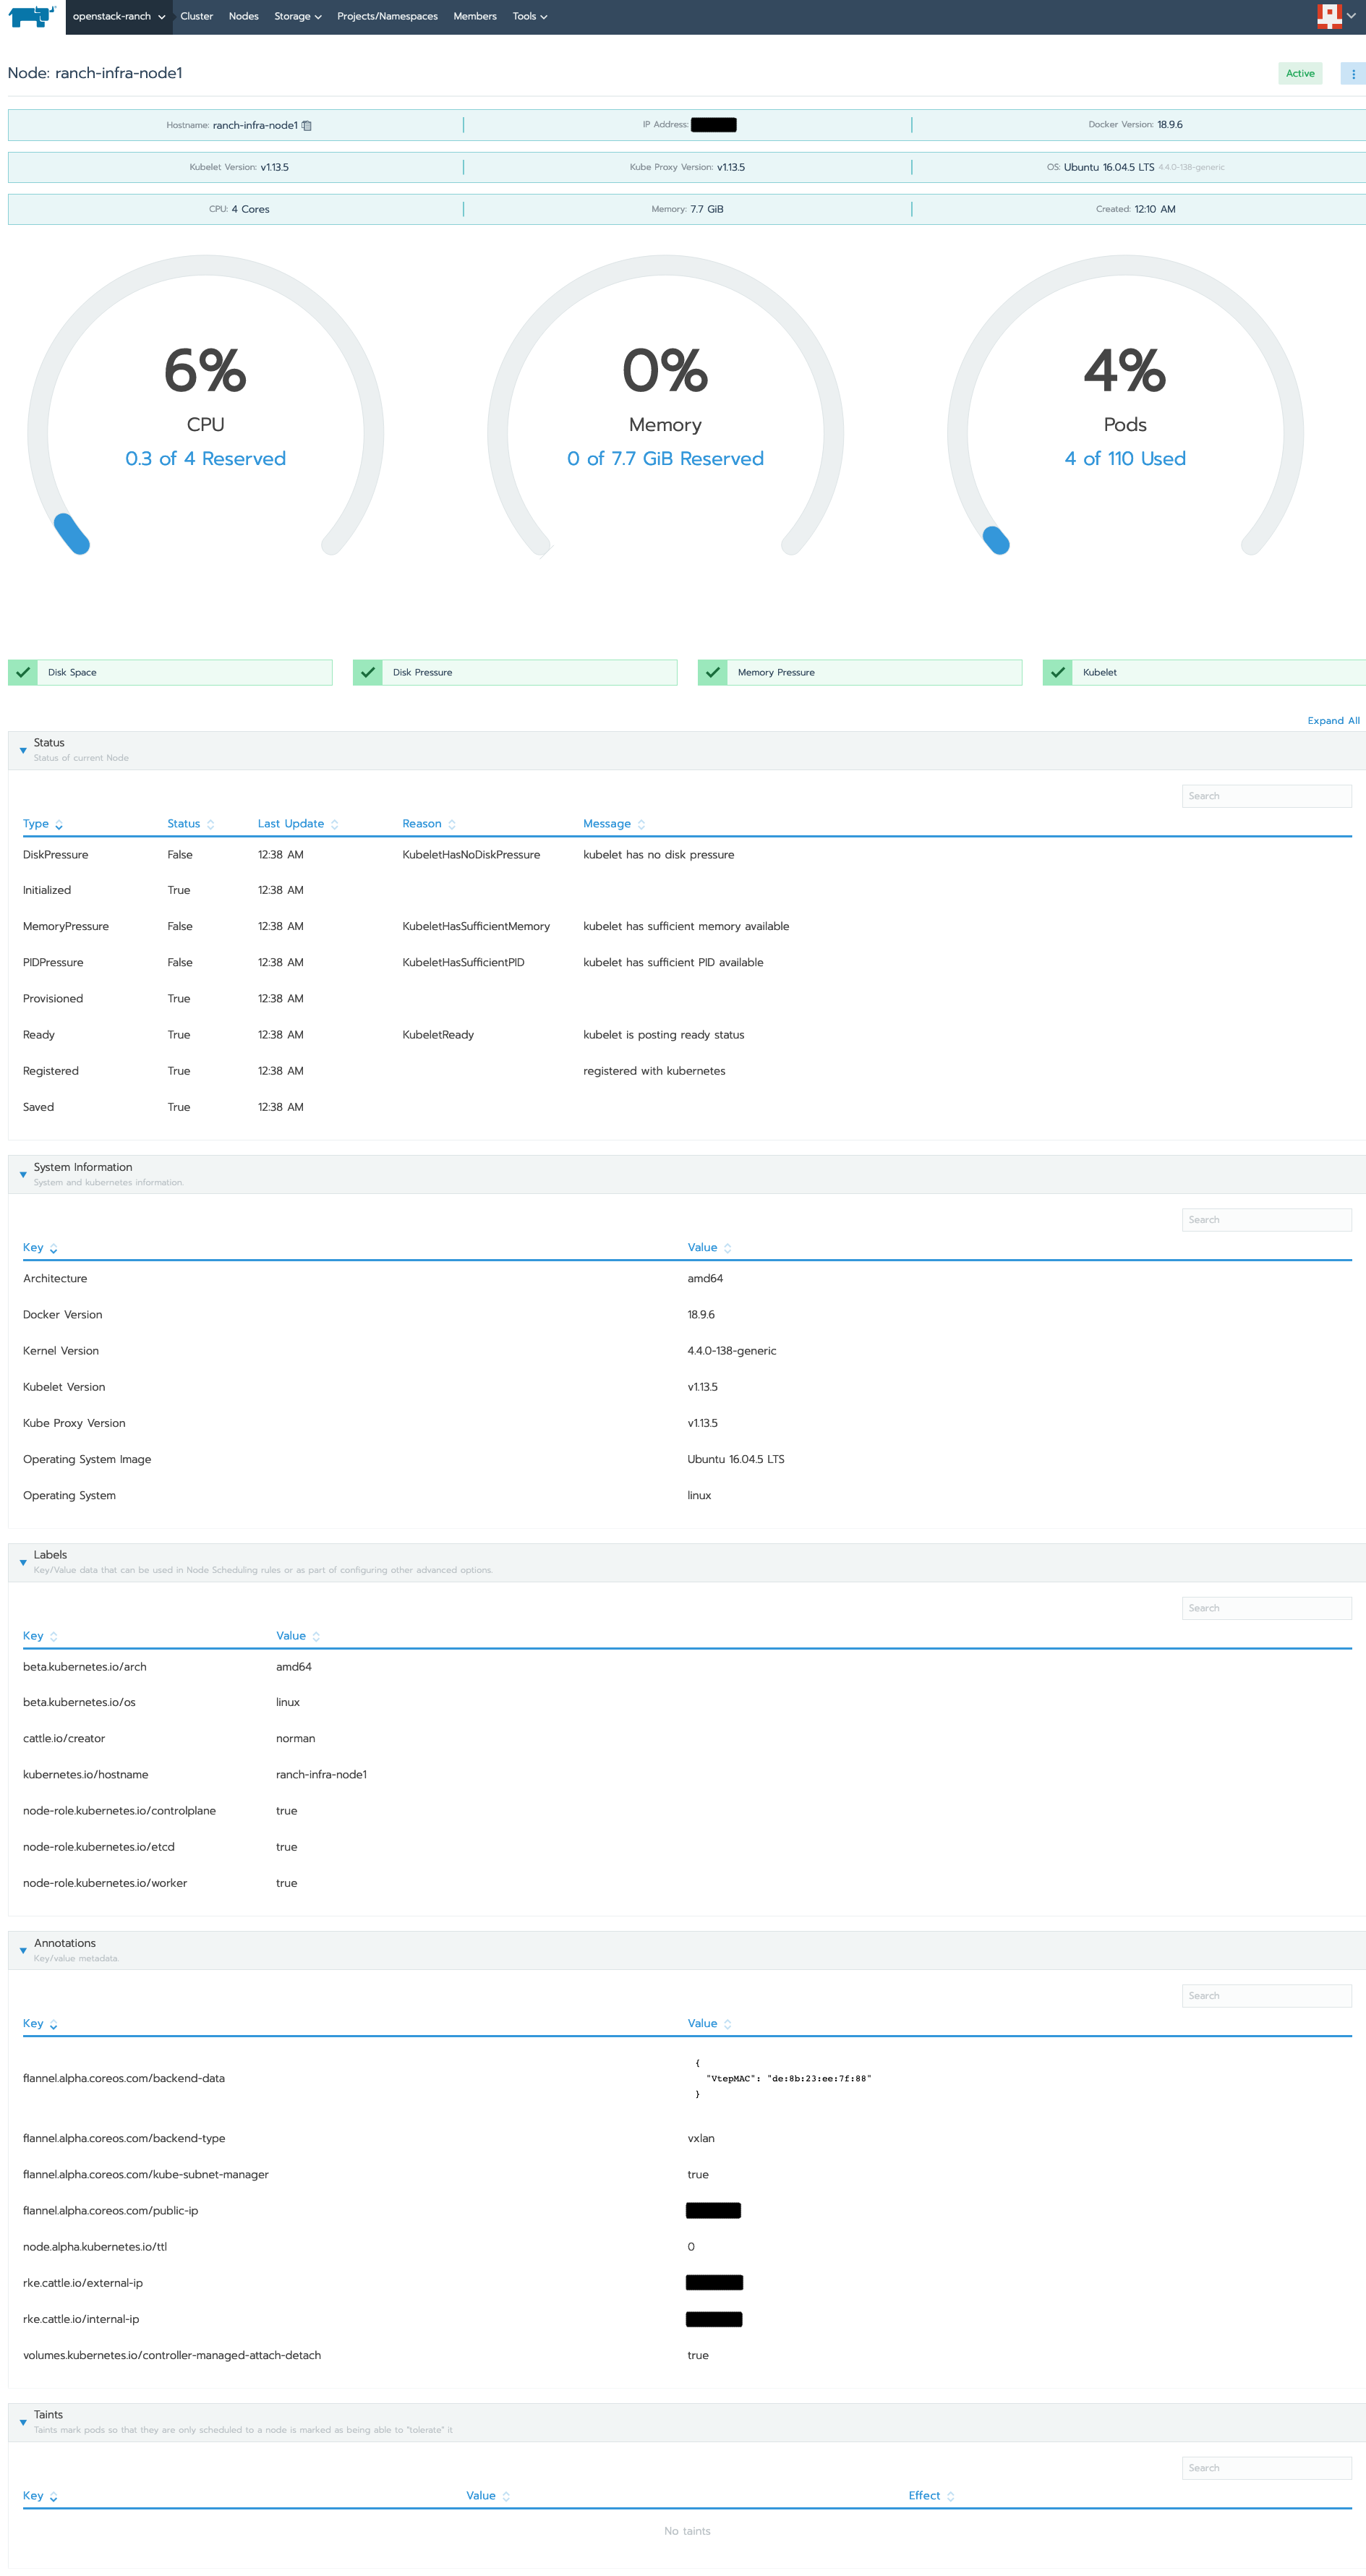
 Each node in the cluster will also be updated with the relevant information:
Post Deployment
Creating A Project
Rancher introduces a new component that is not native to Kubernetes projects. The project may contain several Kubernetes namespaces underneath, which are logically grouped and can be maintained using the same RBAC policies, which allows utilizing multitenancy.
By default, Rancher creates the following projects/namespaces:
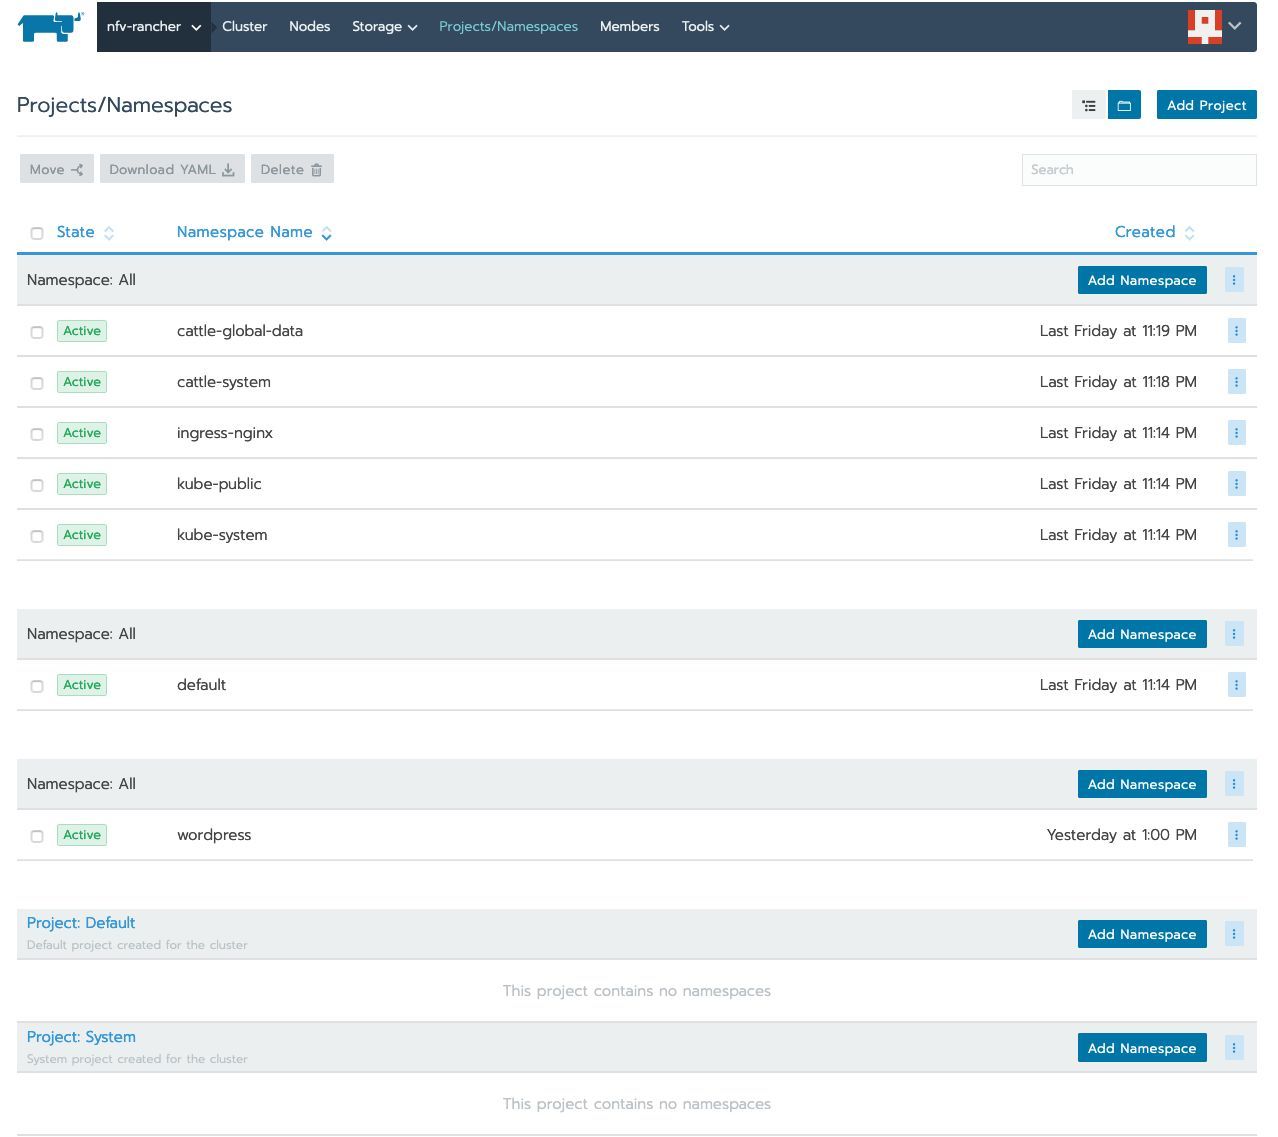
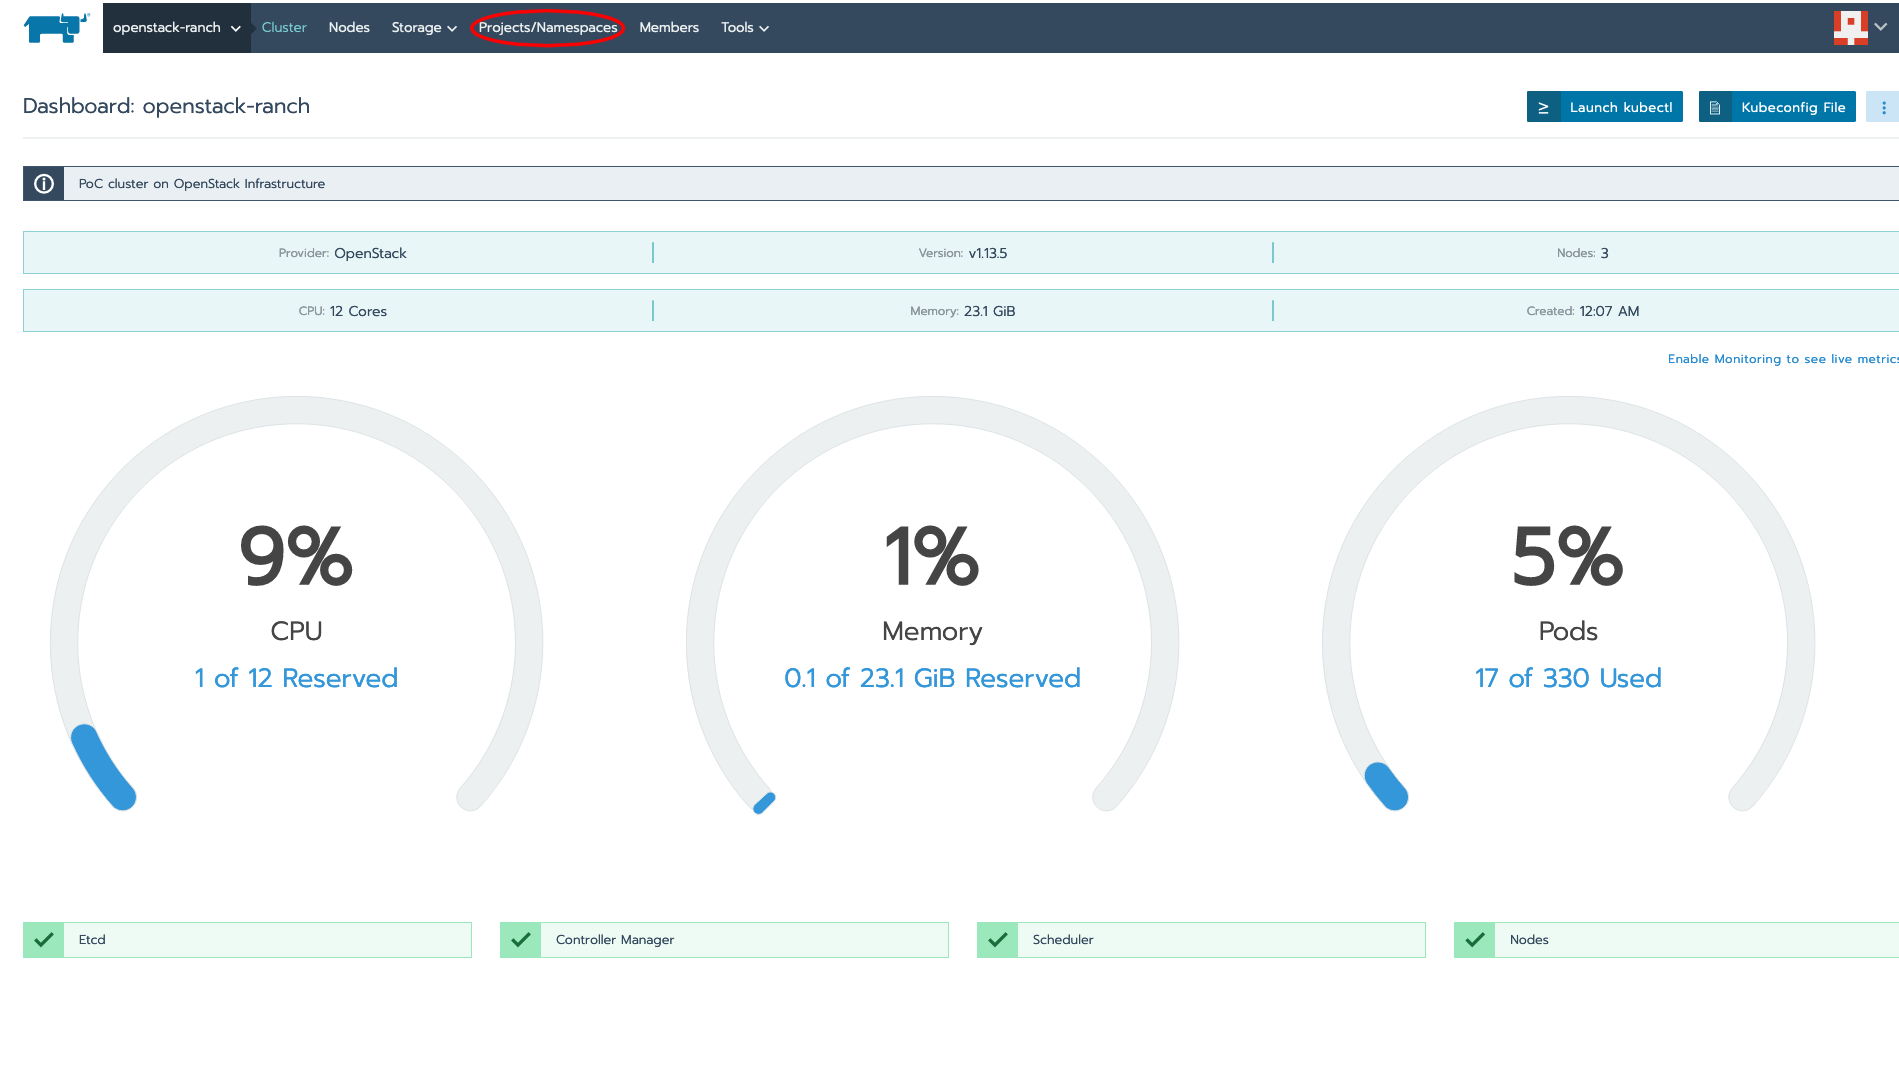
To create a project, navigate to Projects/Namespaces:
Click Add Project:
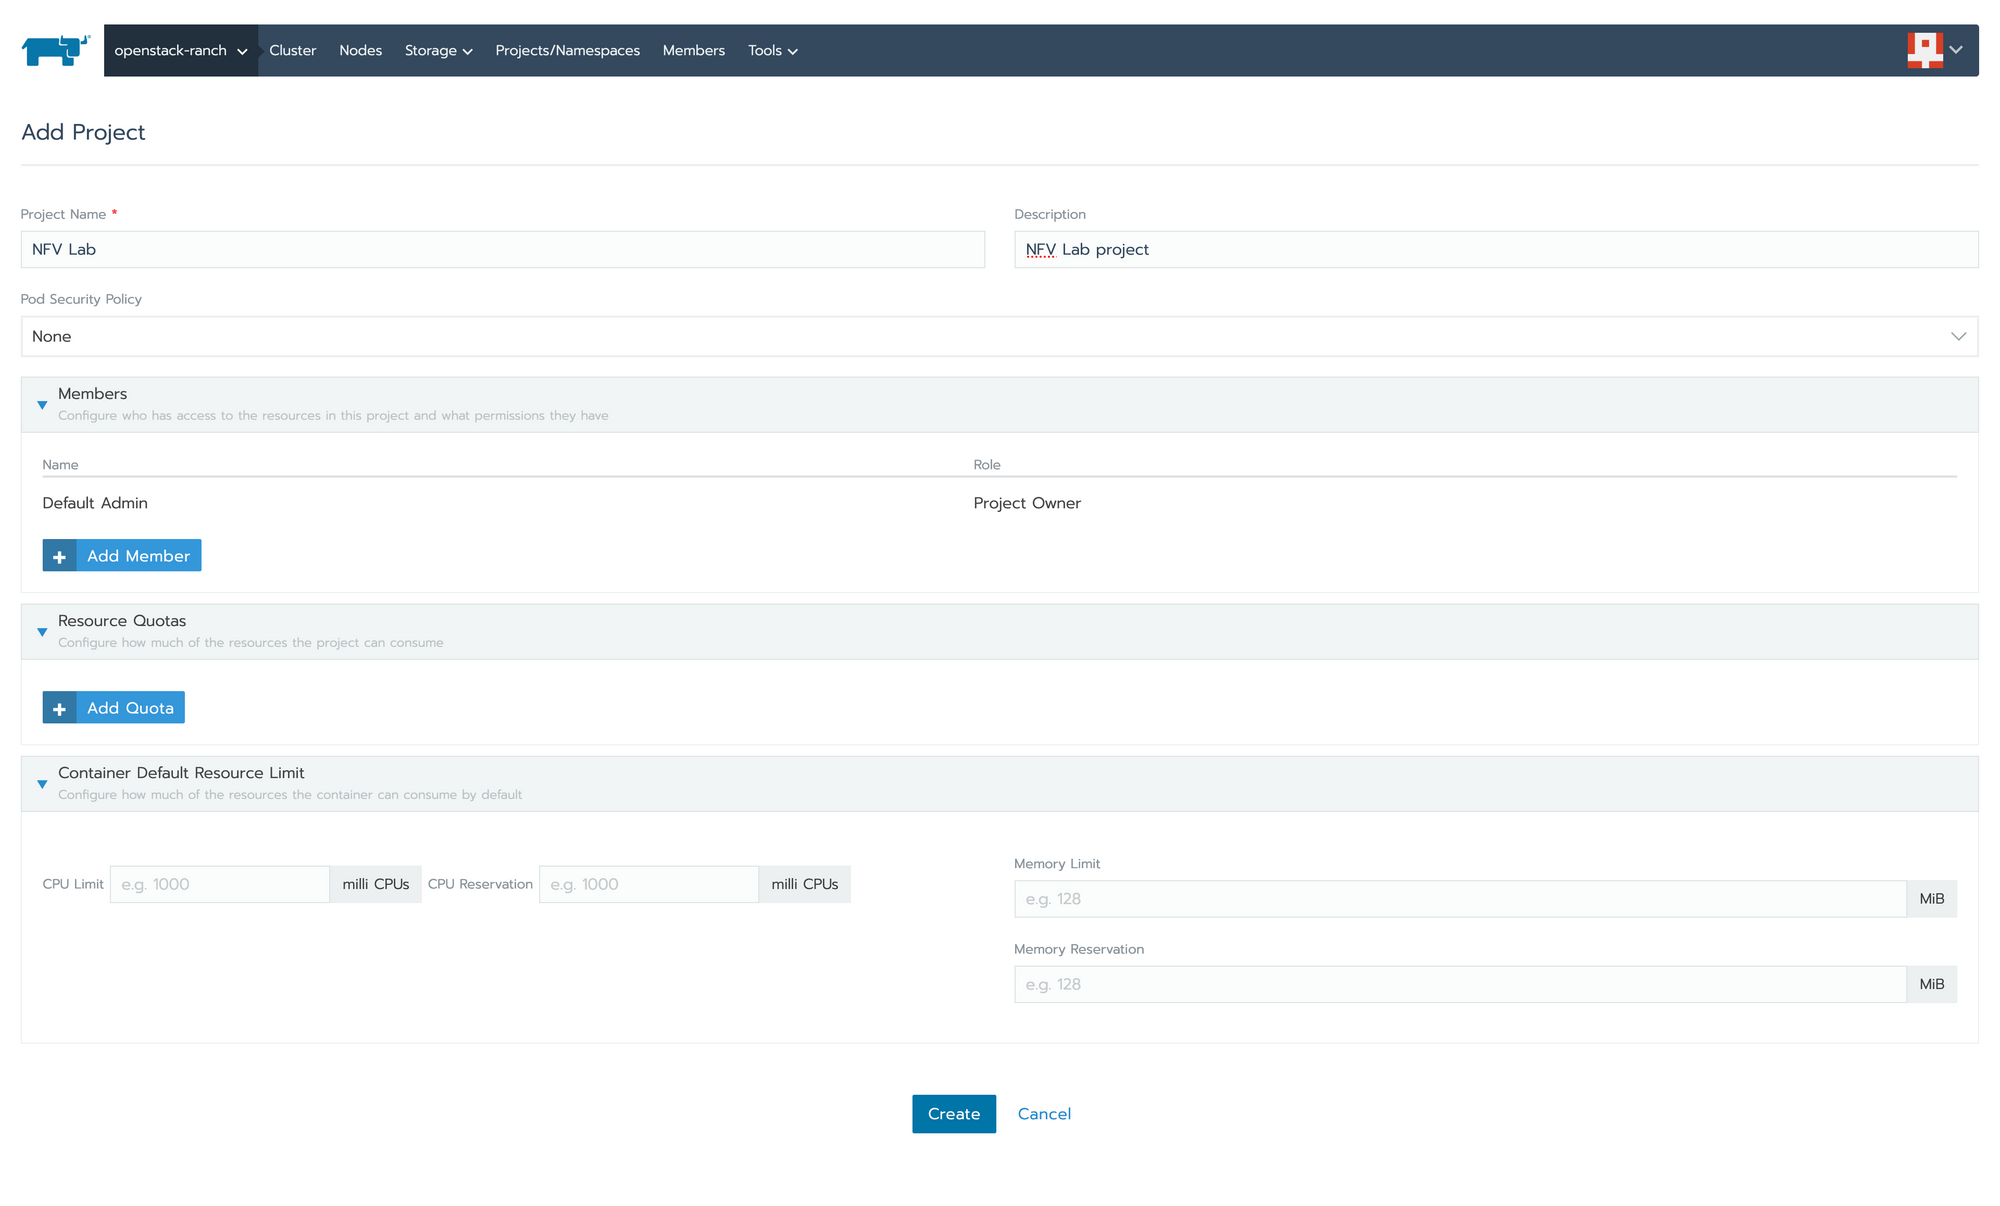
Resource quotas allow you to limit resource utilization. Refer to the documentation for more info.
Creating A Namespace
After creating a project, we can create a namespace by clicking on Create Namespace in the desired project:
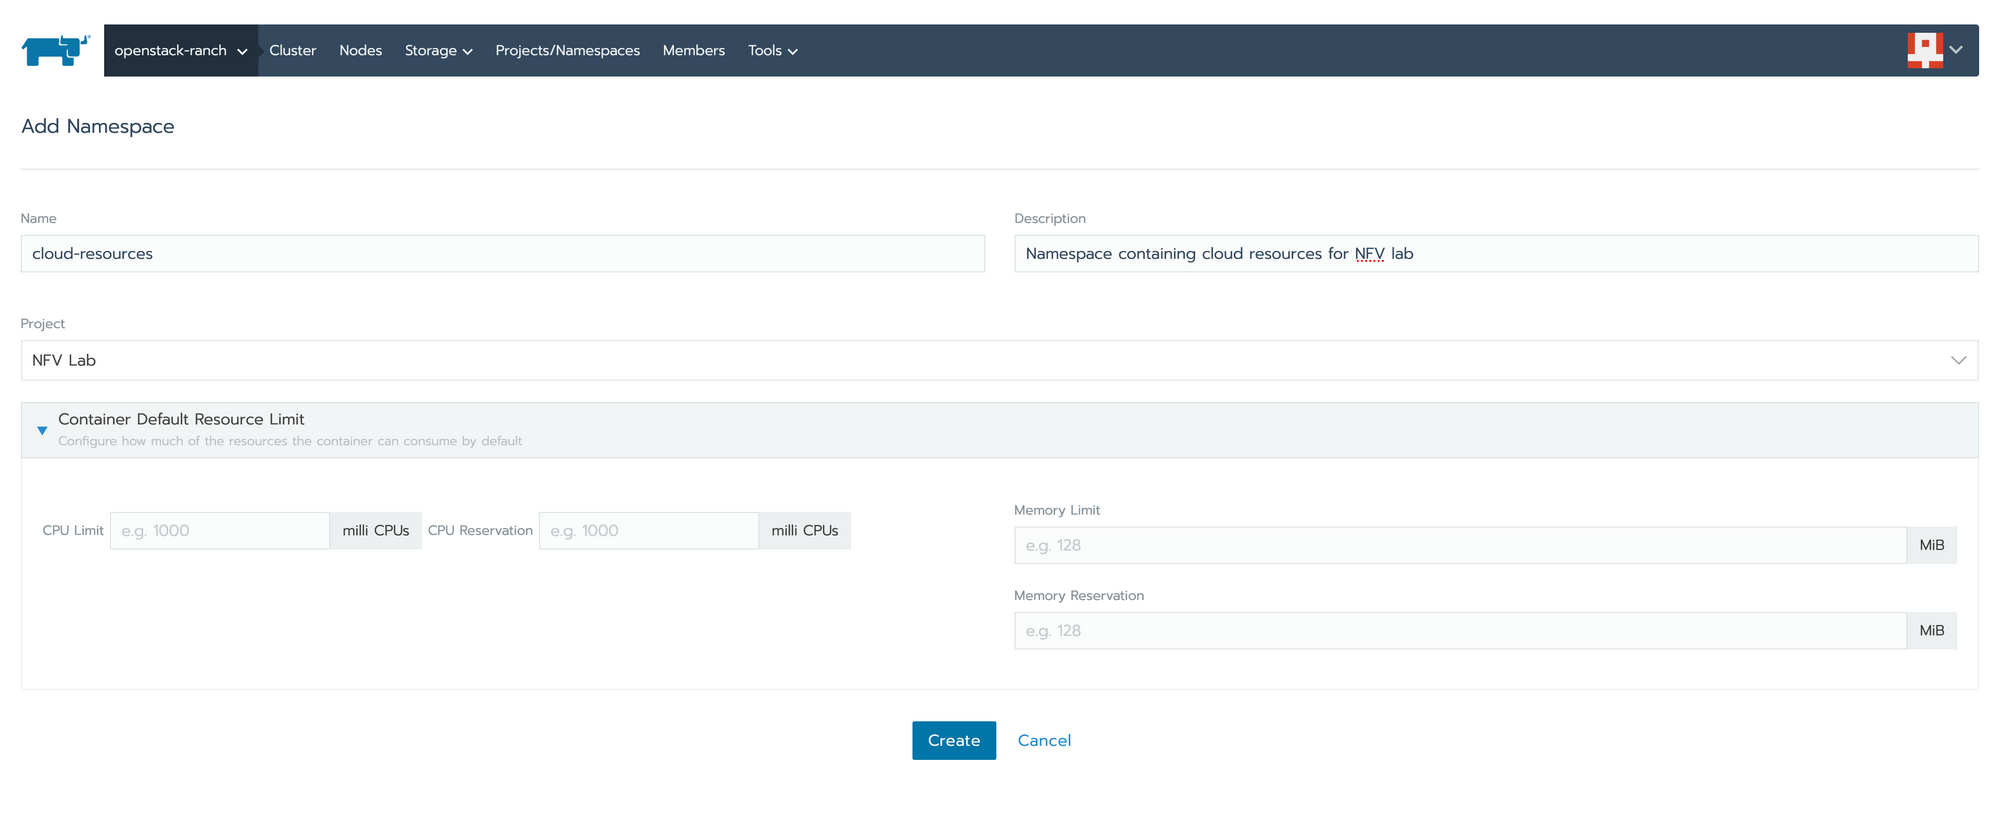
Once a namespace is created, it’ll appear under a project:

Deploying A Workload
Rancher Workloads
Workloads in Rancher include:
- Kubernetes Deployments - stateless pods, pods which on disruption do not keep their storage and are recreated.
- Kubernetes StatefulSets - stateful pods, pods that keep their storage on disruption.
- Kubernetes DaemonSets - pods that are scheduled on every node in the cluster.
- Kubernetes Jobs - pods which on successful completion terminate themselves.
- Kubernetes CronJobs - similar to Kubernetes Jobs but run to completion on a cron-based schedule.
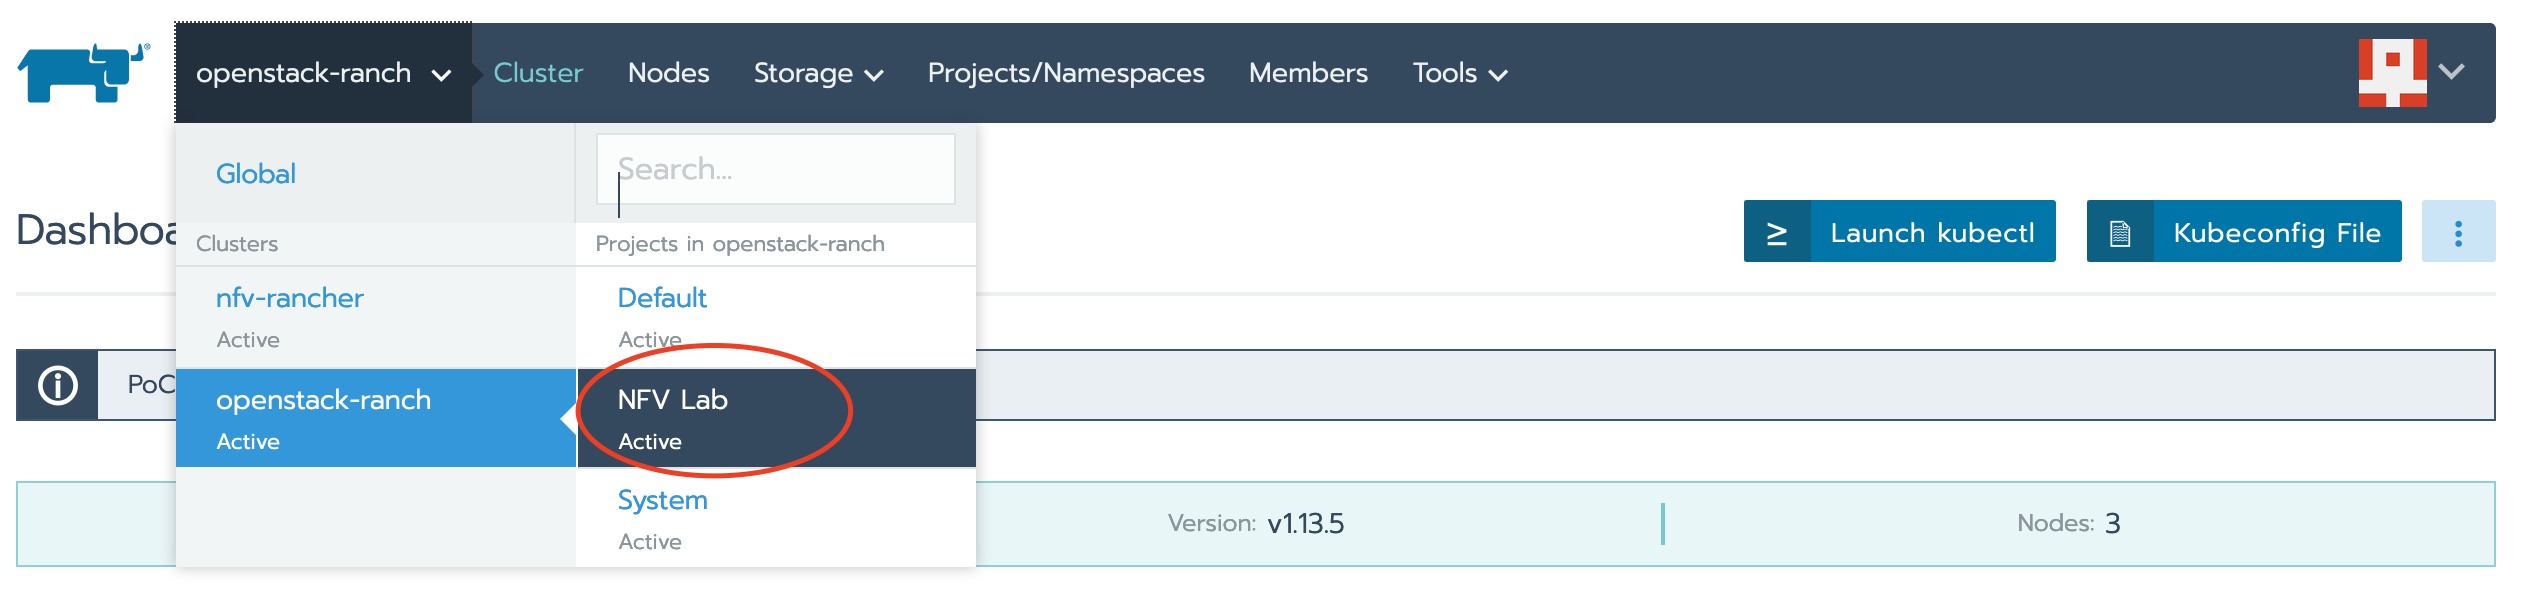
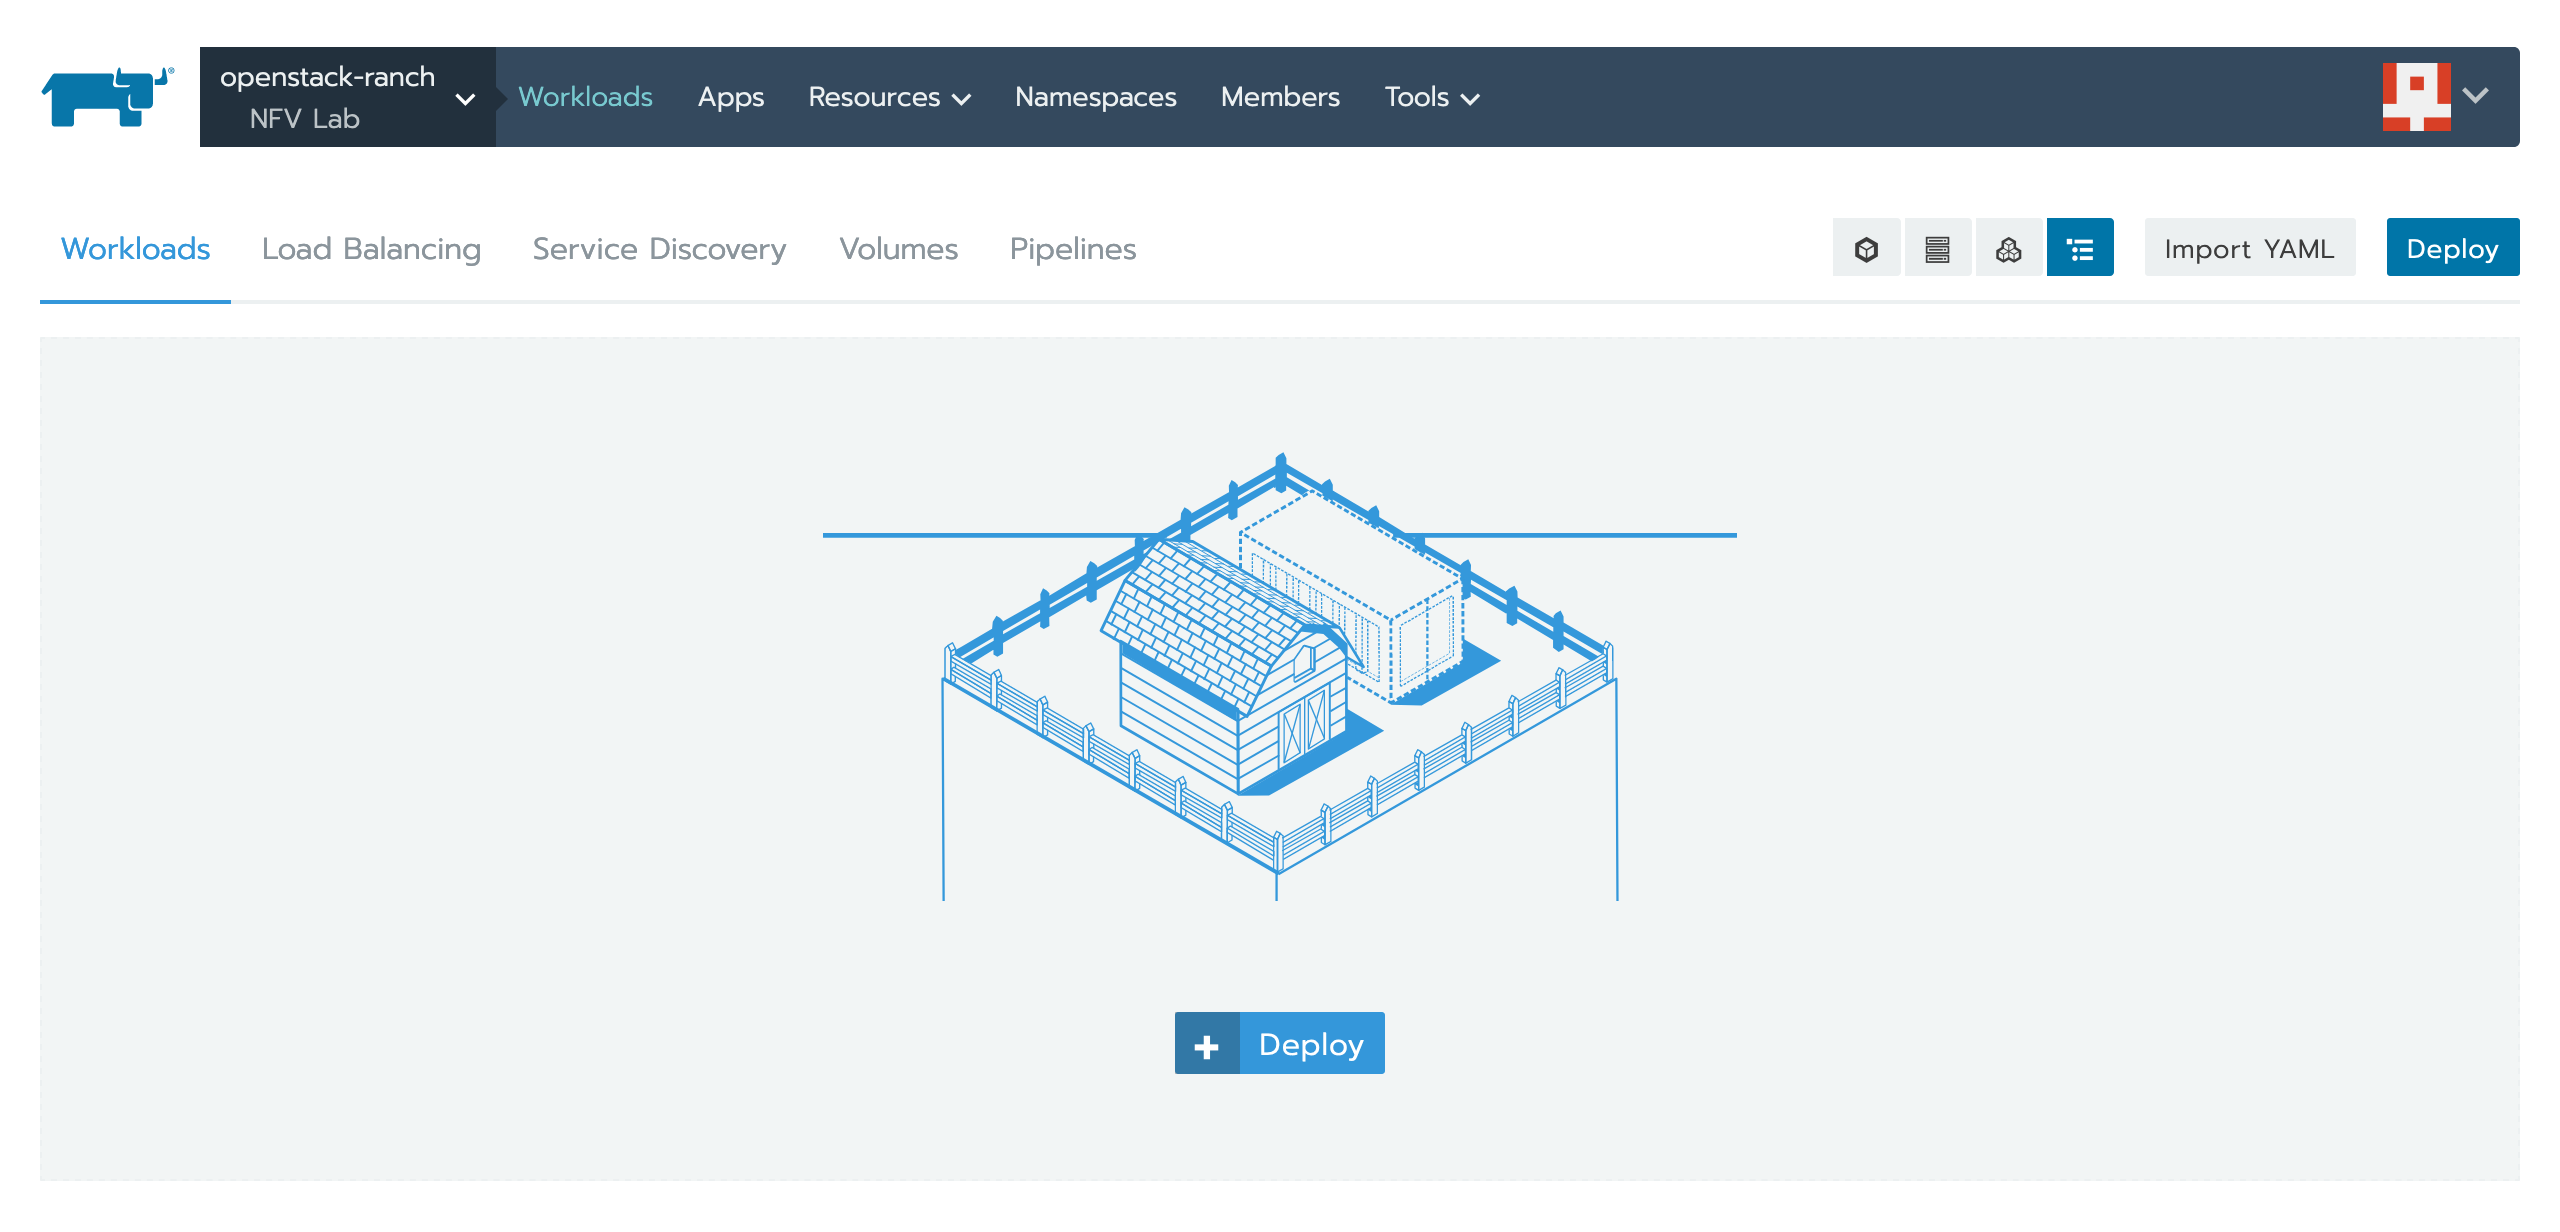
To deploy a workload, click on the scope section in a navigation bar and select your cluster and project:
Press Deploy:
Deploy Workload
Pick the type of workload, image, name, and namespace:

Port Mapping
Expose container ports, and there are several options to pick from:
- NodePort - expose container ports on all nodes in the cluster
- HostPort - expose container ports on a node where the container resides
- ClusterIP - expose container ports on a cluster network(internal)
- Layer-4 Load Balancer - expose container ports through a load balancer

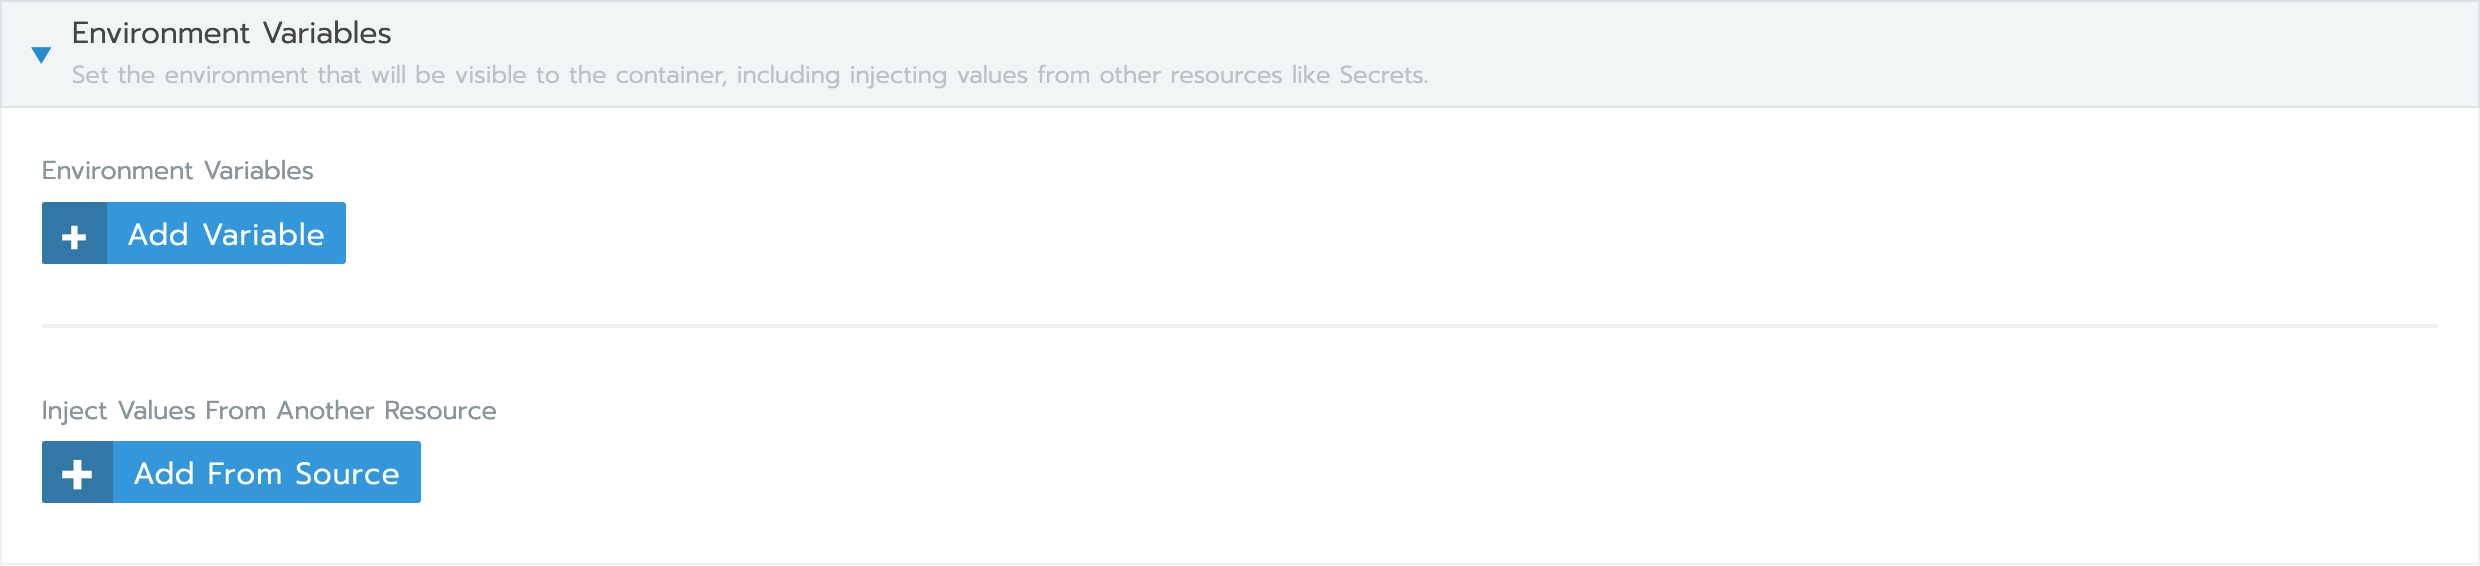
Environment Variables
Pass environment variables and secrets:
Node Scheduling
Define the scheduling rules of workload:
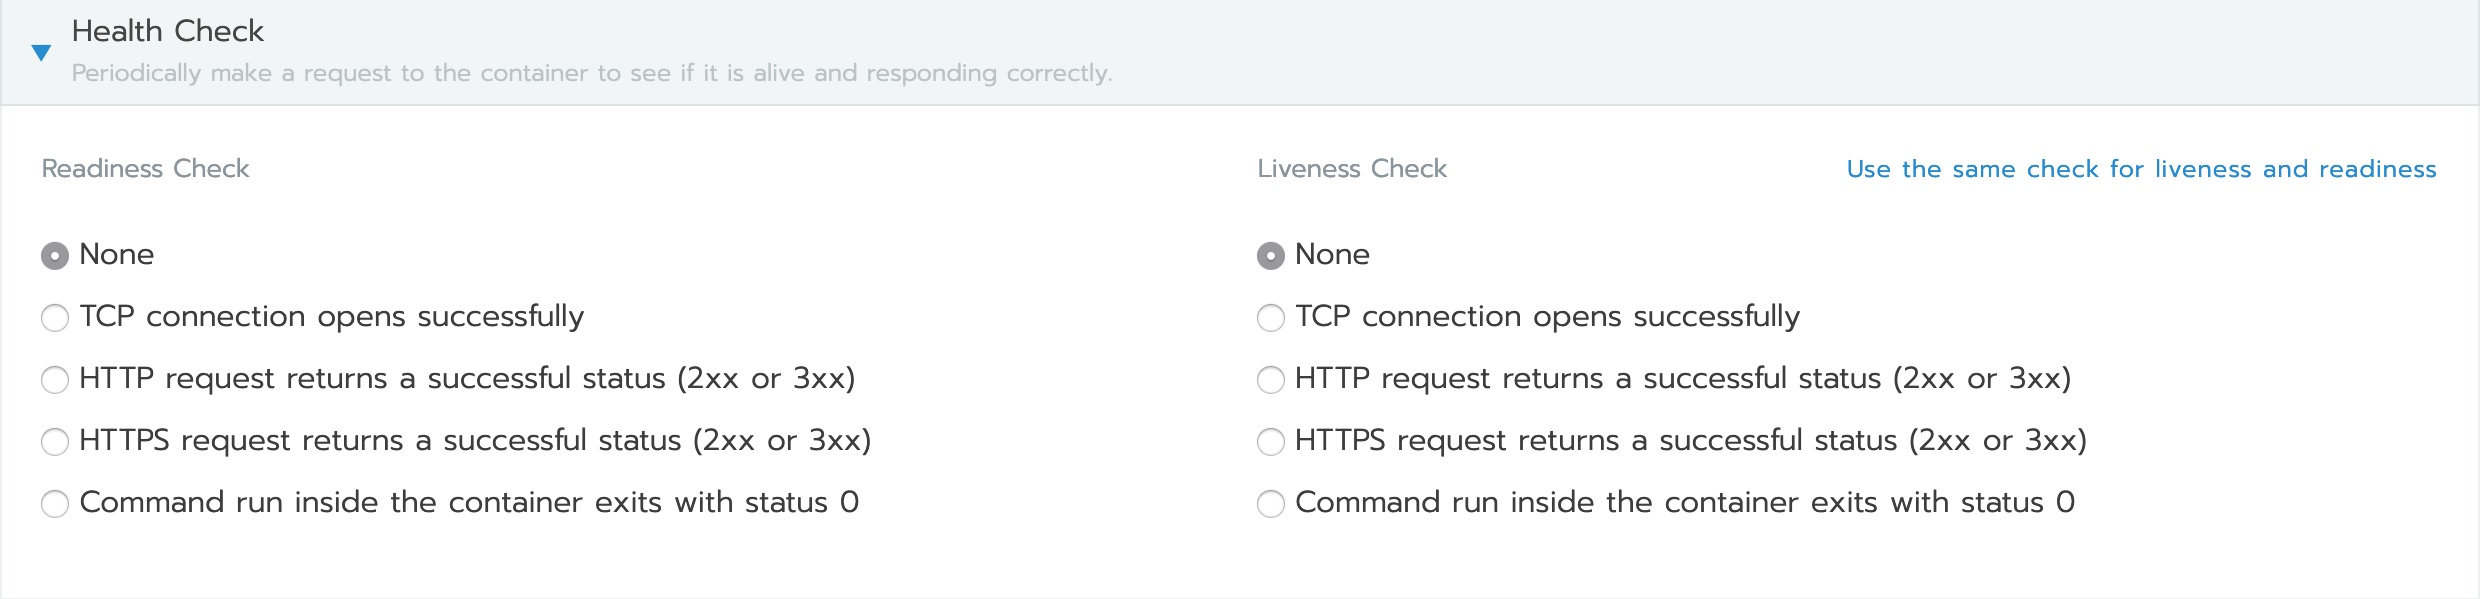
Health Check
Define workload liveness and readiness:
Volumes
Attach volumes to workload:

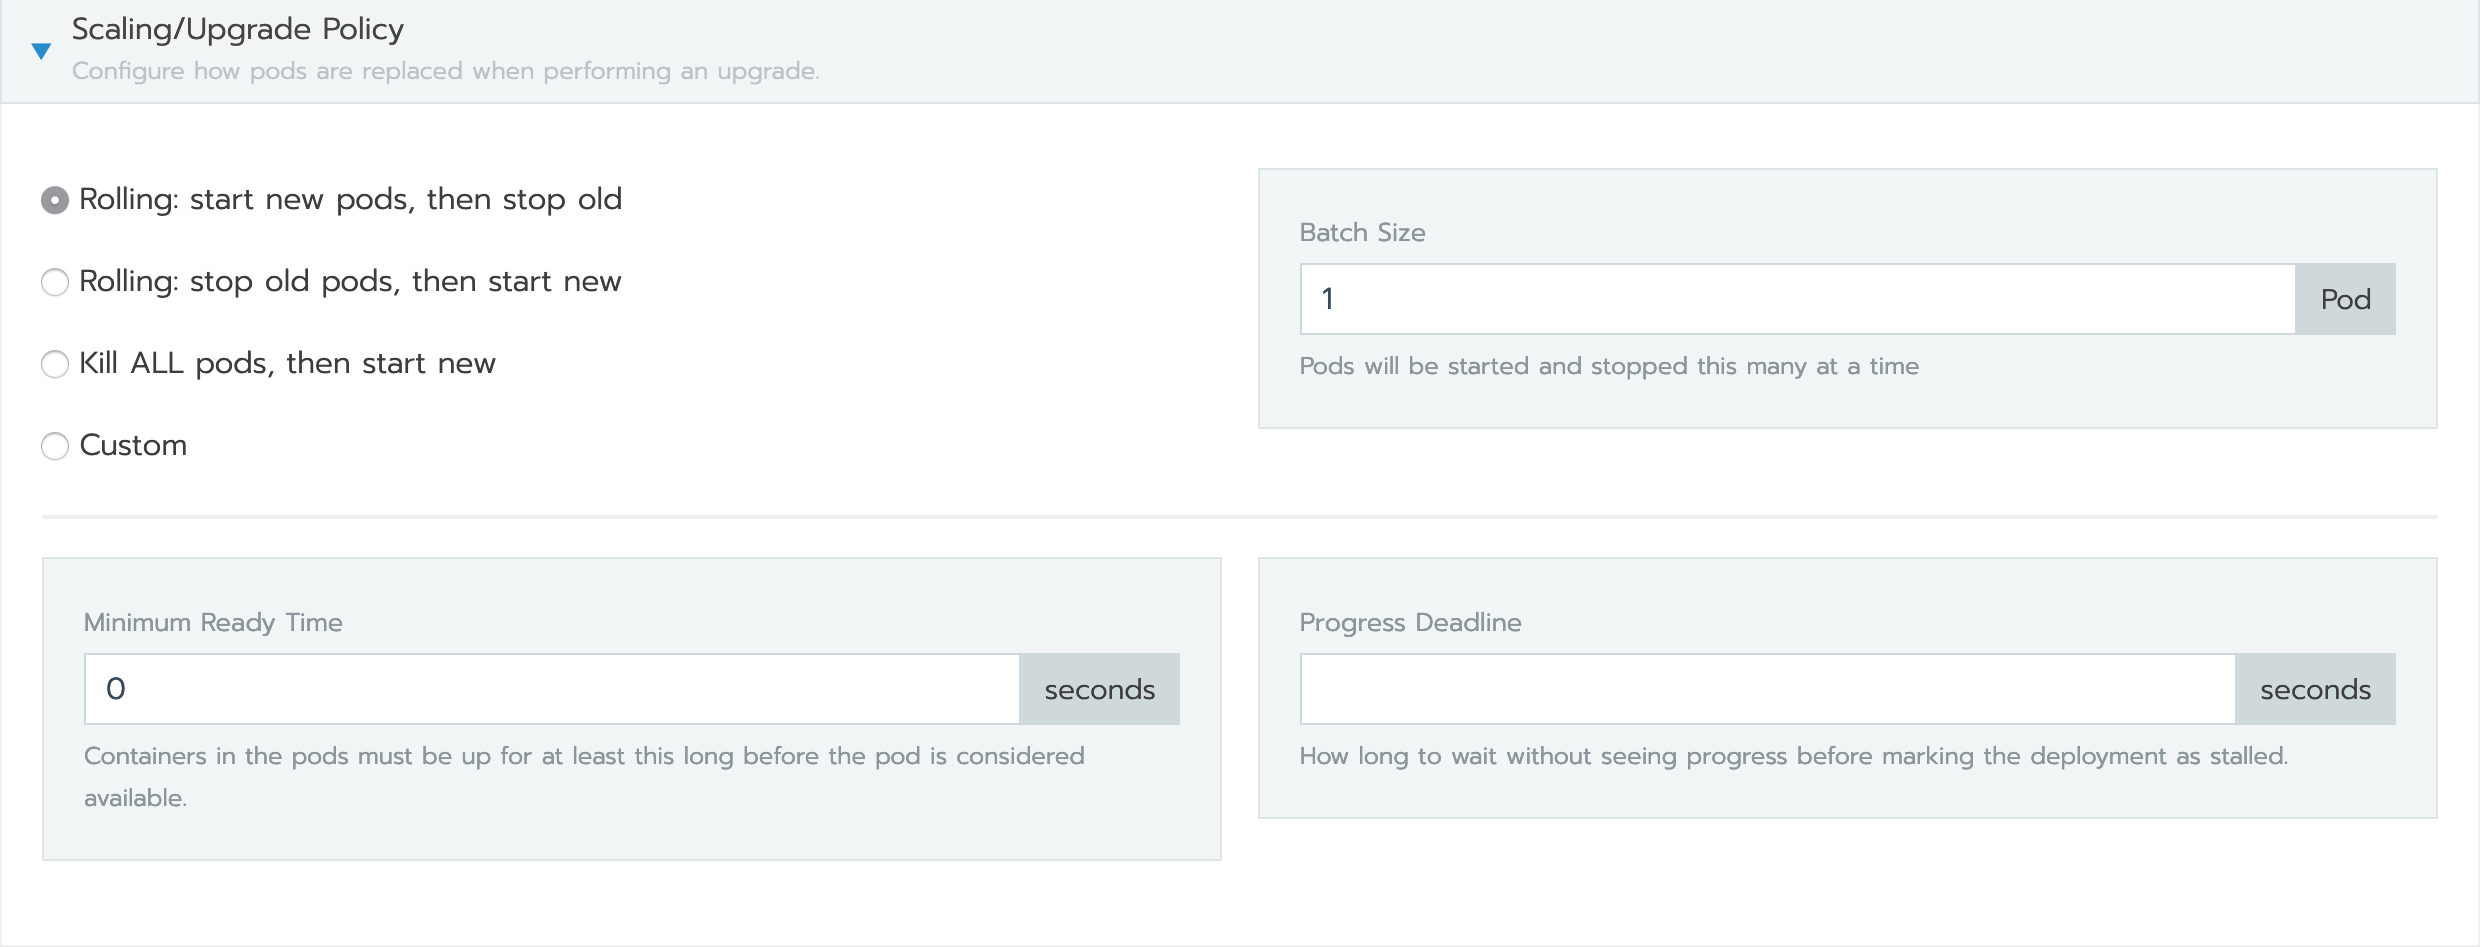
Scaling/Upgrade Policy
Define the scaling/update policy of workload:
Verifying Workload
If your workload were successfully deployed, it would appear under Workloads:

You should be able to connect to your pod(s) depending on your configuration.
Deploying An Application
Rancher Application
Applications in Rancher refer to Helm charts. Helm charts are a collection of files that describe Kubernetes resources.
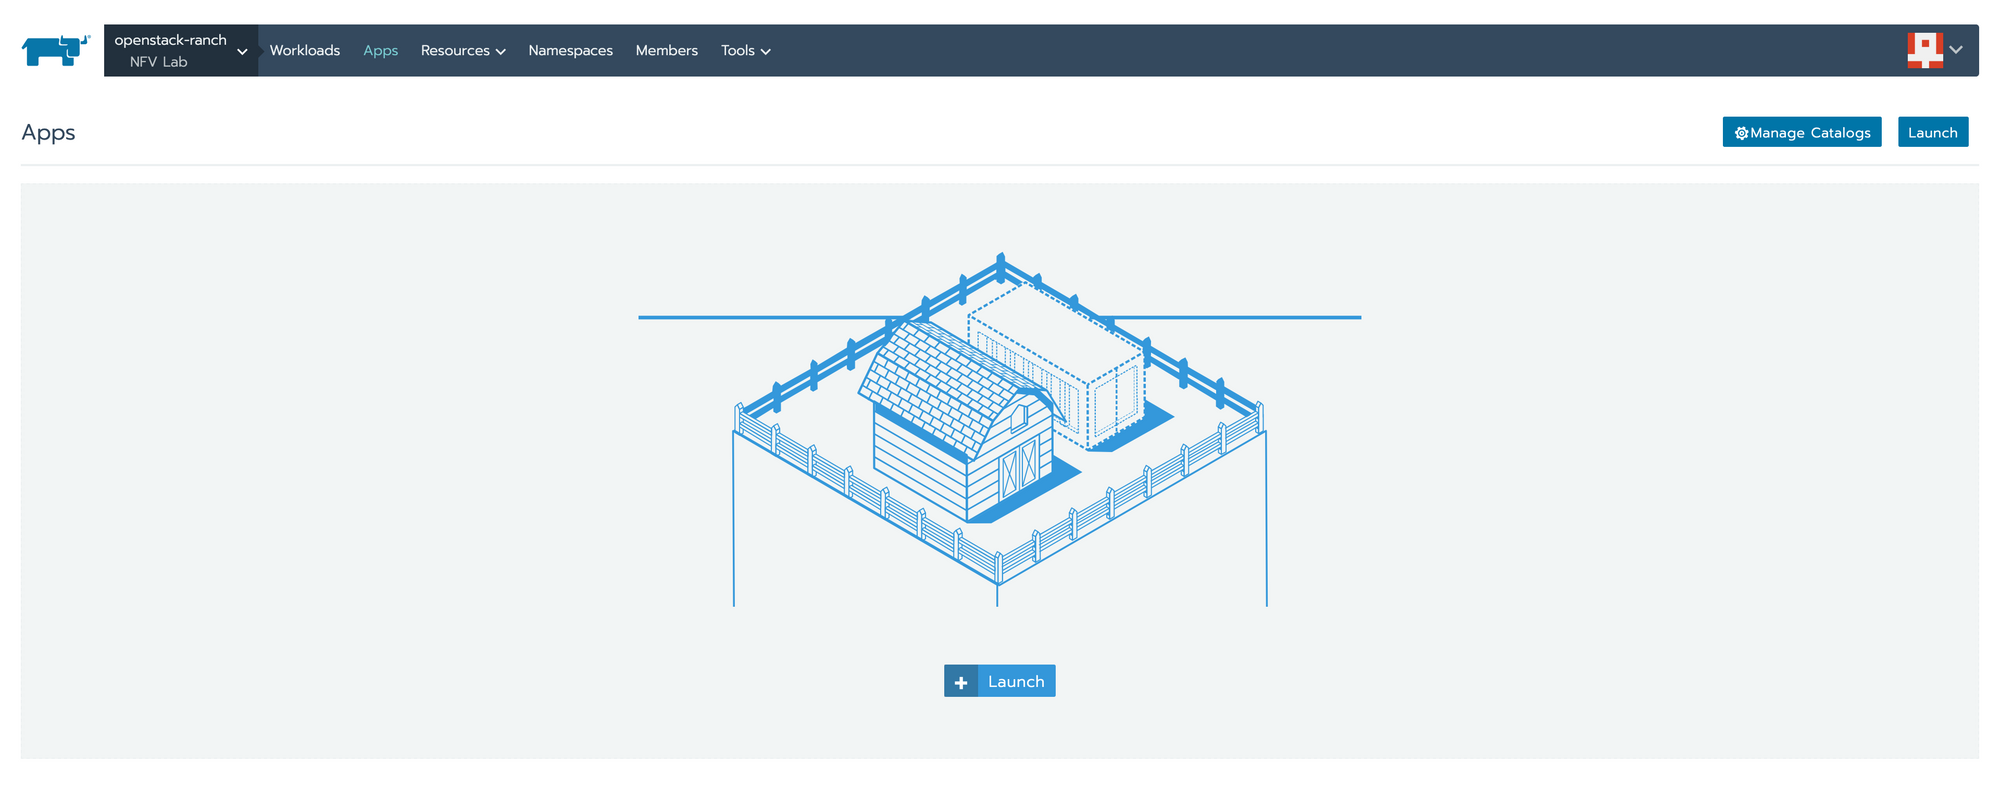
To deploy an application, click on the scope section in a navigation bar and select your cluster and project:
Click on Apps in the navigation menu and press Launch:
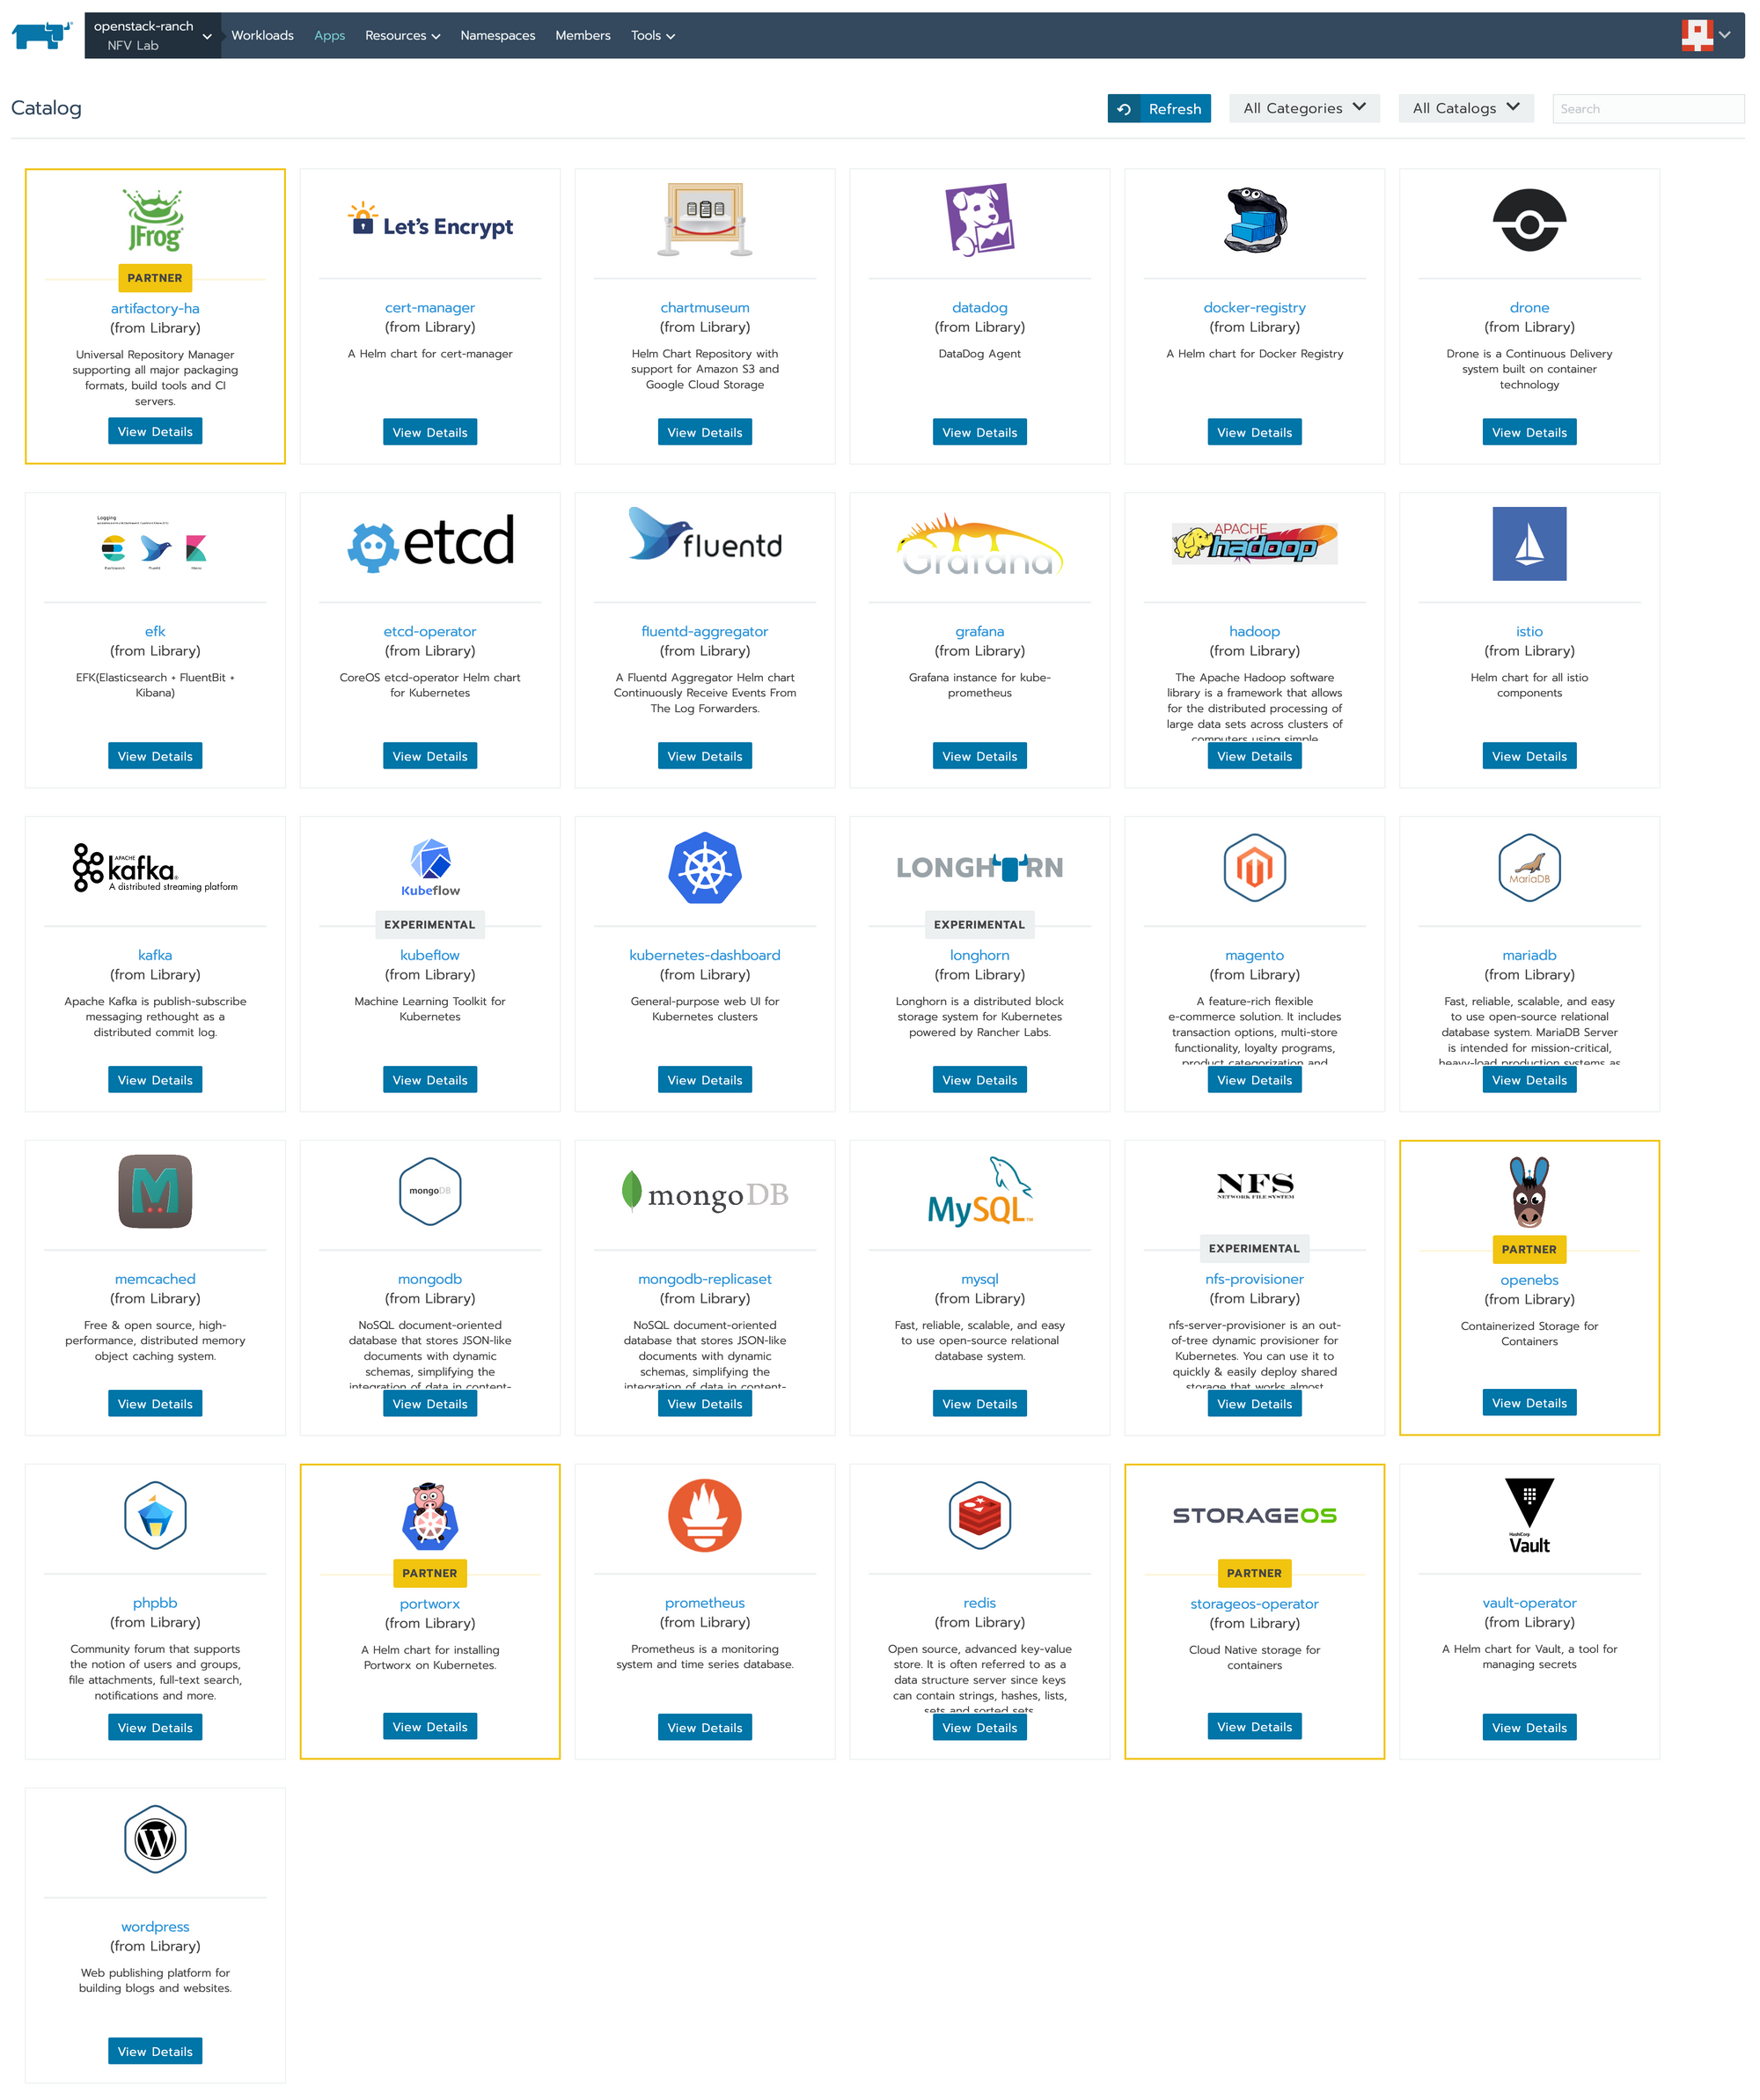
Select An Application From The Catalog
Helm charts are stored in a catalog.
Rancher’s default catalog contains many popular applications:
Deploying Application
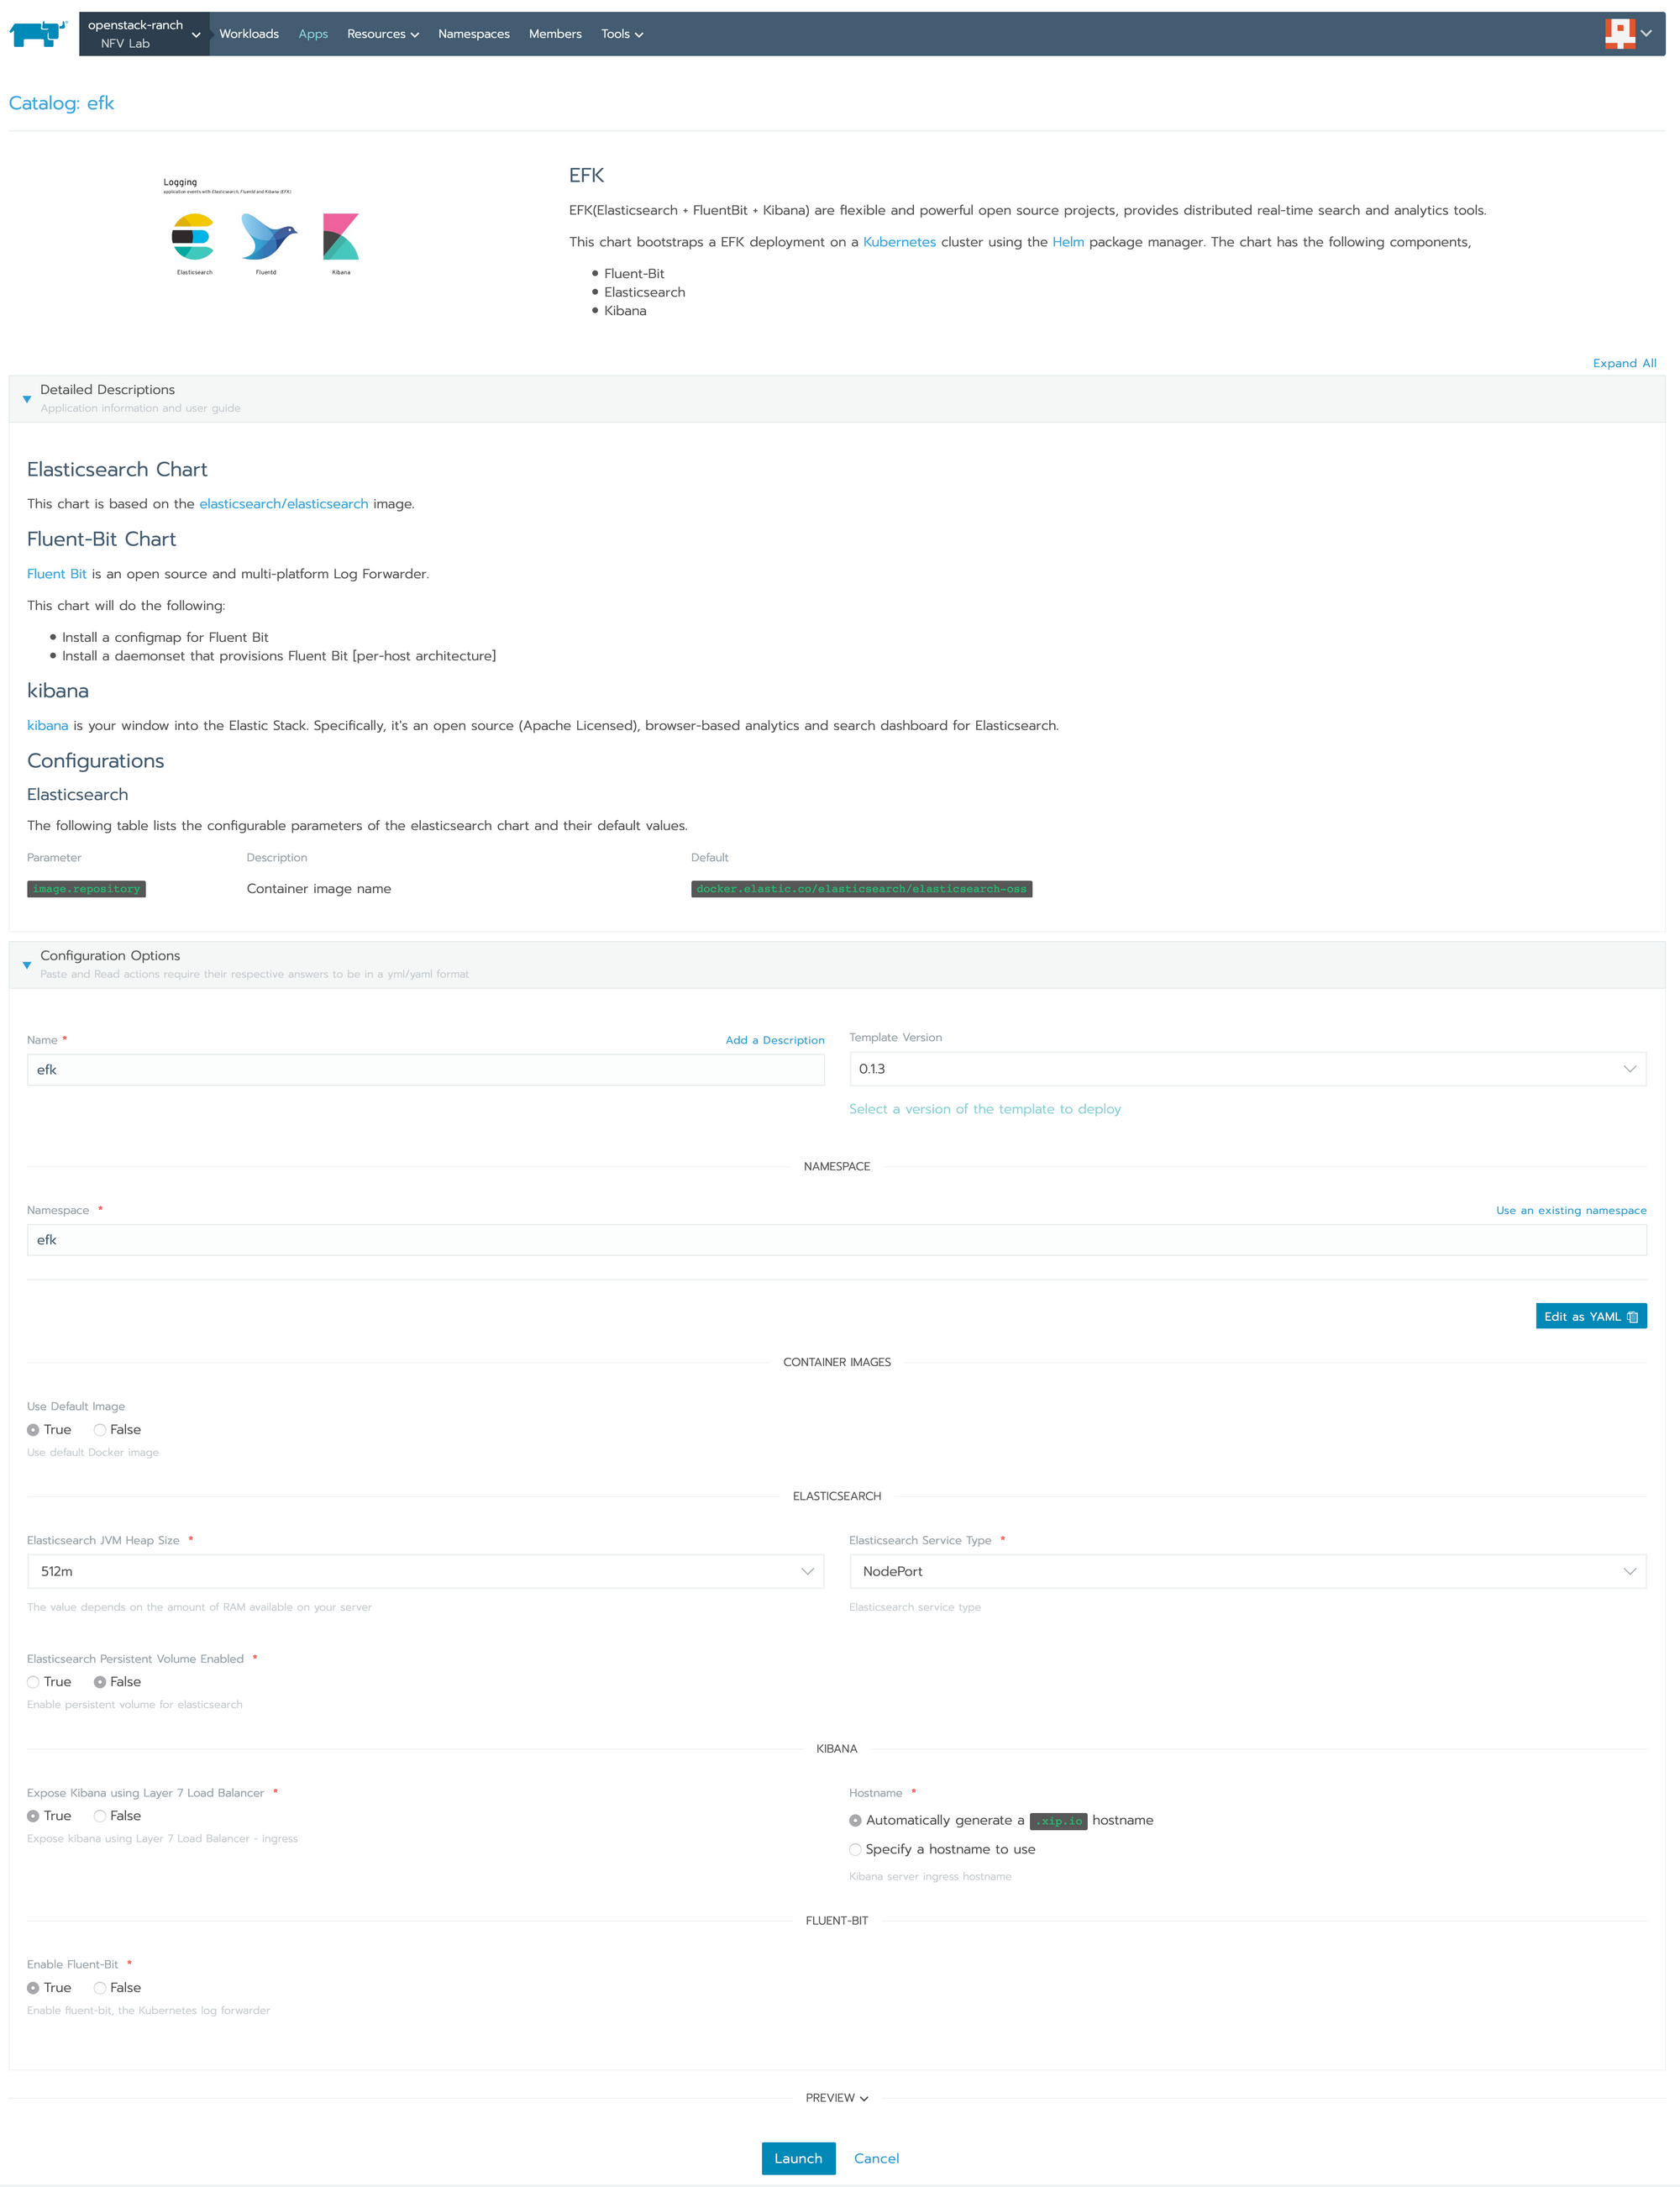
After picking an application from the catalog, a configuration screen will appear.
Every application will have its configuration:
xip.io As A Wildcard DNS Server
If you want multitenancy or several applications under the same host, you may use the wildcard DNS approach.
Wildcard DNS (*.XXX.XXX.XXX.XXX) will resolve all the subdomains using the XXX.XXX.XXX.XXX address, for example, both my-first-app.10.10.10.10 and my-second-app.10.10.10.10 will resolve to 10.10.10.10.
Container management platforms leverage wildcard DNS to direct traffic between containers using a single domain.
xip.io is a public wildcard DNS server that will be used by default during application deployments.
Applications will receive a DNS address http://<app_name>>.10.10.10.10.xip.io that is resolved to 10.10.10.10.
Verifying Application
If your application were successfully deployed, it would appear under Apps:

Summary
This blog post discussed how to quickstart a development Rancher environment using OpenStack infrastructure. This blog post does not discuss many additional features (persistent volumes with Cinder, configuring a load balancer using Octavia, and more) which will make your deployment production ready.
To know more about additional features, refer to Rancher, Kubernetes, and OpenStack documentation.