Creating A UTM Virtual Machine From CLI
Tags:
#UTM
#virtualization
Verified
Tested on UTM version 4.4.3 and macOS 14.0 (Sonoma).
Warning
This method is not endorsed by UTM!
Note
Apple Virtualization backend with Linux virtual machine is used in this blog post.
Note
Network devices must be added via GUI.
Preface
In a previous blog post, we discussed modifying UTM virtual machine configuration using CLI.
In this post, we will create an Arch Linux virtual machine from CLI without GUI.
The virtual machine will boot from an external Linux kernel and an external intiramfs, and we will attach a single storage device.
This post only covers a particular configuration but can be referred to when required to build different configurations (QEMU, macOS, and so on).
Why
UTM is an excellent virtualization software but doesn’t offer a native way to automate virtual machine creation.
Users can export their existing virtual machine bundles and then re-import them.
Users are also able to clone existing virtual machines.
We are interested in creating new virtual machine bundles programmatically.
Prerequisites
Before creating the virtual machine, please make sure you have the following prerequisites:
- UTM application installed
uuidgenbinary present (should be part of the operating system in/usr/bin/uuidgen)/usr/libexec/PlistBuddy, a utility to modifyplistfiles/usr/bin/swift, a binary to run Swift codehdiutilbinary present (should be part of the operating system in/usr/bin/hidutil)
Creating The Virtual Machine
Each virtual machine includes unique identifiers UTM uses to differentiate between virtual machines.
Most identifiers use uuid v4, while Apple-specific identifiers use VZMacMachineIdentifier.
Configuring Variables
Define a display name for the virtual machine:
UTM_VIRTUAL_MACHINE_DISPLAY_NAME="arch-linux-00"
Generating Unique Identifiers
-
Generate a UUID for UTM metadata:
UTM_VIRTUAL_MACHINE_UUID=$(uuidgen) -
Generate UUID for storage device:
UTM_VIRTUAL_MACHINE_STORAGE_DEVICE_UUID=$(uuidgen) -
Generating a unique Apple virtual machine identifier requires running Swift code.
We will save the generated value into a temporary file:swift repl << EOF > /tmp/apple_vm_identifier.txt import Foundation import Virtualization struct VM: Codable { var machineIdentifier: Data? } let placeholder = VM(machineIdentifier: VZGenericMachineIdentifier().dataRepresentation) let encoder = PropertyListEncoder() do { let encodedData = try encoder.encode(placeholder) let tmpDirectory = FileManager.default.temporaryDirectory let plistURL = tmpDirectory.appendingPathComponent("vm.plist") try encodedData.write(to: plistURL) print("\(plistURL.path)") } catch { print("Error encoding data to plist: \(error)") } EOFExample of an output:
placeholder: VM = {
  machineIdentifier = 70 bytes
}
encoder: Foundation.PropertyListEncoder = {}
/var/folders/93/8twrdp_x72j8dhl3cwbyzjzm0000gn/T/vm.plist
Read the content of the file:
cat /var/folders/93/8twrdp_x72j8dhl3cwbyzjzm0000gn/T/vm.plist
bplist00_machineIdentifierOFbplist00TUUIDO{jH%
Save output to a variable:
UTM_VIRTUAL_MACHINE_IDENTIFIER=$(cat /tmp/apple_vm_identifier.txt | tail -n1 | tr -d '\r' | xargs cat)
Creating A Virtual Machine Bundle
Note
To learn more about UTM virtual machine bundle, refer to a blog post linked in the `preface` section.
Required config.plist Keys
Before creating config.plist, we can take a look at all keys defined in (my) other virtual machines:
# Retrieve all keys
/usr/libexec/PlistBuddy -c Print "../archlinux.utm/config.plist" | perl -lne 'print $1 if /^    (\S*) =/'
# Output
Serial # serial console devices
Backend # virtualization backend (QEMU/Apple)
System # virtual machine system information
Virtualization # virtualized devices/features
Information # UTM virtual machine metadata
Network # network devices
Drive # storage devices
Display # display device
ConfigurationVersion # UTM configuration version
An example of a configuration file may look like this:
/usr/libexec/PlistBuddy -c Print "../archlinux.utm/config.plist"
# Output
Dict {
Serial = Array {
}
Backend = Apple
System = Dict {
CPUCount = 4
Boot = Dict {
LinuxCommandLine = console=hvc0 root=/dev/vda2
LinuxKernelPath = Image-archboot-aarch64
OperatingSystem = Linux
UEFIBoot = false
}
GenericPlatform = Dict {
machineIdentifier = bplist00—TUUIDOÊdëcÍH©r;≤ÛÊF
����������������������������#
}
Architecture = aarch64
MemorySize = 8192
}
Virtualization = Dict {
Pointer = true
Trackpad = false
Keyboard = true
Audio = true
Entropy = true
Rosetta = true
Balloon = true
ClipboardSharing = true
}
Information = Dict {
Icon = arch-linux
Name = Arch Linux
UUID = F7823A3D-5583-4CF8-BB56-59AD38D0C14A
IconCustom = false
}
Network = Array {
Dict {
MacAddress = <MAC_ADDRESS>
Mode = Shared
}
}
Drive = Array {
Dict {
Identifier = 86BDC3C3-E94C-446F-A9E2-A323BAF582D1
ImageName = 86BDC3C3-E94C-446F-A9E2-A323BAF582D1.img
ReadOnly = false
}
}
Display = Array {
Dict {
WidthPixels = 1920
PixelsPerInch = 80
HeightPixels = 1200
}
}
ConfigurationVersion = 4
}
Creating A Bundle
Create a virtual machine bundle:
mkdir -p "$HOME/Library/Containers/com.utmapp.UTM/Data/Documents/$UTM_VIRTUAL_MACHINE_DISPLAY_NAME.utm/Data"
Creating config.plist
Create the configuration file:
/usr/libexec/PlistBuddy -c 'save' "$HOME/Library/Containers/com.utmapp.UTM/Data/Documents/$UTM_VIRTUAL_MACHINE_DISPLAY_NAME.utm/config.plist"
Populating Values For config.plist
-
Add a serial console device, which will be used as a tty:
/usr/libexec/PlistBuddy -c 'add :Serial array' "$HOME/Library/Containers/com.utmapp.UTM/Data/Documents/$UTM_VIRTUAL_MACHINE_DISPLAY_NAME.utm/config.plist" /usr/libexec/PlistBuddy -c 'add :Serial:0:Mode string Terminal' "$HOME/Library/Containers/com.utmapp.UTM/Data/Documents/$UTM_VIRTUAL_MACHINE_DISPLAY_NAME.utm/config.plist" /usr/libexec/PlistBuddy -c 'add :Serial:0:Terminal:BackgroundColor string #000000' "$HOME/Library/Containers/com.utmapp.UTM/Data/Documents/$UTM_VIRTUAL_MACHINE_DISPLAY_NAME.utm/config.plist" /usr/libexec/PlistBuddy -c 'add :Serial:0:Terminal:Font string Menlo' "$HOME/Library/Containers/com.utmapp.UTM/Data/Documents/$UTM_VIRTUAL_MACHINE_DISPLAY_NAME.utm/config.plist" /usr/libexec/PlistBuddy -c 'add :Serial:0:Terminal:CursorBlink bool true' "$HOME/Library/Containers/com.utmapp.UTM/Data/Documents/$UTM_VIRTUAL_MACHINE_DISPLAY_NAME.utm/config.plist" /usr/libexec/PlistBuddy -c 'add :Serial:0:Terminal:FontSize integer 12' "$HOME/Library/Containers/com.utmapp.UTM/Data/Documents/$UTM_VIRTUAL_MACHINE_DISPLAY_NAME.utm/config.plist" /usr/libexec/PlistBuddy -c 'add :Serial:0:Terminal:ForegroundColor string #ffffff' "$HOME/Library/Containers/com.utmapp.UTM/Data/Documents/$UTM_VIRTUAL_MACHINE_DISPLAY_NAME.utm/config.plist" -
Set virtualization backend to Apple virtualization:
/usr/libexec/PlistBuddy -c 'add :Backend string Apple' "$HOME/Library/Containers/com.utmapp.UTM/Data/Documents/$UTM_VIRTUAL_MACHINE_DISPLAY_NAME.utm/config.plist" -
Set virtual machine CPU arhitecture to
aarch64:/usr/libexec/PlistBuddy -c 'add :System:Architecture string aarch64' "$HOME/Library/Containers/com.utmapp.UTM/Data/Documents/$UTM_VIRTUAL_MACHINE_DISPLAY_NAME.utm/config.plist" -
Set virtual machine core count (4 cores in this case):
/usr/libexec/PlistBuddy -c 'add :System:CPUCount integer 4' "$HOME/Library/Containers/com.utmapp.UTM/Data/Documents/$UTM_VIRTUAL_MACHINE_DISPLAY_NAME.utm/config.plist" -
Set virtual machine memory size (8192MB in this case):
/usr/libexec/PlistBuddy -c 'add :System:MemorySize integer 8192' "$HOME/Library/Containers/com.utmapp.UTM/Data/Documents/$UTM_VIRTUAL_MACHINE_DISPLAY_NAME.utm/config.plist" -
Set Apple virtual machine identifier:
/usr/libexec/PlistBuddy -c "add :System:GenericPlatform:machineIdentifier data $UTM_VIRTUAL_MACHINE_IDENTIFIER" "$HOME/Library/Containers/com.utmapp.UTM/Data/Documents/$UTM_VIRTUAL_MACHINE_DISPLAY_NAME.utm/config.plist" -
Configure Boot Configuration (external dependencies will be downloaded later):
/usr/libexec/PlistBuddy -c 'add :System:Boot:UEFIBoot bool false' "$HOME/Library/Containers/com.utmapp.UTM/Data/Documents/$UTM_VIRTUAL_MACHINE_DISPLAY_NAME.utm/config.plist" /usr/libexec/PlistBuddy -c 'add :System:Boot:OperatingSystem string Linux' "$HOME/Library/Containers/com.utmapp.UTM/Data/Documents/$UTM_VIRTUAL_MACHINE_DISPLAY_NAME.utm/config.plist" /usr/libexec/PlistBuddy -c 'add :System:Boot:LinuxCommandLine string console=hvc0' "$HOME/Library/Containers/com.utmapp.UTM/Data/Documents/$UTM_VIRTUAL_MACHINE_DISPLAY_NAME.utm/config.plist" /usr/libexec/PlistBuddy -c 'add :System:Boot:LinuxKernelPath string Image-aarch64' "$HOME/Library/Containers/com.utmapp.UTM/Data/Documents/$UTM_VIRTUAL_MACHINE_DISPLAY_NAME.utm/config.plist" /usr/libexec/PlistBuddy -c 'add :System:Boot:LinuxInitialRamdiskPath string initrd-aarch64.img' "$HOME/Library/Containers/com.utmapp.UTM/Data/Documents/$UTM_VIRTUAL_MACHINE_DISPLAY_NAME.utm/config.plist" -
Configure virtualization features:
/usr/libexec/PlistBuddy -c 'add :Virtualization:Pointer bool true' "$HOME/Library/Containers/com.utmapp.UTM/Data/Documents/$UTM_VIRTUAL_MACHINE_DISPLAY_NAME.utm/config.plist" /usr/libexec/PlistBuddy -c 'add :Virtualization:Trackpad bool false' "$HOME/Library/Containers/com.utmapp.UTM/Data/Documents/$UTM_VIRTUAL_MACHINE_DISPLAY_NAME.utm/config.plist" /usr/libexec/PlistBuddy -c 'add :Virtualization:Keyboard bool true' "$HOME/Library/Containers/com.utmapp.UTM/Data/Documents/$UTM_VIRTUAL_MACHINE_DISPLAY_NAME.utm/config.plist" /usr/libexec/PlistBuddy -c 'add :Virtualization:Audio bool true' "$HOME/Library/Containers/com.utmapp.UTM/Data/Documents/$UTM_VIRTUAL_MACHINE_DISPLAY_NAME.utm/config.plist" /usr/libexec/PlistBuddy -c 'add :Virtualization:Entropy bool true' "$HOME/Library/Containers/com.utmapp.UTM/Data/Documents/$UTM_VIRTUAL_MACHINE_DISPLAY_NAME.utm/config.plist" /usr/libexec/PlistBuddy -c 'add :Virtualization:Rosetta bool true' "$HOME/Library/Containers/com.utmapp.UTM/Data/Documents/$UTM_VIRTUAL_MACHINE_DISPLAY_NAME.utm/config.plist" /usr/libexec/PlistBuddy -c 'add :Virtualization:Balloon bool true' "$HOME/Library/Containers/com.utmapp.UTM/Data/Documents/$UTM_VIRTUAL_MACHINE_DISPLAY_NAME.utm/config.plist" /usr/libexec/PlistBuddy -c 'add :Virtualization:ClipboardSharing bool true' "$HOME/Library/Containers/com.utmapp.UTM/Data/Documents/$UTM_VIRTUAL_MACHINE_DISPLAY_NAME.utm/config.plist" -
Configure UTM metadata:
/usr/libexec/PlistBuddy -c 'add :Information:Icon string arch-linux' "$HOME/Library/Containers/com.utmapp.UTM/Data/Documents/$UTM_VIRTUAL_MACHINE_DISPLAY_NAME.utm/config.plist" /usr/libexec/PlistBuddy -c "add :Information:Name string $UTM_VIRTUAL_MACHINE_DISPLAY_NAME" "$HOME/Library/Containers/com.utmapp.UTM/Data/Documents/$UTM_VIRTUAL_MACHINE_DISPLAY_NAME.utm/config.plist" /usr/libexec/PlistBuddy -c "add :Information:UUID string $UTM_VIRTUAL_MACHINE_UUID" "$HOME/Library/Containers/com.utmapp.UTM/Data/Documents/$UTM_VIRTUAL_MACHINE_DISPLAY_NAME.utm/config.plist" /usr/libexec/PlistBuddy -c 'add :Information:IconCustom bool false' "$HOME/Library/Containers/com.utmapp.UTM/Data/Documents/$UTM_VIRTUAL_MACHINE_DISPLAY_NAME.utm/config.plist" -
Configure an empty display array (we will not be creating a display device):
/usr/libexec/PlistBuddy -c 'add :Display array' "$HOME/Library/Containers/com.utmapp.UTM/Data/Documents/$UTM_VIRTUAL_MACHINE_DISPLAY_NAME.utm/config.plist" -
Configure an empty Network array (will be populated via GUI):
/usr/libexec/PlistBuddy -c 'add :Network array' "$HOME/Library/Containers/com.utmapp.UTM/Data/Documents/$UTM_VIRTUAL_MACHINE_DISPLAY_NAME.utm/config.plist" -
Configure storage device (disk will be created later):
/usr/libexec/PlistBuddy -c 'add :Drive array' "$HOME/Library/Containers/com.utmapp.UTM/Data/Documents/$UTM_VIRTUAL_MACHINE_DISPLAY_NAME.utm/config.plist" /usr/libexec/PlistBuddy -c "add :Drive:0:Identifier string $UTM_VIRTUAL_MACHINE_STORAGE_DEVICE_UUID" "$HOME/Library/Containers/com.utmapp.UTM/Data/Documents/$UTM_VIRTUAL_MACHINE_DISPLAY_NAME.utm/config.plist" /usr/libexec/PlistBuddy -c "add :Drive:0:ImageName string $UTM_VIRTUAL_MACHINE_STORAGE_DEVICE_UUID.img" "$HOME/Library/Containers/com.utmapp.UTM/Data/Documents/$UTM_VIRTUAL_MACHINE_DISPLAY_NAME.utm/config.plist" /usr/libexec/PlistBuddy -c "add :Drive:0:ReadOnly bool false" "$HOME/Library/Containers/com.utmapp.UTM/Data/Documents/$UTM_VIRTUAL_MACHINE_DISPLAY_NAME.utm/config.plist" -
Set UTM configuration version:
/usr/libexec/PlistBuddy -c 'add :ConfigurationVersion integer 4' "$HOME/Library/Containers/com.utmapp.UTM/Data/Documents/$UTM_VIRTUAL_MACHINE_DISPLAY_NAME.utm/config.plist"
Download External Dependencies
-
Download Arch Linux kernel:
curl https://archboot.net/iso/aarch64/latest/boot/Image-aarch64 -o "$HOME/Library/Containers/com.utmapp.UTM/Data/Documents/$UTM_VIRTUAL_MACHINE_DISPLAY_NAME.utm/Data/Image-aarch64" -
Download Arch Linux ramdisk (this ramdisk is minimal and to complete installation will require network connectivity):
curl https://archboot.net/iso/aarch64/latest/boot/initrd-aarch64.img -o "$HOME/Library/Containers/com.utmapp.UTM/Data/Documents/$UTM_VIRTUAL_MACHINE_DISPLAY_NAME.utm/Data/initrd-aarch64.img"
Configure Storage Devices
-
Create a storage device (60GB in this case):
hdiutil create -layout none -size 60g "$HOME/Library/Containers/com.utmapp.UTM/Data/Documents/$UTM_VIRTUAL_MACHINE_DISPLAY_NAME.utm/Data/$UTM_VIRTUAL_MACHINE_STORAGE_DEVICE_UUID" -
Rename storage device to the expected UTM naming convention:
mv "$HOME/Library/Containers/com.utmapp.UTM/Data/Documents/$UTM_VIRTUAL_MACHINE_DISPLAY_NAME.utm/Data/$UTM_VIRTUAL_MACHINE_STORAGE_DEVICE_UUID.dmg" "$HOME/Library/Containers/com.utmapp.UTM/Data/Documents/$UTM_VIRTUAL_MACHINE_DISPLAY_NAME.utm/Data/$UTM_VIRTUAL_MACHINE_STORAGE_DEVICE_UUID.img"
Importing The Virtual Machine
After generating a virtual machine bundle, we will import the virtual machine into UTM:
open "$HOME/Library/Containers/com.utmapp.UTM/Data/Documents/$UTM_VIRTUAL_MACHINE_DISPLAY_NAME.utm/"
Don’t forget to add a networking device using the UTM GUI before starting the installation.
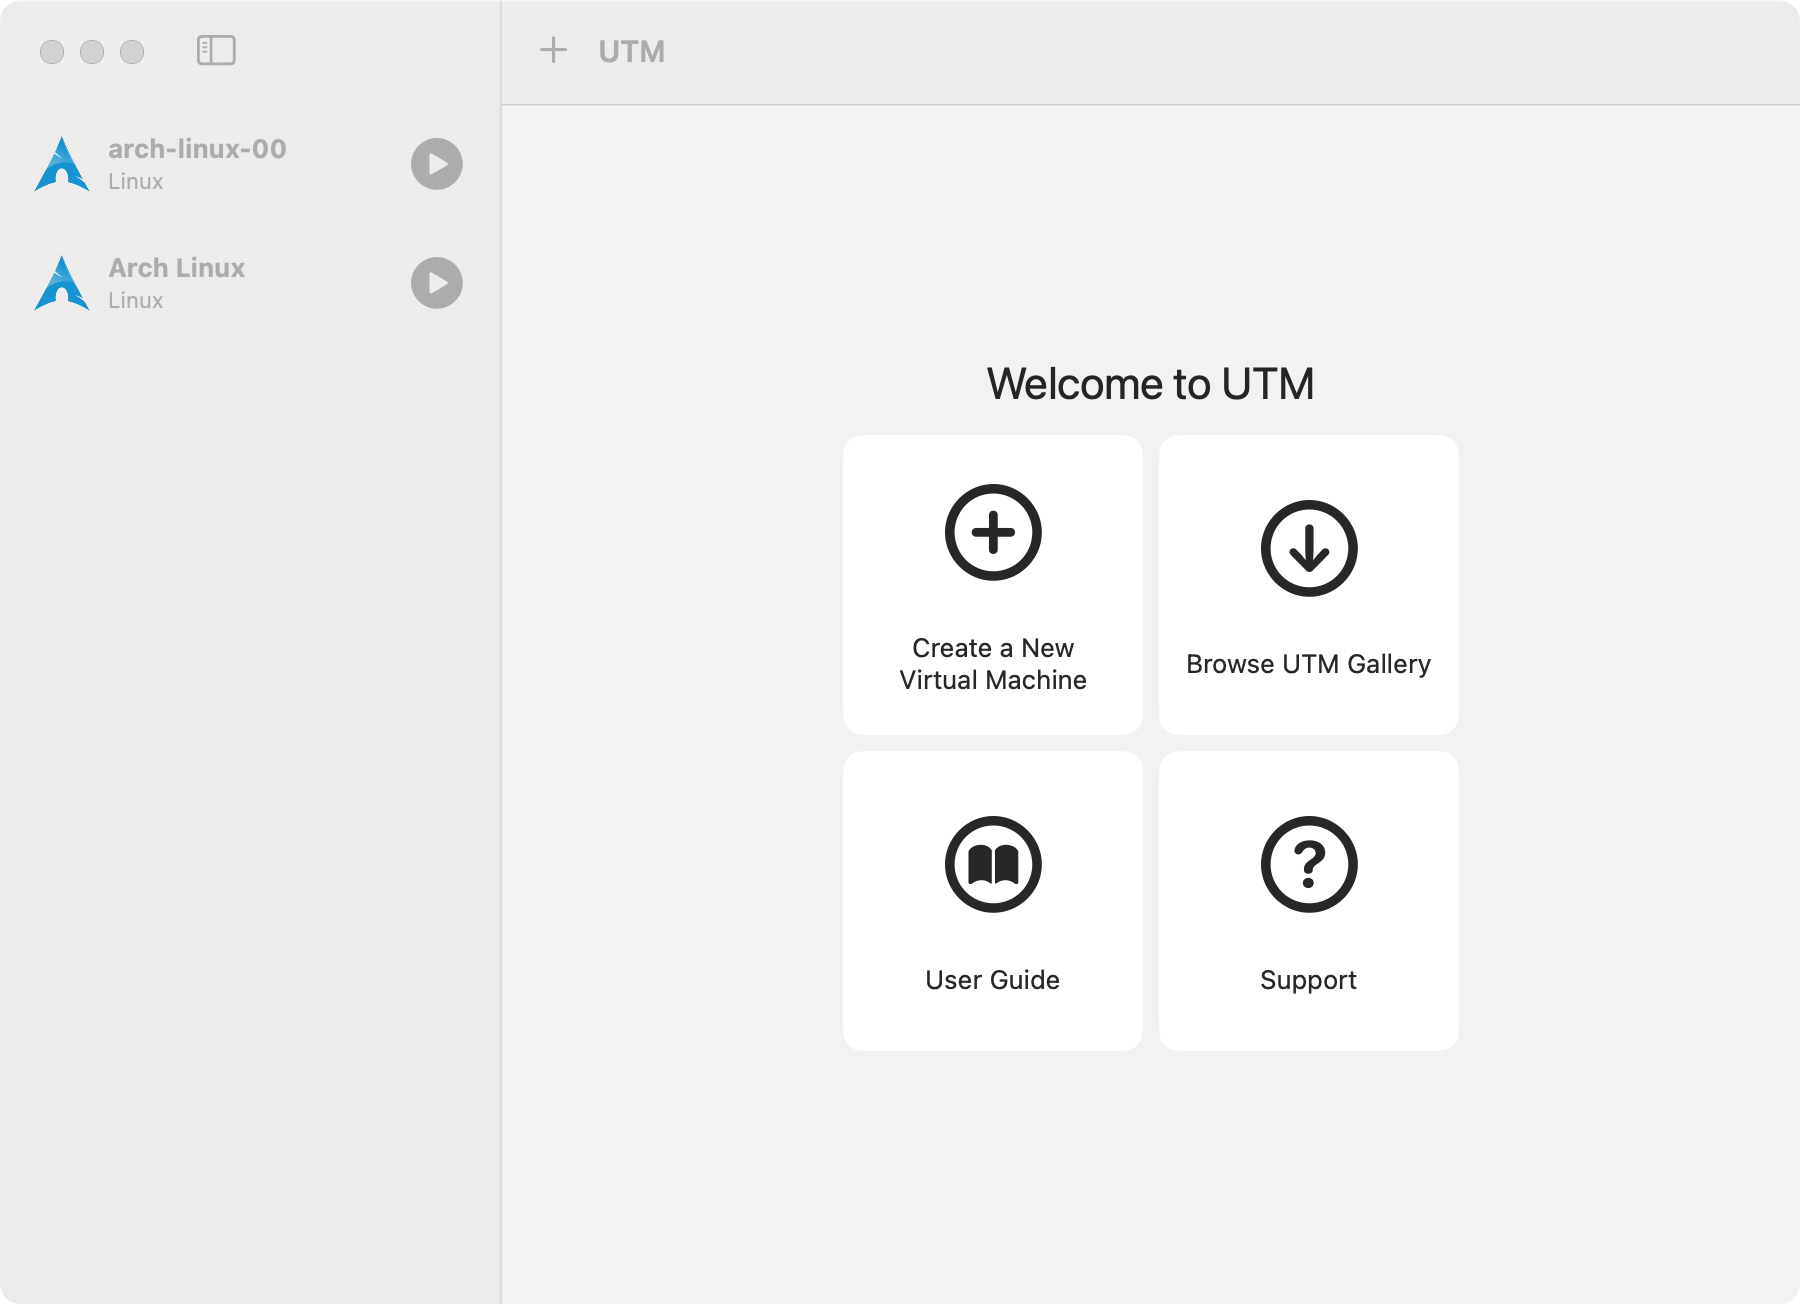
If our configuration file is valid, we should be able to see the virtual machine in UTM:
Final Notes
While there isn’t an official UTM capability to create virtual machines using CLI, this blog post can be used as a quick hack to create virtual machines programmatically.