Booting Arch Linux Using Apple Virtualization Framework With UTM
Tags:
#macOS
#virtualization
#UTM
Note
Booting various Linux distributions on top of Apple Virtualization Framework is possible.
Warning
UTM automation (utmcli and Apple Script) for the Apple virtualization backend is limited and unstable.
My Personal Use Of Local Virtual Machines
As part of my work, I have access to various baremetals, appliances, and virtual machines spanning multiple clouds.
I tend not to develop things locally, and I have gotten spoiled with the performance of baremetals and tuned virtual machines.
Previously, I have used local virtual machines for two use cases:
- Customizing guest images using libguestfs.
This is no longer possible since switching to Apple Silicon. There are no compiled binaries for macOS.
There are community patches, but they only work on Intel-based Macs. - Container workloads are not natively possible on macOS, and all existing tools create a Linux virtual machine behind the scenes responsible for running the containers.
Unhappy With Current Container Solutions
Since containers are not natively available on macOS, plenty of solutions were created to run container workloads on macOS.
The most popular is Docker Desktop.
Docker Desktop is an application packaging the open-source docker engine with additional tools and extensions. Last year it added support for Apple virtualization framework.
Changes to Docker licensing and controversies has discouraged me from using it.
Being part of the Red Hat ecosystem, the next logical replacement is Podman Desktop.
Podman Desktop is an open-source application packaging the open-source podman toolset.
The graphical interface is built using Electron and offers various extensions.
I dislike Electron graphical interfaces, and the extension ecosystem doesn’t interest me.
Behind the scenes of Podman Desktop for macOS is podman-machine. A utility that manages virtual machines using QEMU with HVF acceleration.
Using those virtual machines, I had problems configuring root and rootless containers to access my home directory.
Another easy-to-use solution is OrbStack. It is a closed-source solution with upcoming potential license changes.
A popular open-source solution is Colima, which is based on lima.
Colima creates a virtual machine using lima and configures Docker, Containerd or Kubernetes.
In the past, I have used lima on Intel-based Mac. However, I did not wish to use the supported operating systems and was able to configure a Fedora CoreOS virtual machine with custom configuration (lima only supports configuring systems with cloud-init. Fedora CoreOS uses Ignition for bootstrapping).
I stopped using lima since I could not easily configure my preferred Linux distribution on Apple Silicon.
Amazon has open-sourced Finch which leverages lima. I haven’t tried it and am not interested in using lima again.
There might be additional tools, but my capacity for discovering them is limited.
Back To Basics
My Mac is a powerful machine (M1 Pro with 32GB RAM) that can easily handle a single VM for container workloads. I shouldn’t compensate for low performance or not being able to use my preferred distributions.
Since my main deterrents are virtual machine choice and licensing, I have decided to return to the “basics” and manage my virtual machine and use podman-remote.
If it was up to me, there shouldn’t be many limitations (wrong, more on that later).
In macOS Monterey (12.0) release, Apple has introduced a new virtualization framework, a native way to run Linux virtual machines on macOS.
Being a big fan of performant virtual machines, this was an exciting thing to try.
I have been working with QEMU-KVM for years, and it has been a great experience on top of Linux hosts.
Using a native approach for virtualization sounded like a fun thing to try with a potentially great outcome. QEMU accelerated with HVF has served me well, but I wanted to try something more native.
My Hypervisor My Choice
It is possible to create a Linux virtual machine on macOS natively using Objective C or Swift, and the procedure is described in several Apple Developer articles and videos.
Being eager to return to running container workloads locally, I did not want to spend time writing code and preferred using a “hypervisor” to manage the virtual machine lifecycle.
I chose UTM, an open-source application supporting the Apple virtualization framework that is available on macOS and iOS.
Not So Basic
Note
UTM can boot virtual machines using (U)EFI with Apple Virtualization as the backend.
Note
It is probably possible to get a lot of distributions running without (U)EFI with additional extra work.
Being eager to leverage the hardware and squeeze as much as possible, I have decided to opt out of using (U)EFI to boot the virtual machine and use the kernel as the bootloader, similar to Apple’s documentation.
I was interested in using Fedora CoreOS again since I had a great experience with it running container workloads.
Being excited that they offer official kernel and initramfs, I have started imagining what kind of Ignition configuration I should use this time.
 Wait what?
After encountering this “detailed” error, I have tried to explore Console to locate the root cause of this issue.
Failing to locate the root cause of the issue, I have re-read the documentation again. The documentation states that kernel files must be of type Linux kernel ARM64 boot executable Image, little-endian, 4K pages.
Looking at our downloaded file:
# Check file type
file fedora-coreos-38.20230430.3.1-live-kernel-aarch64
# Output, incorrect type
fedora-coreos-38.20230430.3.1-live-kernel-aarch64: PE32+ executable (EFI application) Aarch64 (stripped to external PDB), for MS Windows\
This looks like the culprit. To verify this, I have downloaded Debian’s net installer ISO and have extracted the kernel and initramfs and was able to start the VM.
Failing to boot Fedora CoreOS and being unwilling to proceed further with retrieving and building these components, I have decided to fall back to Fedora Server (which requires extracting the network install ISO to retrieve kernel and initramfs, similar to Debian).
Fool me once, shame on you; fool me twice, shame on me.
The shipped Fedora Server network install ISO has the same kernel file type as Fedora Core OS:
# Check file type
file vmlinuz
# Output, incorrect type
vmlinuz: PE32+ executable (EFI application) Aarch64 (stripped to external PDB), for MS Windows
I am not willing to give up on the Red Hat family or work hard, so I have tried CentOS Stream 9.
It also ships kernel and initramfs binaries.
# Check file type
file vmlinuz
# Output. correct type
vmlinuz: Linux kernel ARM64 boot executable Image, little-endian, 4K pages
Filled with hope, I have configured a Kickstart file and have managed to boot the instance:
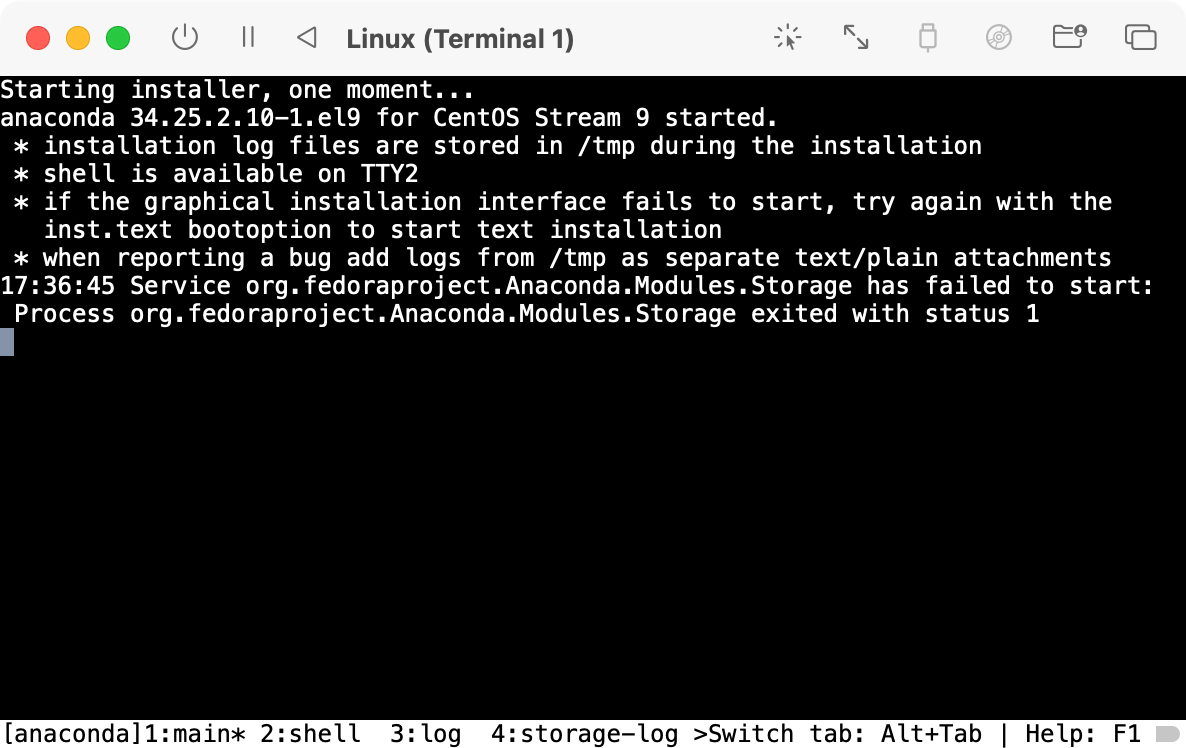 The third time is the charm. No!
After looking at the installation log, I have found the following error:
Traceback (most recent call last):
  File "/sbin/anaconda", line 913, in <module>
    from pyanaconda import geoloc
  File "/usr/lib64/python2.7/site-packages/pyanaconda/geoloc.py", line 109, in <module>
    from pyanaconda import network
  File "/usr/lib64/python2.7/site-packages/pyanaconda/network.py", line 40, in <module>
    from blivet.devices import FcoeDiskDevice, iScsiDiskDevice
  File "/usr/lib/python2.7/site-packages/blivet/__init__.py", line 75, in <module>
    from .devices import BTRFSDevice, BTRFSSubVolumeDevice, BTRFSVolumeDevice, DirectoryDevice, FileDevice, LVMLogicalVolumeDevice, LVMThinLogicalVolumeDevice, , NFSDevice, NoDevice, OpticalDevice, PartitionDevice, TmpFSDevice, devicePathToName
    from .devices import BTRFSDevice, BTRFSSubVolumeDevice, BTRFSVolumeDevice, DirectoryDevice, FileDevice, LVMLogicalVolumeDevice, LVMThinLogicalVolumeDevice, , NFSDevice, NoDevice, OpticalDevice, PartitionDevice, TmpFSDevice, devicePathToName
  File "/usr/lib/python2.7/site-packages/blivet/devices.py", line 51, in <module>
    from .formats import get_device_format_class, getFormat, DeviceFormat
  File "/usr/lib/python2.7/site-packages/blivet/formats/__init__.py", line 508, in <module>
    collect_device_format_classes()
  File "/usr/lib/python2.7/site-packages/blivet/formats/__init__.py", line 108, in collect_device_format_classes
    globals()[mod_name] = __import__(mod_name, globals(), locals(), [], -1)
  File "/usr/lib/python2.7/site-packages/blivet/formats/biosboot.py", line 26, in <module>
    from .. import platform
  File "/usr/lib/python2.7/site-packages/blivet/platform.py", line 442, in <module>
    platform = getPlatform()
  File "/usr/lib/python2.7/site-packages/blivet/platform.py", line 440, in getPlatform
    raise SystemError("Could not determine system architecture.")
SystemError: Could not determine system architecture.
This is a known bug I was not aware of, anaconda is not able to start installation on non-U(EFI) aarch64 hosts.
At this point, I was ready to hang my hat.
From One Extreme To The Other
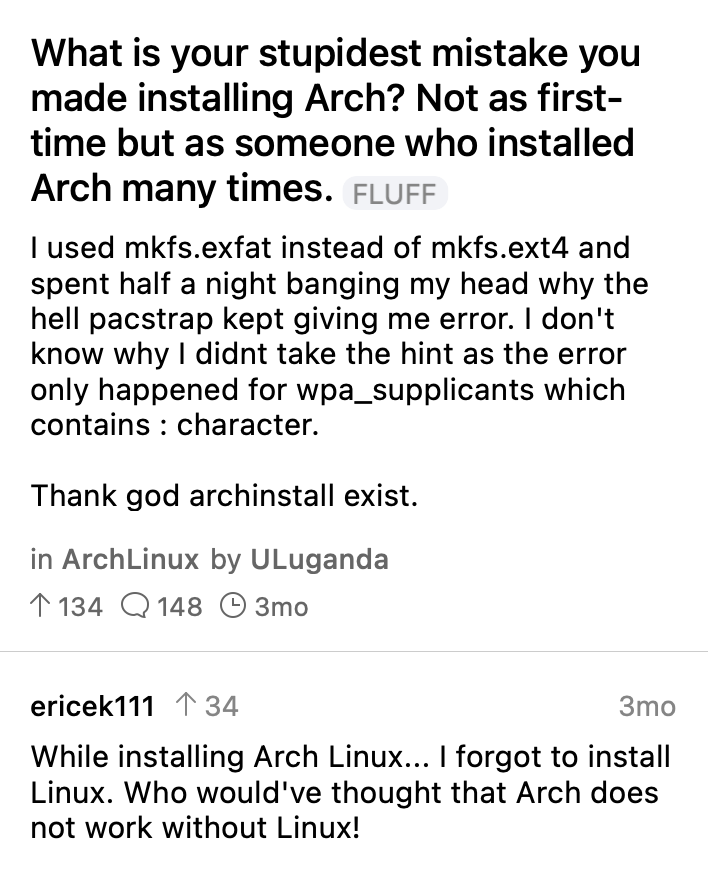
Being frustrated that my preferred distributions are not working (or at least quickly, like I got used to), I have decided to refer to the distribution that will let you destroy itself without any objections (obviously a hyperbole).

I don’t. It is a meme.
If Fedora-flavored distributions are known for their ease of use, Arch Linux is the opposite.
Arch Linux is a lightweight, highly customizable distribution that “tries to keep it simple”.
It offers an ARM distribution.
Due to several limitations of automating UTM for my use case, I have chosen to use Archboot for my manual installation, and the procedure will be covered in this blog post.
Caveats
Please be aware of some caveats if attempting to follow this blog:
- As mentioned and will be mentioned, UTM automation capabilities are severely limited for the Apple virtualization backend.
- Apple virtualization support is experimental in UTM.
- Apple virtualization backend requires macOS Monterey (12.0).
virtiosfsrequires macOS Monterey (12.2) for Apple Sillicon.- Rosetta for Apple virtualization backend requires macOS Ventura (13.0).
- There are bugs with the Apple virtualization backend and specific Apple silicon chips, as mentioned in UTM’s documentation.
- Hiding the virtual machine’s windows might be buggy with UTM and Apple virtualization backend.
- All Arch Linux configurations in this post are a personal preference, and Arch Linux allows you to configure to your preference.
Installing UTM
It can be downloaded through their official website, Apple Store or using brew:
# Install UTM using brew
brew install --cask utm
Before creating a virtual machine, we must download the required Arch Linux binaries.
Downloading Archboot
Warning
Ensure that downloaded binaries match the file types described in this section.
Archboot can be used to install Arch Linux.
It will allow us to easily install Arch Linux using shipped PXE kernel and initramfs binaries.
Required binaries are located at Archboot’s website.
We will download the latest binaries for the aarch64 (ARM) architecture:
# Download the latest uncompressed kernel (~40M)
curl https://pkgbuild.com/~tpowa/archboot/iso/aarch64/latest/boot/Image-archboot-aarch64 -O
# Download initramfs (ramdisk) used for installation (~246M)
curl https://pkgbuild.com/~tpowa/archboot/iso/aarch64/latest/boot/initramfs-aarch64.img -O
The downloaded binaries should be uncompressed and match the following types. Otherwise, we will not be able to boot:
# Check downloaded kernel type
file Image-archboot-aarch64
# Output, correct type
Linux kernel ARM64 boot executable Image, little-endian, 4K pages
# Check downloaded initramfs (ramdisk) type
file initramfs-aarch64.img
# Output, correct type
Zstandard compressed data (v0.8+), Dictionary ID: None
Creating The Virtual Machine
Note
We will use the default "Shared Network" network interface configured by UTM.
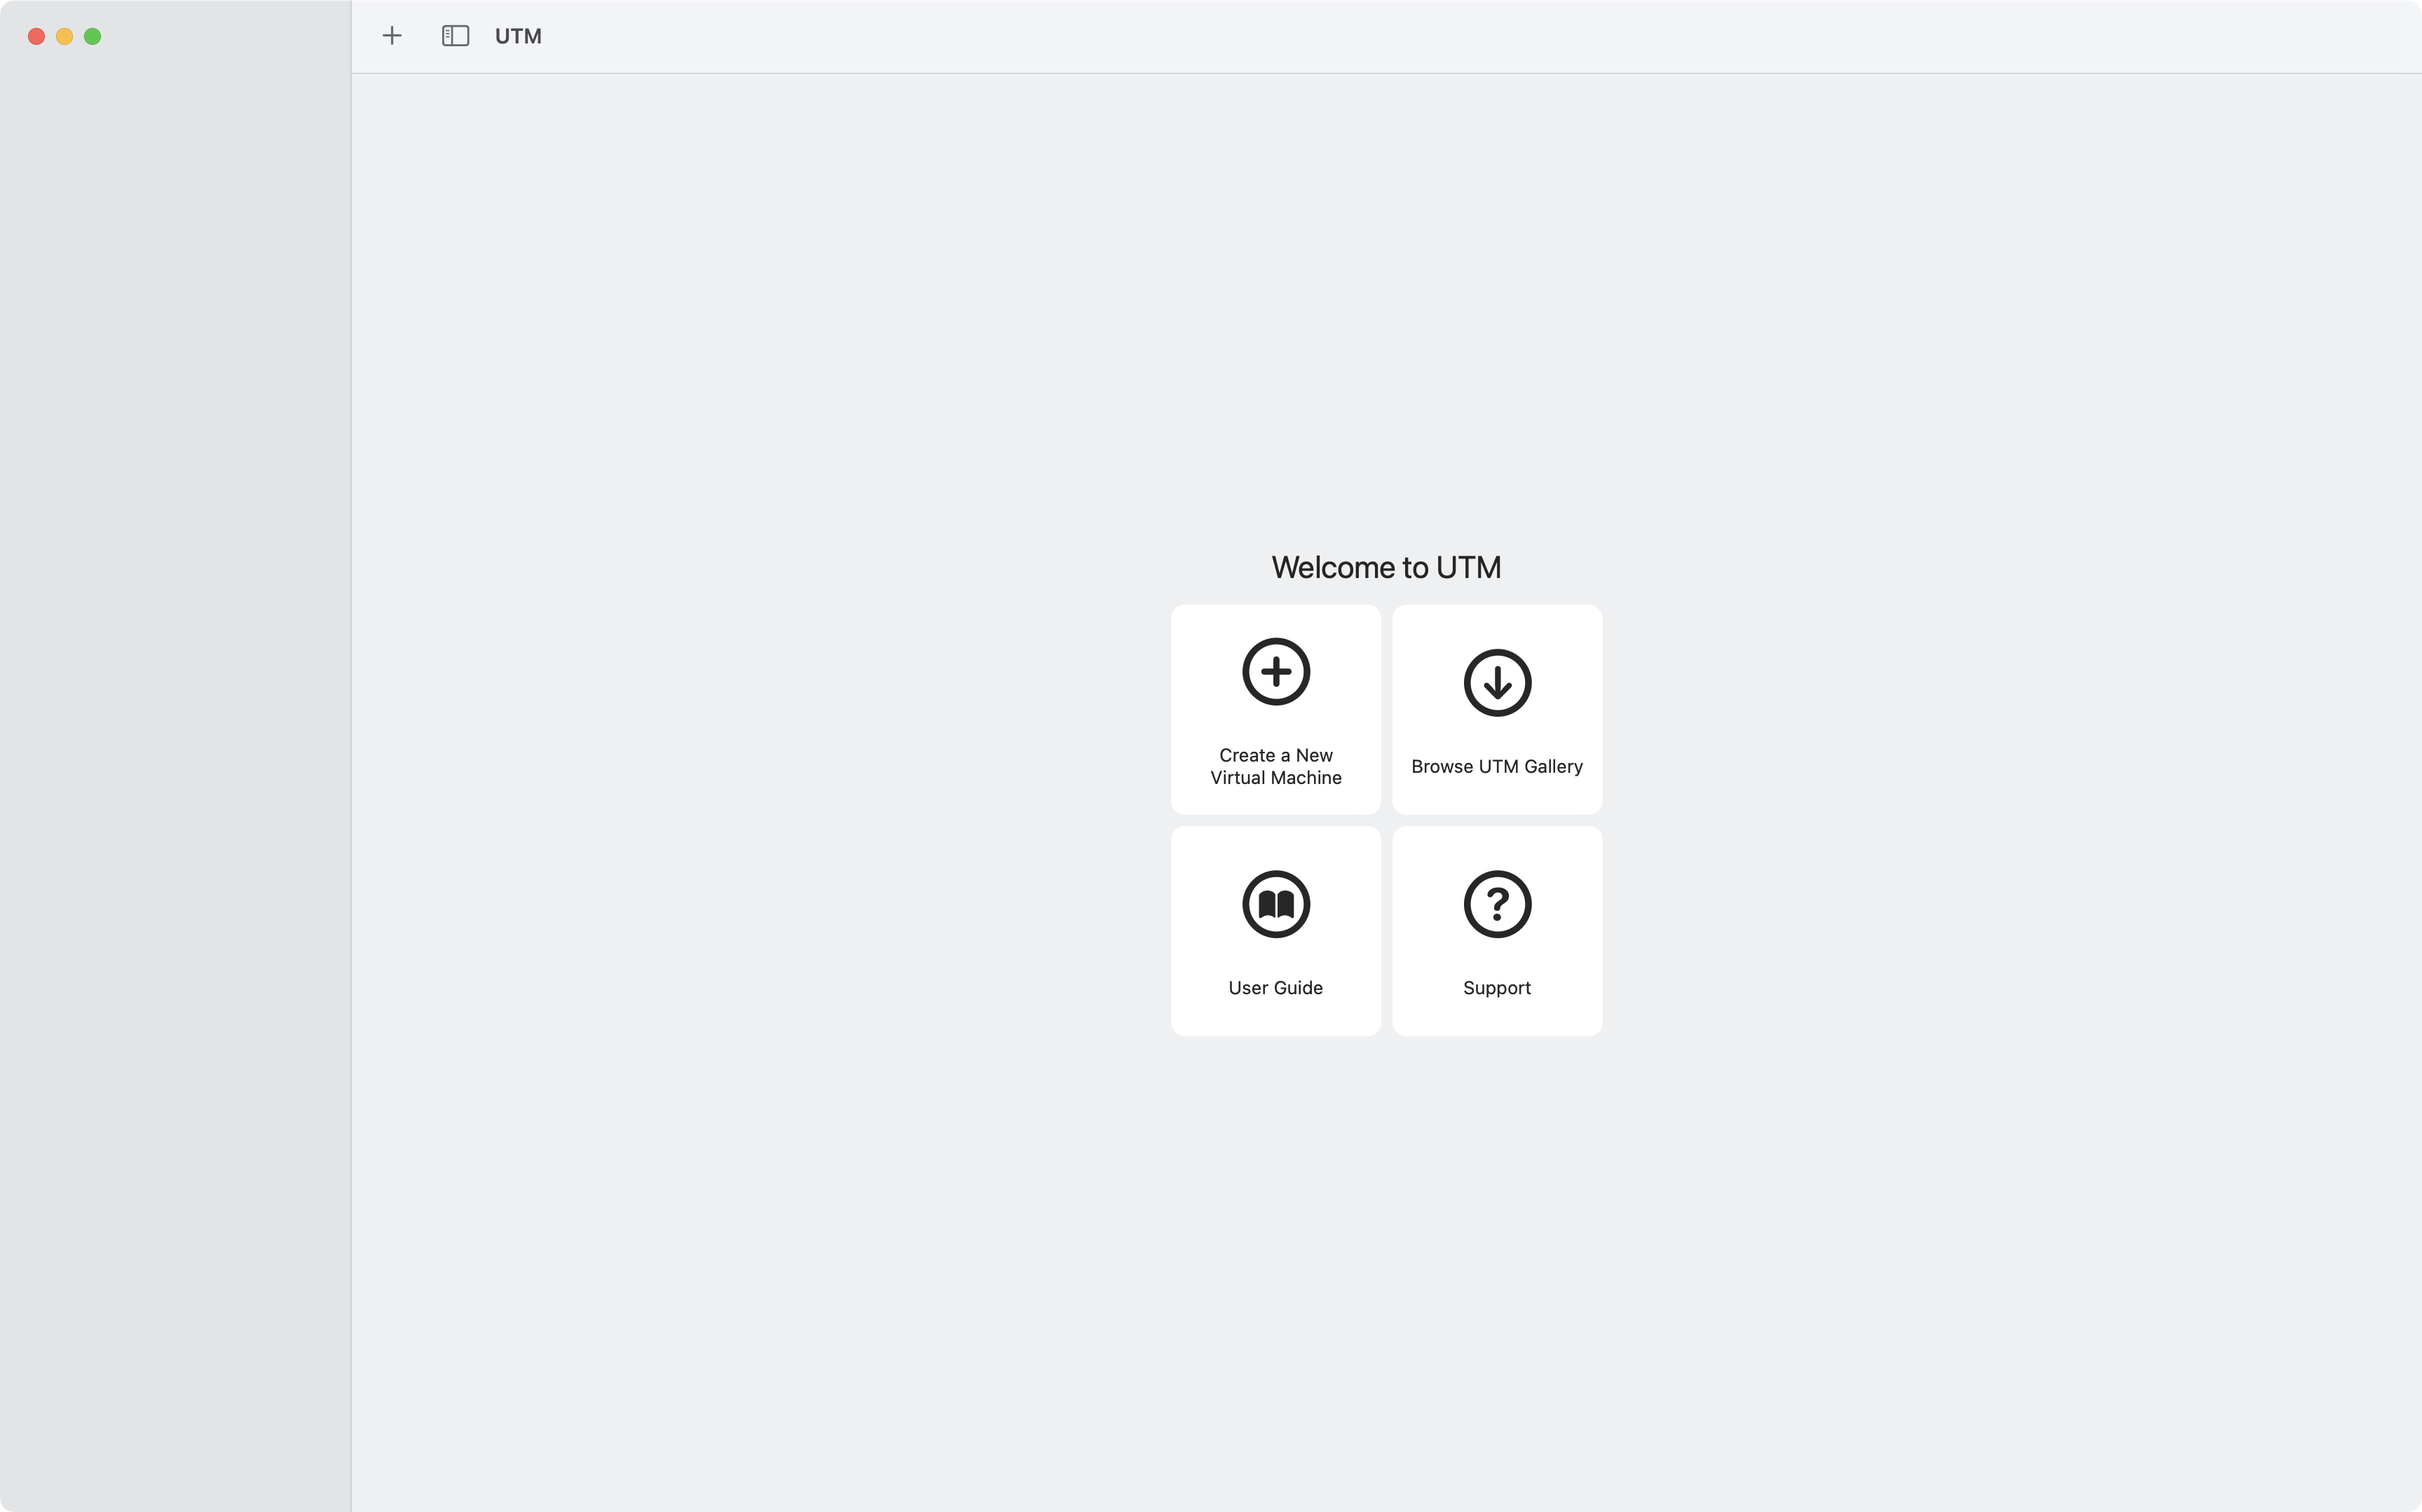
Open the UTM application, and choose Create a New Virtual Machine:
You will be given the option to virtualize or emulate. Pick Virtualize:

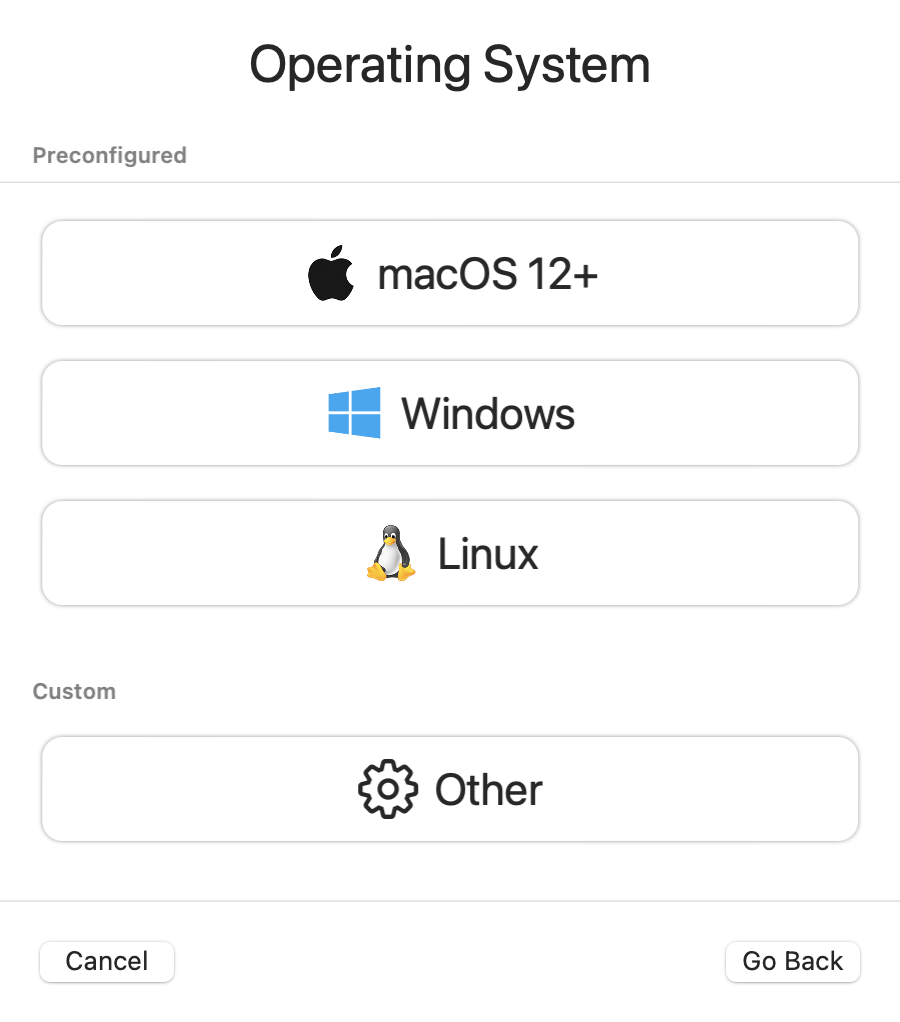
Afterward, a menu will appear, allowing us to pick several operating system types, click on Linux:
A configuration menu will appear. Select the following options:
Use Apple Virtualizationto use Apple virtualization instead of QEMU.Boot from kernel imageto use the kernel as a bootloader instead of (U)EFI.Enable Rosetta (x86_64 Emulation)(Optional), use Rosetta if you wish to leverage native macOS translation layer to speed up x86_64 emulation (also requires configuration in the guest, will be detailed later in the post).
Scroll down the menu, and additional options will appear:
- Provide the kernel binary downloaded earlier, in my case,
Image-archboot-aarch64. - Provide the initramfs (initial ramdisk) binary downloaded earlier, in my case,
initramfs-aarch64.img. - Set boot arguments to
console=hvc0. It will redirect kernel messages to a terminal window.
In the following menu, choose the resources you want to assign to the virtual machine (which can be changed later):
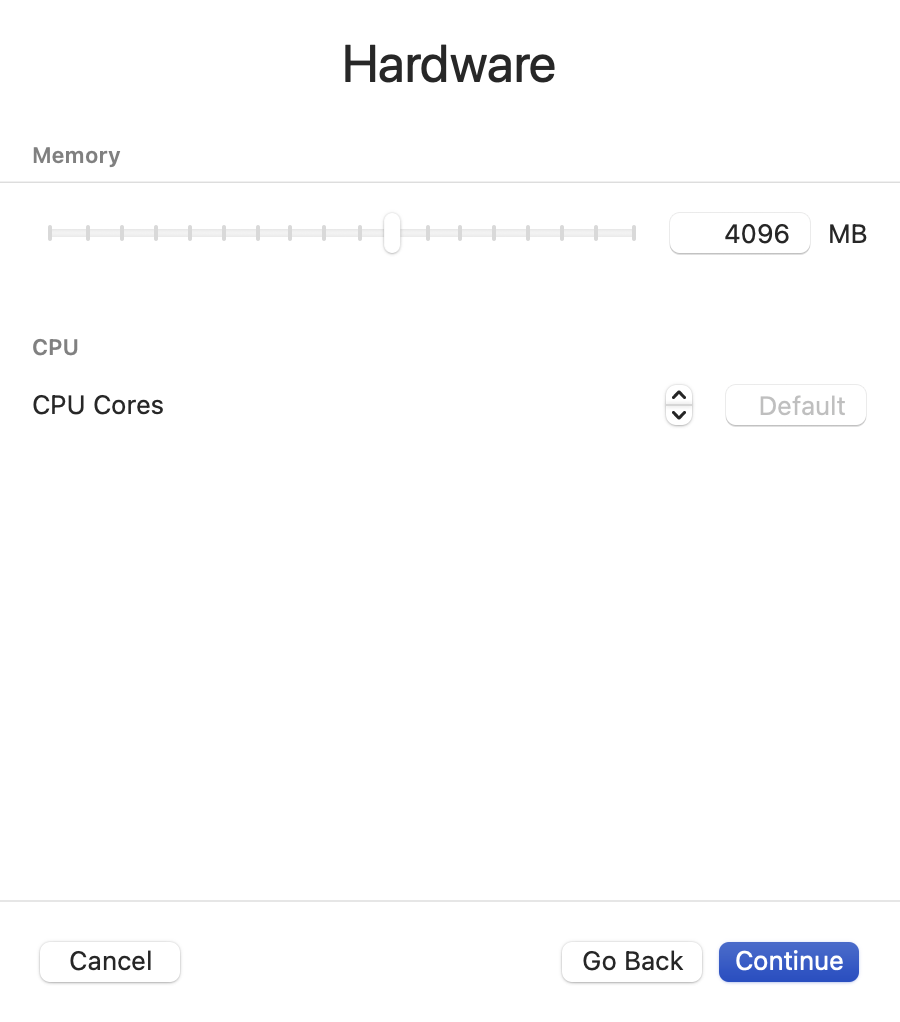
Choose the disk size to attach to this virtual machine (it can’t be resized later through UTM, but it is possible to add new storage devices later):

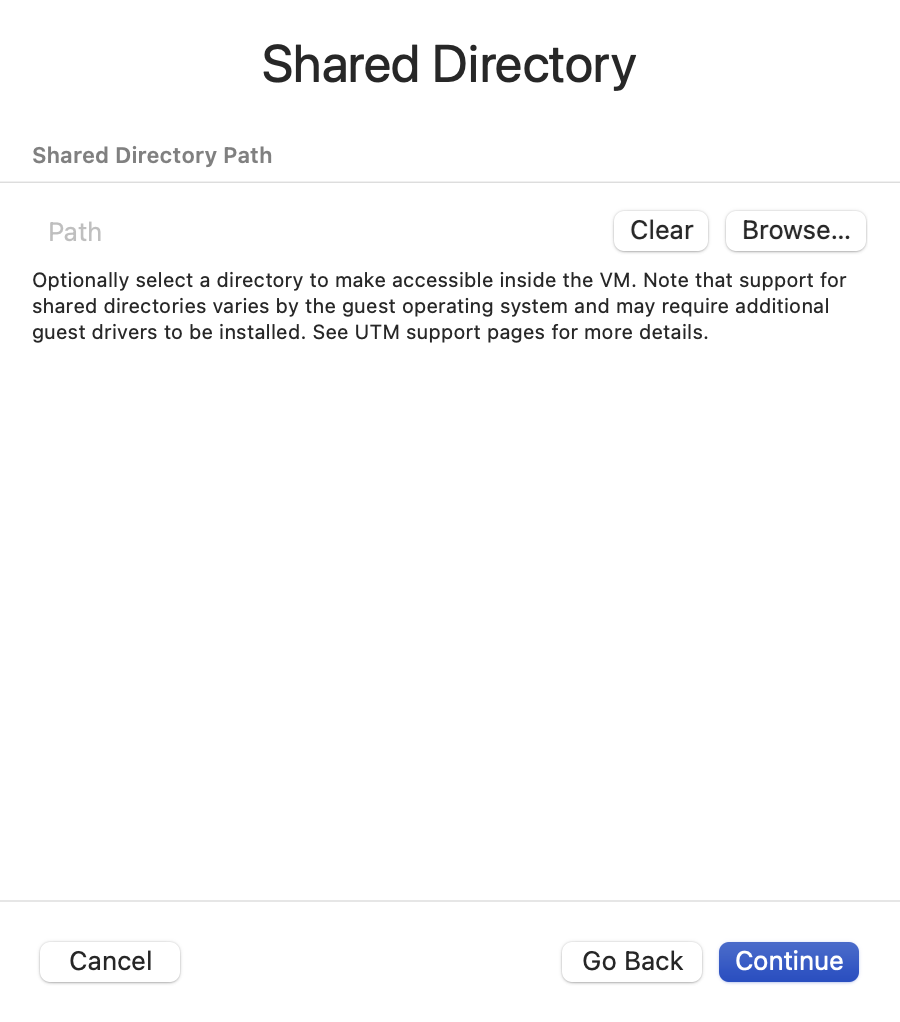
(Optional) Next, there is an option to share directories between macOS and the virtual machine (in this menu, all directories will be shared with read/write permissions, it is possible to add a directory with only read permission later after creation).
This requires the virtiofs driver to be available on the virtual machine.
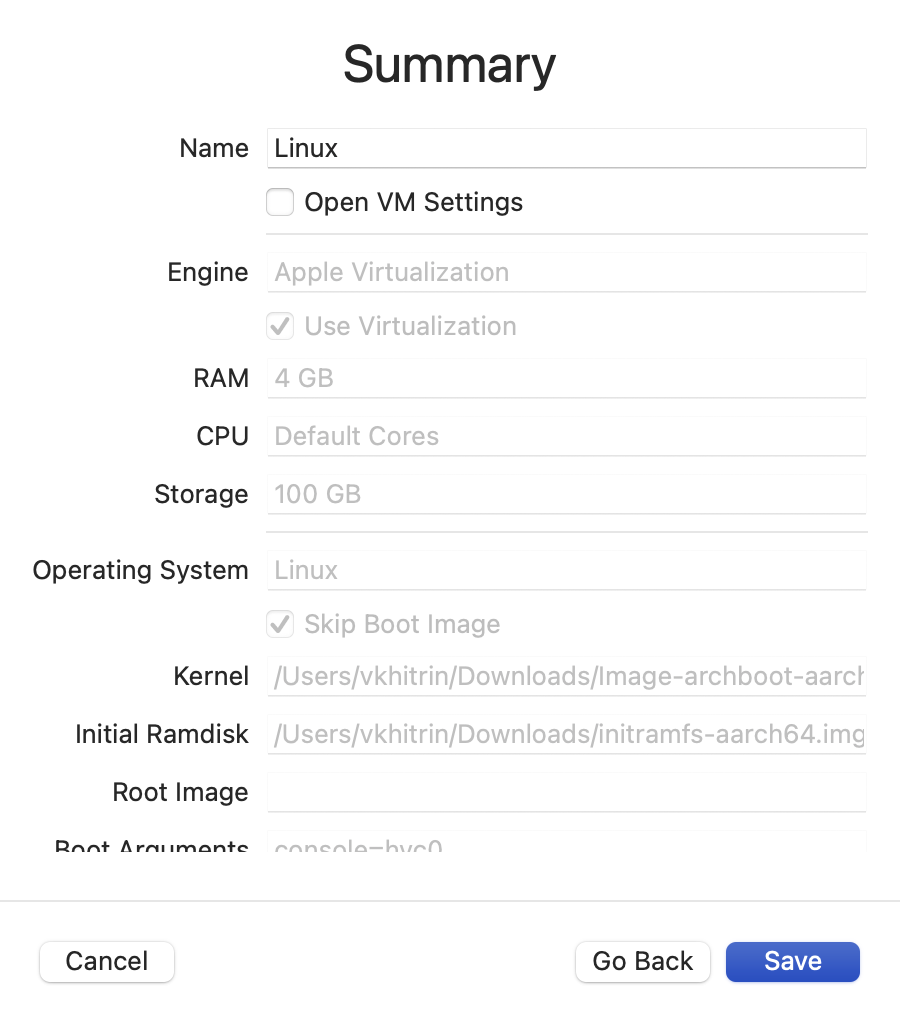
The final menu is a summary of all settings configured for the virtual machine with the option to set a display name for the virtual machine in UTM and the ability to open virtual machine settings to access additional settings:
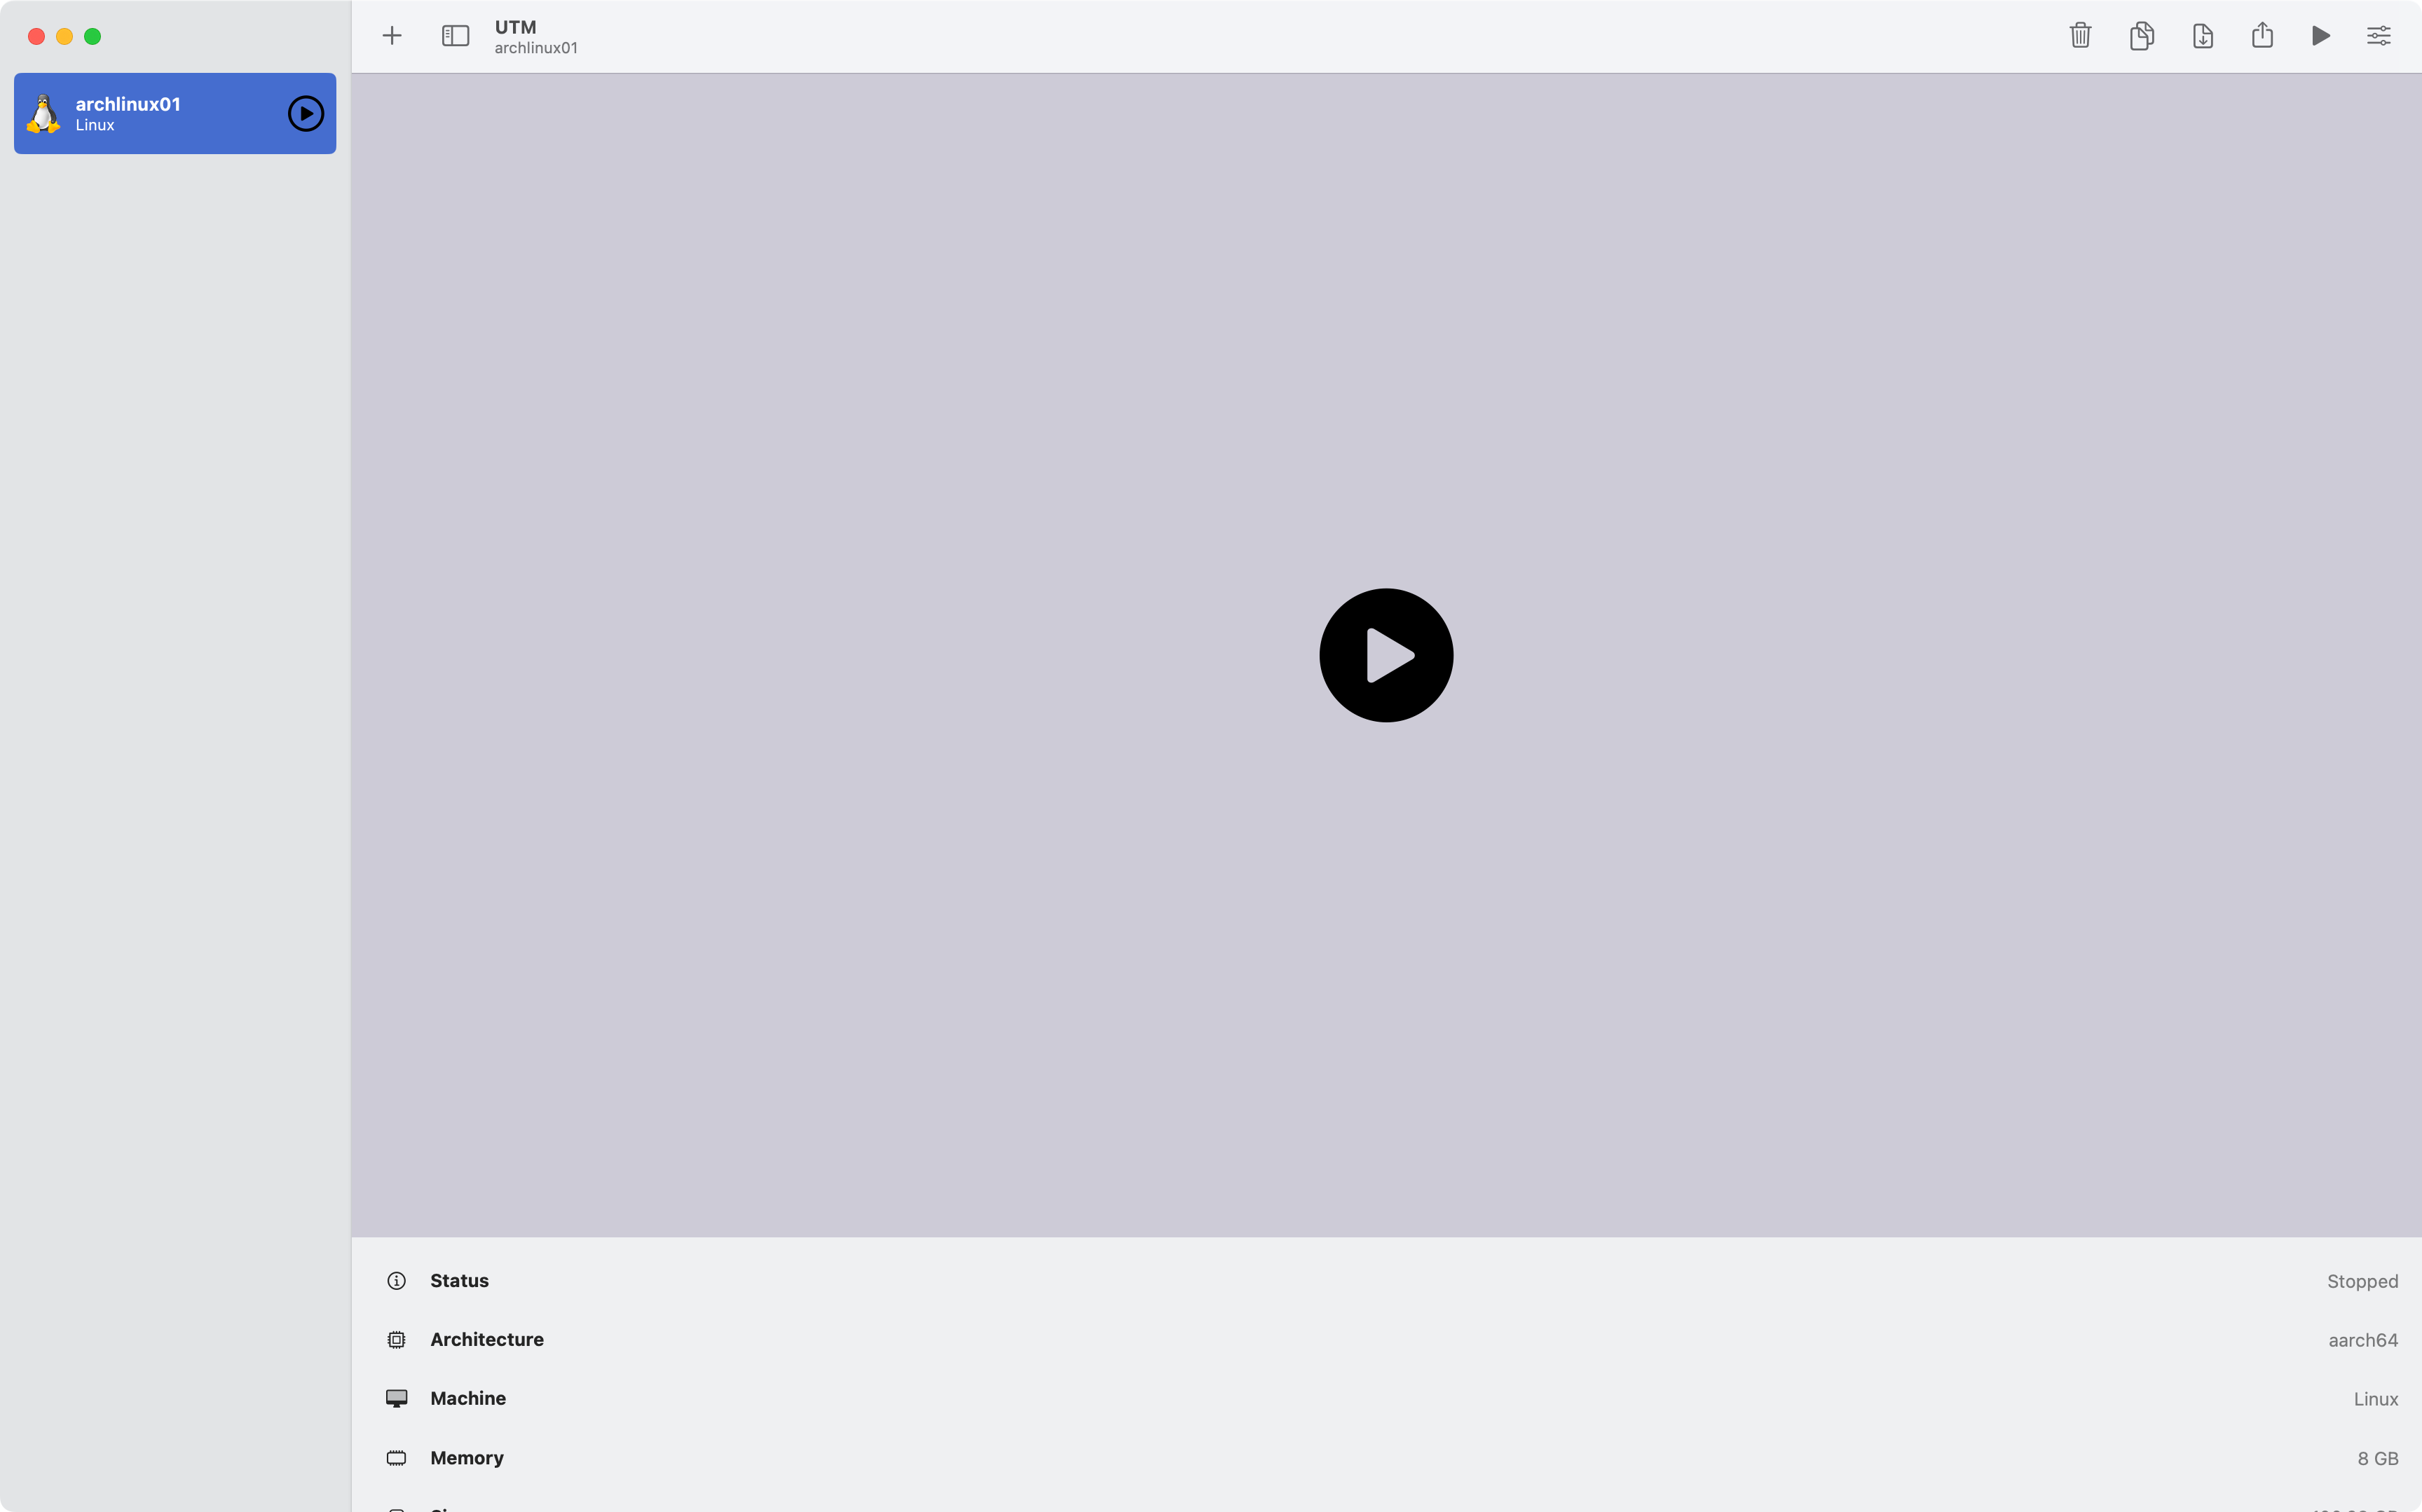
The virtual machine will be created, and you can start it by pressing the play button:
Installing Operating System Inside Virtual Machine
Retrieving IP Address From Virtual Machine Console
After starting the virtual machine, two windows will appear:
- An emulated terminal connected to the virtual machine (left window).
- A window of the virtual machine itself (right window).

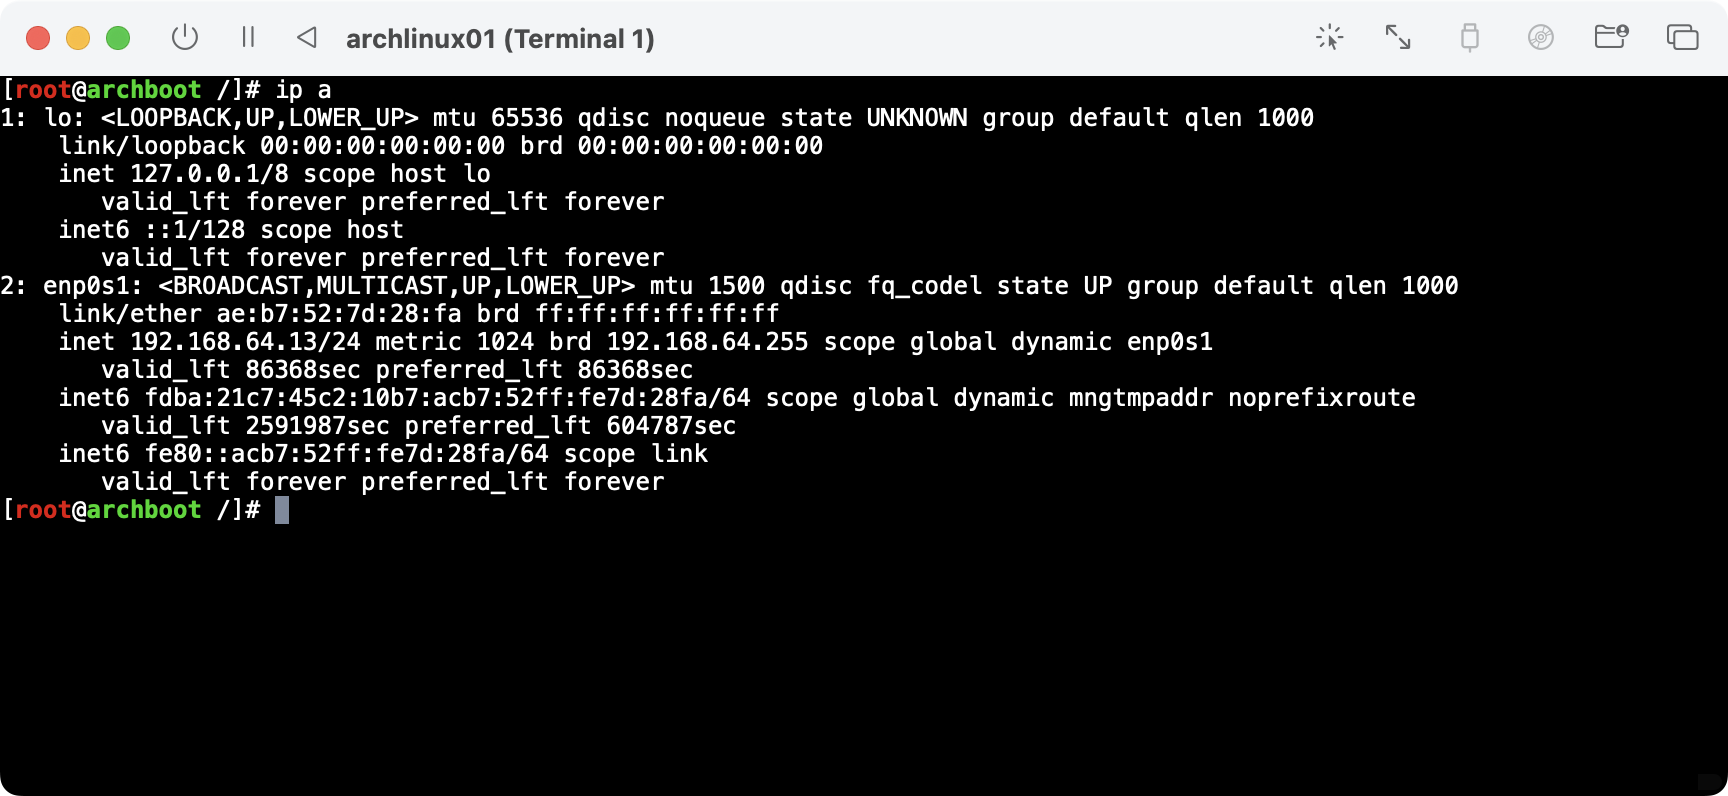
In the window titled <virtual machine name> (Terminal 1), hit Enter to start the shell login and press ESC, and select <Yes> until you are dropped into a shell.
Afterward, type ip a and retrieve the IP address assigned to the enp0s1 interface. This IP address will be used to access the virtual machine remotely.
Your IP address may be different.
Accessing Installation Wizard Via SSH
Ensure host entry is not in $HOME/.ssh/known_hosts via command or manually (or ignore key verification using SSH options):
ssh-keygen -R 192.168.64.13
SSH to host, root password is not set (ignoring key verification):
ssh -o StrictHostKeyChecking=no -o UserKnownHostsFile=/dev/null root@192.168.64.13
Exit TUI by pressing ESC and choosing <Yes> until we are dropped to a shell.
Check Network Connectivity
Check connectivity is working:
ping "geo.mirror.pkgbuild.com"
Environment Variables
Note
In the following sections, I will refer to environment variables in commands. Replace them with your values if required.
Export environment variables in the shell:
export NEW_USER=vkhitrin
export NEW_HOSTNAME=archlinux01.utm.local
export VIRT_ROOT_DISK=/dev/vda
export SWAP_SIZE=8G
export NEW_TZ=UTC
export NEW_LOCALE="en_US.UTF-8 UTF-8"
Configuring Storage
Partitioning Hard Drive
Warning
We assume that there are no partitions in this drive. It is outside this blog post's scope to handle existing partitions.
Warning
I Have chosen to use the "xfs" filesystem. It is outside this blog post's scope to discuss filesystem preferences.
Partition the hard drive, and create a GPT table, the first partition is for swap, and the second one is for the Linux filesystem:
parted -s -- ${VIRT_ROOT_DISK} mklabel gpt
parted -s -- ${VIRT_ROOT_DISK} mkpart swap linux-swap 0% ${SWAP_SIZE}
parted -s -- ${VIRT_ROOT_DISK} mkpart primary xfs ${SWAP_SIZE} 100%
Ensure partitions are created:
# View disk partitions
parted ${VIRT_ROOT_DISK} --list
# Output
Model: Virtio Block Device (virtblk)
Disk /dev/vda: 137GB
Sector size (logical/physical): 512B/512B
Partition Table: gpt
Disk Flags:

Number  Start   End     Size    File system  Name     Flags
 1      1049kB  8000MB  7999MB               swap     swap
 2      8000MB  137GB   129GB                primary
Configuring swap
Create and enable swap om /dev/vda1:
mkswap "${VIRT_ROOT_DISK}1"
swapon "${VIRT_ROOT_DISK}1"
Ensure swap is enabled:
# View enabled swaps
cat /proc/swaps
# Output
Filename        Type          Size          Used		Priority
/dev/vda1       partition     7811068       0		    -2
Configuring Filesystem
Create xfs filesystem on /dev/vda2:
mkfs.xfs "${VIRT_ROOT_DISK}2"
Mount created filesystem to /mnt:
mount "${VIRT_ROOT_DISK}2" /mnt
Ensure the filesystem is mounted:
# Check filesystem is mounted
mount | grep "${VIRT_ROOT_DISK}2"
# Output
/dev/vda2 on /mnt type xfs (rw,relatime,attr2,inode64,logbufs=8,logbsize=32k,noquota)
Configure Operating System
Installing Packages
Warning
You may see errors during installation. Some of them should be ignored.
Bootstrap (install) packages on /mnt:
# Install packages
pacstrap /mnt base base-devel linux-aarch64 mkinitcpio sudo openssh htop git zsh tmux vim net-tools networkmanager
# Output
==> Creating install root at /mnt
==> Installing packages to /mnt
:: Synchronizing package databases...
 core                                                    244.1 KiB   187 KiB/s 00:01 [#################################################] 100%
 extra                                                     2.5 MiB   713 KiB/s 00:04 [#################################################] 100%
 community                                                 6.5 MiB  2.30 MiB/s 00:03 [#################################################] 100%
 alarm                                                    57.4 KiB  53.5 KiB/s 00:01 [#################################################] 100%
 aur                                                       9.3 KiB  10.1 KiB/s 00:01 [#################################################] 100%
resolving dependencies...
looking for conflicting packages...

Packages (180) acl-2.3.1-3  archlinux-keyring-20230504-1  argon2-20190702-5  attr-2.5.1-3  audit-3.1.1-1  autoconf-2.71-4  automake-1.16.5-2
(output truncated)
Packages should be installed (failures will occur, but we will ignore them).
Configuring System
Generate mounts for booting from the root disk:
genfstab -p /mnt >> /mnt/etc/fstab
Ensure mounts were generated correctly:
# View generated file
cat /mnt/etc/fstab
# Output

# Static information about the filesystems.
# See fstab(5) for details.

# <file system> <dir> <type> <options> <dump> <pass>
# UUID=72fdca8f-b2a2-4bc2-ab65-a209f76d5a46
/dev/vda2           	/         	xfs       	rw,relatime,attr2,inode64,logbufs=8,logbsize=32k,noquota	0 1

# UUID=bc238995-a2f9-4340-9500-61b8576d0ff4
/dev/vda1           	none      	swap      	defaults  	0 0
Set hostname:
arch-chroot /mnt hostnamectl hostname ${NEW_HOSTNAME}
Configure timezone and locale files:
ln -s "/usr/share/zoneinfo/${NEW_TZ}" /mnt/etc/localtime
echo "${NEW_LOCALE}" > /mnt/etc/locale.gen
Generate locale:
arch-chroot /mnt locale-gen
Configuring User
Create a non-root user:
arch-chroot /mnt useradd -m -g users -G wheel ${NEW_USER}
Allow the created user to execute sudo (uncomment your preference, allow without password or require a password, I have chosen sudo with a password requirement):
EDITOR=vim arch-chroot /mnt visudo
Create user directories:
mkdir -p "/mnt/home/${NEW_USER}/.ssh"
touch "/mnt/home/${NEW_USER}/.ssh/authorized_keys"
chmod 700 "/mnt/home/${NEW_USER}/.ssh"
chmod 600 "/mnt/home/${NEW_USER}/.ssh/authorized_keys"
arch-chroot /mnt chown -R "${NEW_USER}:users" /home/${NEW_USER}/.ssh
Inject SSH public keys if desired:
vim "/mnt/home/${NEW_USER}/.ssh/authorized_keys"
Configure password if desired (add -d flag to set an empty password):
arch-chroot /mnt passwd ${NEW_USER}
Configure zsh as the default shell if desired:
arch-chroot /mnt chsh -s /bin/zsh ${NEW_USER}
Configure Networking
Warning
I Have chosen to use "NetworkManager" for networking. It is outside this blog post's scope to discuss networking.
Enable login, SSH, NetworkManager, and DNS:
arch-chroot /mnt systemctl enable multi-user.target sshd NetworkManager
cp /run/systemd/resolve/resolv.conf /mnt/etc/resolv.conf
Configuring Rosetta (Optional)
Rosetta is a macOS translation layer allowing users to run x86_64 binaries on Apple Sillicon.
Enabling rosetta will allow the operating system to leverage macOS’ rosetta to improve the performance of x86_64 binaries.
This option must also be enabled in the virtual machine configuration (detailed in previous sections).
Create a directory:
mkdir -p /mnt/media/rosetta
Change the root directory to /mnt:
arch-chroot /mnt
Load the required kernel module (in chroot):
modprobe virtiofs
Mount rosetta to /media/rosetta (in chroot):
mount -t virtiofs rosetta /media/rosetta
To mount the filesystem on startup, add the following entry to /etc/fstab using vim or echo (in chroot):
rosetta /media/rosetta virtiofs ro,nofail 0 0
Ensure the virtiofs kernel module will be loaded in initramfs, add to /etc/mkinitcpio.d/linux-aarch64.preset the following line (in chroot):
echo 'MODULES="virtiofs fuse zstd zram cfg80211 rfkill des_generic libdes md4 virtio_net net_failover virtio_gpu virtio_dma_buf drm_shmem_helper failover virtio_balloon virtio_rng loop"' >> /etc/mkinitcpio.d/linux-aarch64.preset
Re-generate initramfs (in chroot):
mkinitcpio -P
Register binary format in the kernel (in chroot):
touch /etc/binfmt.d/rosetta.conf
Populate /etc/binfmt.d/rosetta.conf (in chroot):
echo ":rosetta:M::\x7fELF\x02\x01\x01\x00\x00\x00\x00\x00\x00\x00\x00\x00\x02\x00\x3e\x00:\xff\xff\xff\xff\xff\xfe\xfe\x00\xff\xff\xff\xff\xff\xff\xff\xff\xfe\xff\xff\xff:/media/rosetta/rosetta:CF" > /etc/binfmt.d/rosetta.conf
Exit chroot (in chroot):
exit
Make sure systemd-binfmt.service is enabled:
arch-chroot /mnt systemctl enable systemd-binfmt.service
Save Changes To Disk And Power Off
Sync disk and power off the virtual machine:
sync
systemctl poweroff
Reconfiguring Virtual Machine To Boot From Disk
After installing Arch Linux, we will replace the previous initramfs with the one we generated.
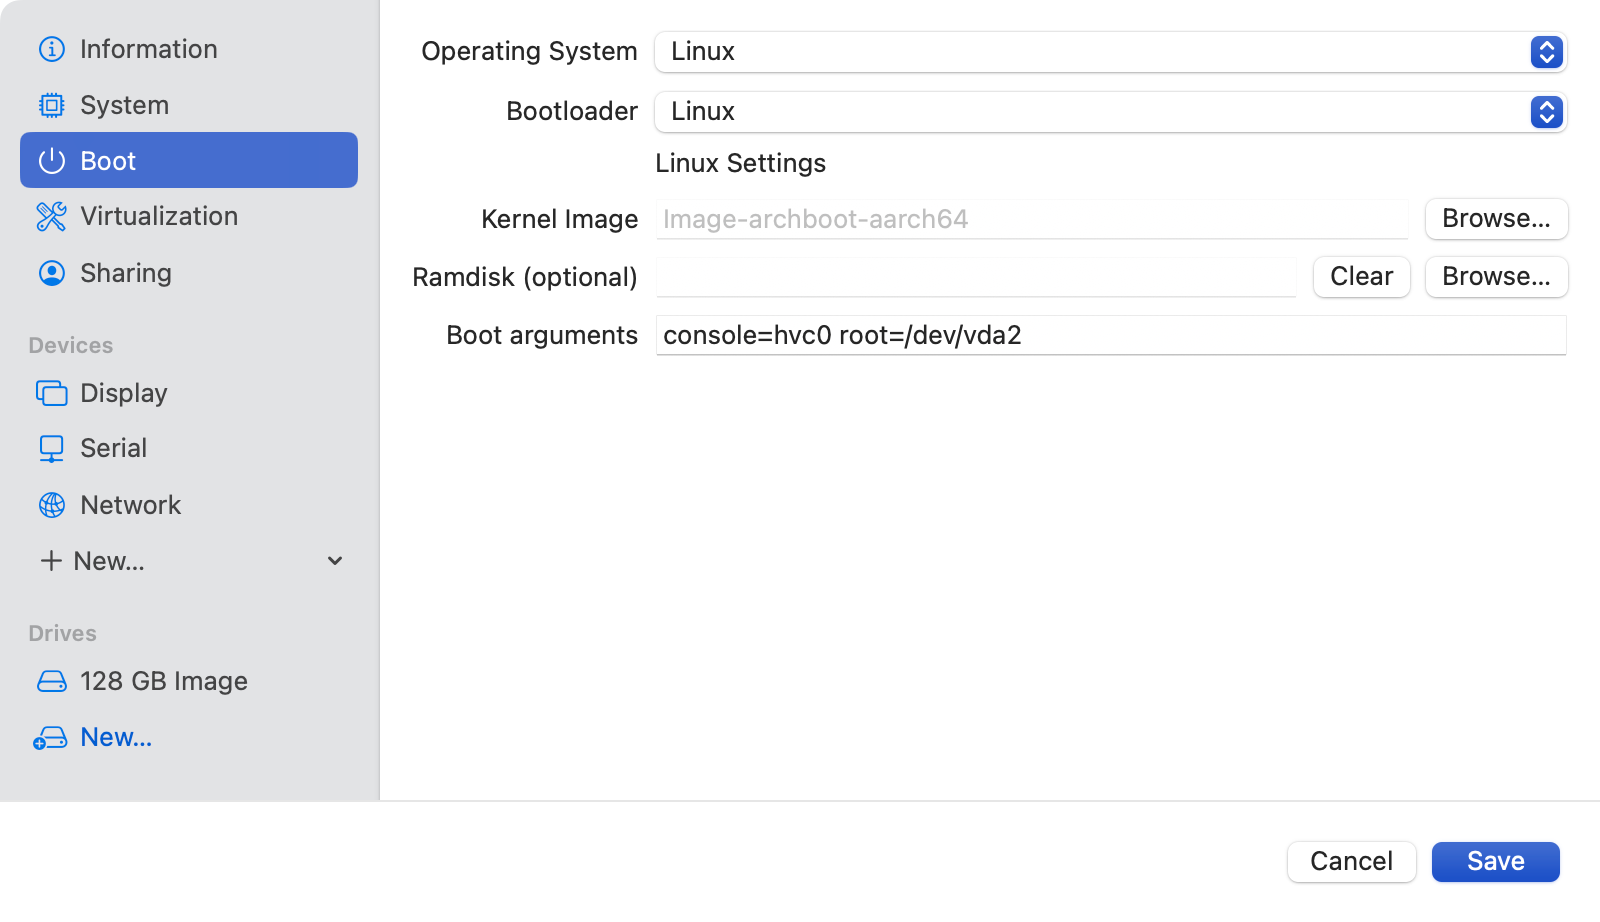
Open UTM and right-click on the virtual machine and select edit:

From there, in the sidebar, pick Boot and append to Boot arguments the root device containing initramfs (in my case, /dev/vda2) and click Save:
Starting The Virtual Machine
Now, you can start your newly installed Arch Linux virtual machine using the kernel as the bootloader running on Apple’s native virtualization framework.
We can start the virtual machine from UTM GUI or CLI.
Using utmcli:
utmctl start <VM_NAME>
Using Apple script:
osascript -e 'tell application "UTM"' -e 'set vm to virtual machine named "<VM_NAME>"' -e "start vm" -e "end tell"
Simple Validations
Warning
These are simple validations, and they might not be accurate over time.
From shutdown/reboot to first ping, this happens quickly when using Linux as the bootloader, in around ~2 seconds:
# Restart VM
utmctl stop archlinux01 --force; echo \"Shutdown: $(date -u "+%Y-%m-%dT%H:%M:%SZ")\"
utmctl start archlinux01; echo \"Startup: $(date -u "+%Y-%m-%dT%H:%M:%SZ")\"\
# Ping
ping 192.168.64.13 | while read pong; do echo "$(date -u +%Y-%m-%dT%H:%M:%SZ): $pong"; done
"Shutdown: 2023-05-23T20:07:14Z"
"Startup: 2023-05-23T20:07:14Z"

# Output
2023-05-23T20:07:16Z: PING 192.168.64.13 (192.168.64.13): 56 data bytes
2023-05-23T20:07:16Z: Request timeout for icmp_seq 0
2023-05-23T20:07:16Z: 64 bytes from 192.168.64.13: icmp_seq=1 ttl=64 time=521.739 ms
2023-05-23T20:07:17Z: 64 bytes from 192.168.64.13: icmp_seq=2 ttl=64 time=0.817 ms
2023-05-23T20:07:17Z: --- 192.168.64.13 ping statistics ---
2023-05-23T20:07:17Z: 3 packets transmitted, 2 packets received, 33.3% packet loss
2023-05-23T20:07:17Z: round-trip min/avg/max/stddev = 0.817/261.278/521.739/260.461 ms
From shutdown/reboot to successful SSH, this happens quickly when using Linux as the bootloader, and It can vary from as little as 2 seconds up to 5 seconds:
# Restart VM
utmctl stop archlinux01 --force; echo \"Shutdown: $(date -u "+%Y-%m-%dT%H:%M:%SZ")\"
utmctl start archlinux01; echo \"Startup: $(date -u "+%Y-%m-%dT%H:%M:%SZ")\"
ssh 192.168.64.13 'echo "Host date: $(date -u +%Y-%m-%dT%H:%M:%SZ)"' | while read pong; do echo "$(date -u +%Y-%m-%dT%H:%M:%SZ): $pong"; done

# Output Attempt #1
"Shutdown: 2023-05-23T20:12:52Z"
"Startup: 2023-05-23T20:12:53Z"
2023-05-23T20:12:55Z: Host date: 2023-05-23T20:12:55Z

# Output Attempt #2
"Shutdown: 2023-05-23T20:16:18Z"
"Startup: 2023-05-23T20:16:18Z"
2023-05-23T20:16:21Z: Host date: 2023-05-23T20:16:21Z

# Output Attempt #3
"Shutdown: 2023-05-23T20:17:16Z"
"Startup: 2023-05-23T20:17:16Z"
2023-05-23T20:17:19Z: Host date: 2023-05-23T20:17:19Z
Mounting my local home directory to the virtual machine with read-only permissions in an identical path:
# Accessing a directory in the home directory from macOS
ls /Users/vkhitrin/Projects/Automation/Setup/macos-env
# Output from macOS
Hardware	Makefile	README.md	Setup

# Accessing the same directory from Arch Linux virtual machine
ls /Users/vkhitrin/Projects/Automation/Setup/macos-env/
# Output from virtual machine
Hardware  Makefile  README.md  Setup

# Creating a file in the home directory from macOS
touch /Users/vkhitrin/Projects/Automation/Setup/macos-env/TEST
ls /Users/vkhitrin/Projects/Automation/Setup/macos-env
# Output from macOS
Hardware	Makefile	README.md	Setup		TEST

# Failing to create a file in the home directory from Arch Linux
touch /Users/vkhitrin/Projects/Automation/Setup/macos-env/TEST
ls /Users/vkhitrin/Projects/Automation/Setup/macos-env/
# Output from virtual machine
touch: cannot touch '/Users/vkhitrin/Projects/Automation/Setup/macos-env/TEST': Read-only file system
Hardware  Makefile  README.md  Setup  TEST
This means that I can easily use my local paths for Container workloads (containers are executed remotely, and the local CLI is used to talk with the podman socket to interact with containers on the virtual machine)
# Podman remote connection from macOS
podman system connection list
Name                   URI                                                 Identity       Default
archlinux01.utm.local  ssh://root@192.168.64.13:22/run/podman/podman.sock  <MY_KEY_PATH>  true

# Running container using podman (remote) CLI from macOS
podman run --rm -v /Users/vkhitrin/Projects/Automation/Setup/macos-env:/Users/vkhitrin/Projects/Automation/Setup/macos-env alpine ls /Users/vkhitrin/Projects/Automation/Setup/macos-env
Hardware
Makefile
README.md
Setup
TEST

# Running container using podman CLI from Arch Linux
podman run --rm -v /Users/vkhitrin/Projects/Automation/Setup/macos-env:/Users/vkhitrin/Projects/Automation/Setup/macos-env alpine ls /Users/vkhitrin/Projects/Automation/Setup/macos-env
Hardware
Makefile
README.md
Setup
TEST
Summary
This blog post briefly explored possible solutions for container workloads on macOS.
We installed an Arch Linux virtual machine using UTM and Apple virtualization as the backend.
Using the local podman tool to execute containers remotely with my home directory mounted on the remote virtual machine has been a great user experience.
It might be fun to run some benchmarks for this solution compared to the rest of the solutions offered by the community.